Meet my old friend – the June Tailor Shape Cut ruler. I was introduced to her when I took my first quilting class many moons ago.

This is the basic model (JT-796), which can cut strips up to 12″ wide. The cutting slits are marked every 1/2″, so I can easily cut in whole and 1/2″ increments. You can often find this ruler on sale @ Joann or Wal-Mart for about $25.00. Similar rulers are also available on Amazon under a variety of brand names. Just be aware that slit cut/slotted rulers are more flexible than a traditional acrylic quilting ruler. There’s also a similar product called Stripology rulers marketed by Creative Grids. It’s a good product, but much more expensive.
Remember, we’re on a budget here. This $25 ruler will allow you to achieve the same basic functions. The key is to learn how to use the ruler, plus a couple of ruler hacks:
(1) Watch the instructional video distributed by AccuQuilt/June Tailor. (AccuQuilt bought June Tailor in 2023.)
(2) Watch this video from Fat Quarter Shop. The demo uses the Stripology ruler; however many of the same principles apply to all slit cut rulers. I found the part on sub-cutting especially helpful. It is about the 6:15 minute mark in the video.
What if you need to cut strips in 1/4″ or 3/4″ increments? There’s a hack for that, but it depends on which version of the ruler you have. Your 1/4″ line will either be to the left or right of the 0 cutting slit. If your version is like mine with 1/4″ and 3/4″ lines to the LEFT of the 0 cutting slit, I HIGHLY recommend you download and print-out the cutting chart referenced in the Fat Quarter Shop video. These directions work well with this version of the ruler.

If you have a version which has a dashed 1/4″ line to the RIGHT of the 0 cutting slit, watch this video and reference the cutting chart in the instructions found here. I’ve only found this configuration on the XL version of the ruler in my local shops, although the official AccuQuilt videos and online product literature show the regular version as having the dashed 1/4″ line to the right. Perhaps a product redesign is coming to market soon? Regardless, check which version you have before making any cuts.
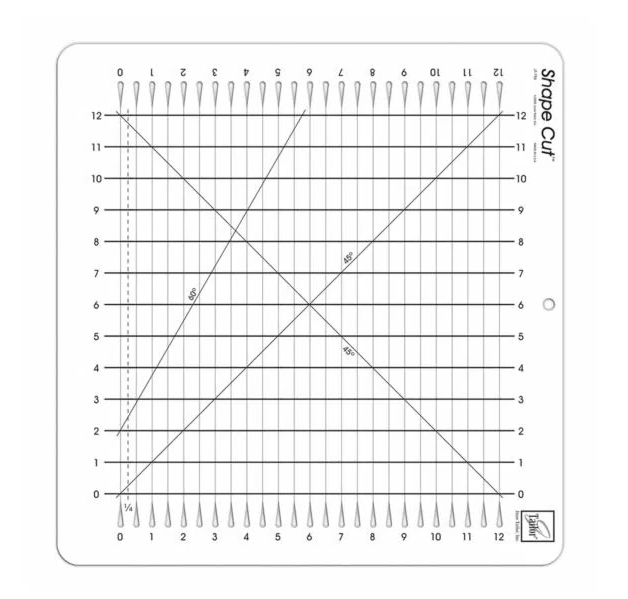
You will essentially make two passes to cut strips in 1/4″ and 3/4″ increments. Same thing applies to sub-cutting into squares and rectangles.. All you have to do is follow the steps on the chart and cut where indicated on each pass. Make sure you are using the appropriate cutting chart for your version of the Shape Cut ruler.
Even with a manual die cutting system, I keep a Shape Cut ruler in my ruler inventory. It’s a handy size and easy to transport to classes/retreats. For small projects or those involving fat quarters, it’s often faster than getting out the Sizzix machine and corresponding AccuQuilt/Sizzix dies.
Tip: If you find you like using slit cut rulers, but want something more substantial like a traditional acrylic ruler, take a look at the Stripology products. They are a lot less “bendy” than the June Tailor versions. The ‘tweens at SQTM Summer Quilt Camp were much more confident with a rotary cutter when they used the Stripology (slit cut) ruler versus a regular quilting ruler.
