Happy 250th Birthday America!
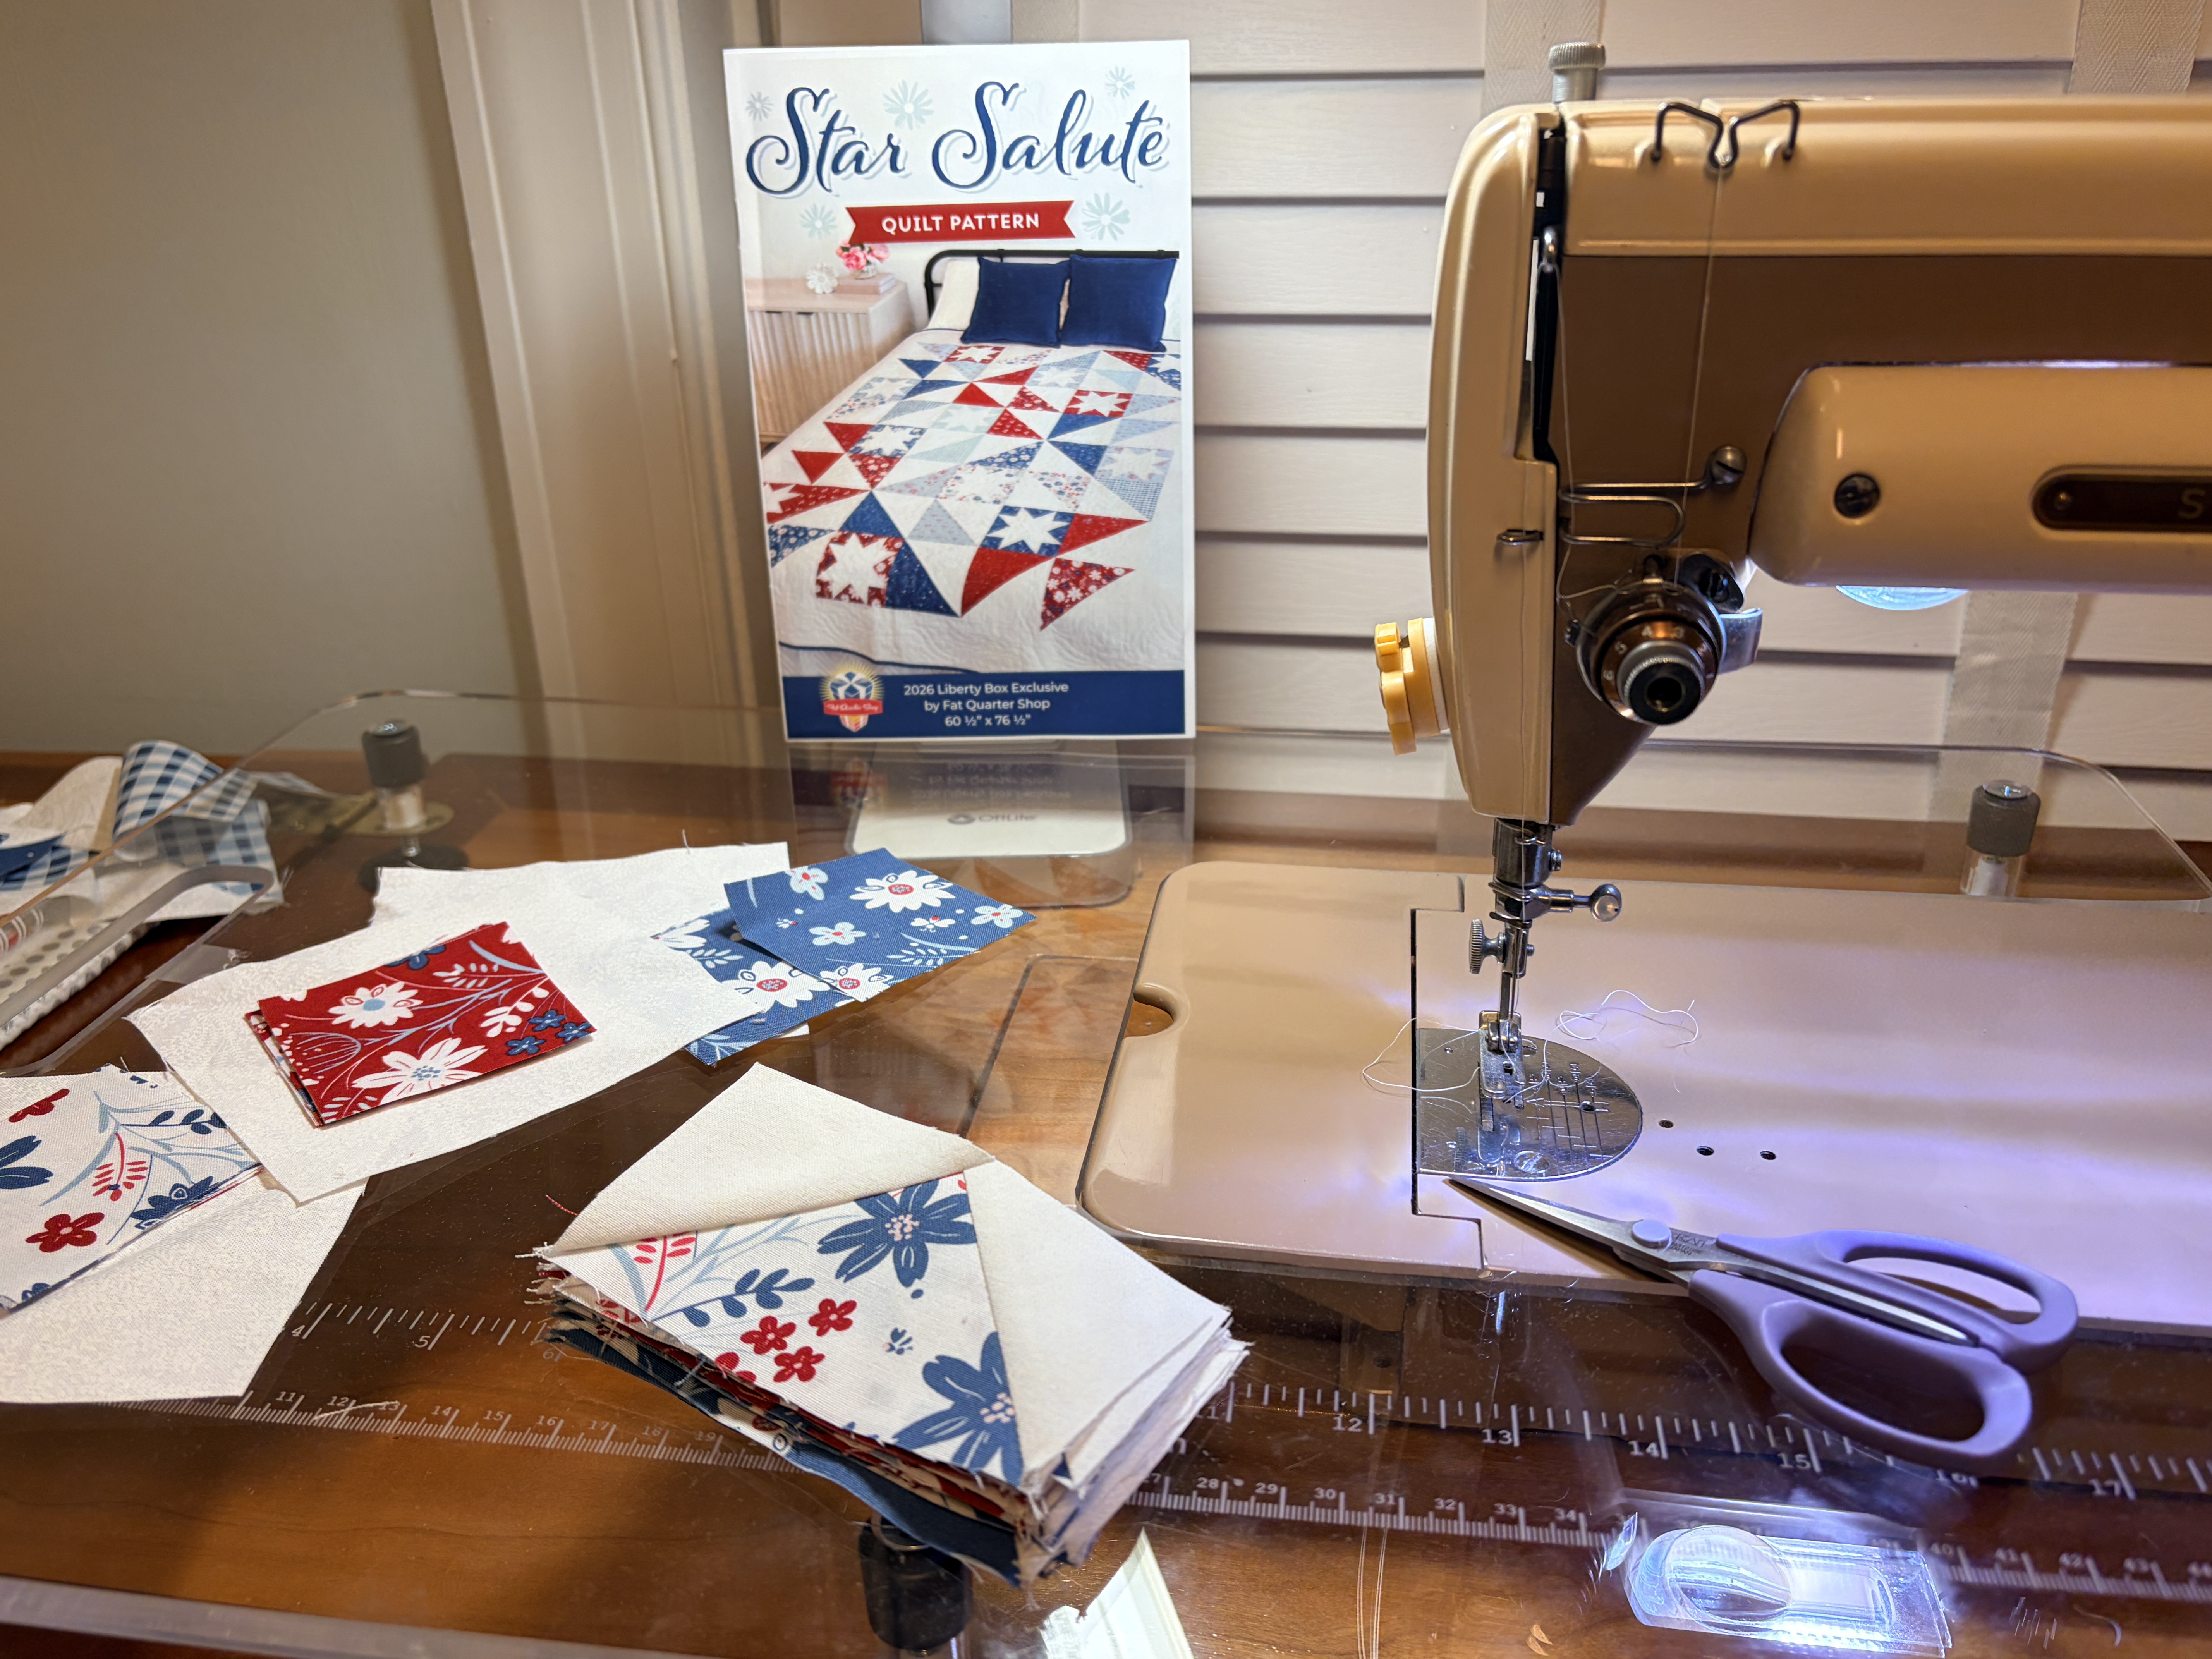
The pattern is Star Salute, which was part the 2026 Liberty Box from Fat Quarter Shop. Fabric used is the FQ bundle that came in the box and the white-on-white background came from another quilter downsizing her stash. Binding will be a denim blue cotton from my inventory. The pattern includes an pieced backing option which consists of a large center star made from leftover HSTs and white yardage, plus some light gray fabric I already have. In case you’re interested, the finished size meets the QOV guidelines. This particular quilt will most likely be donated to my guild’s Quilts for Cops partnership.
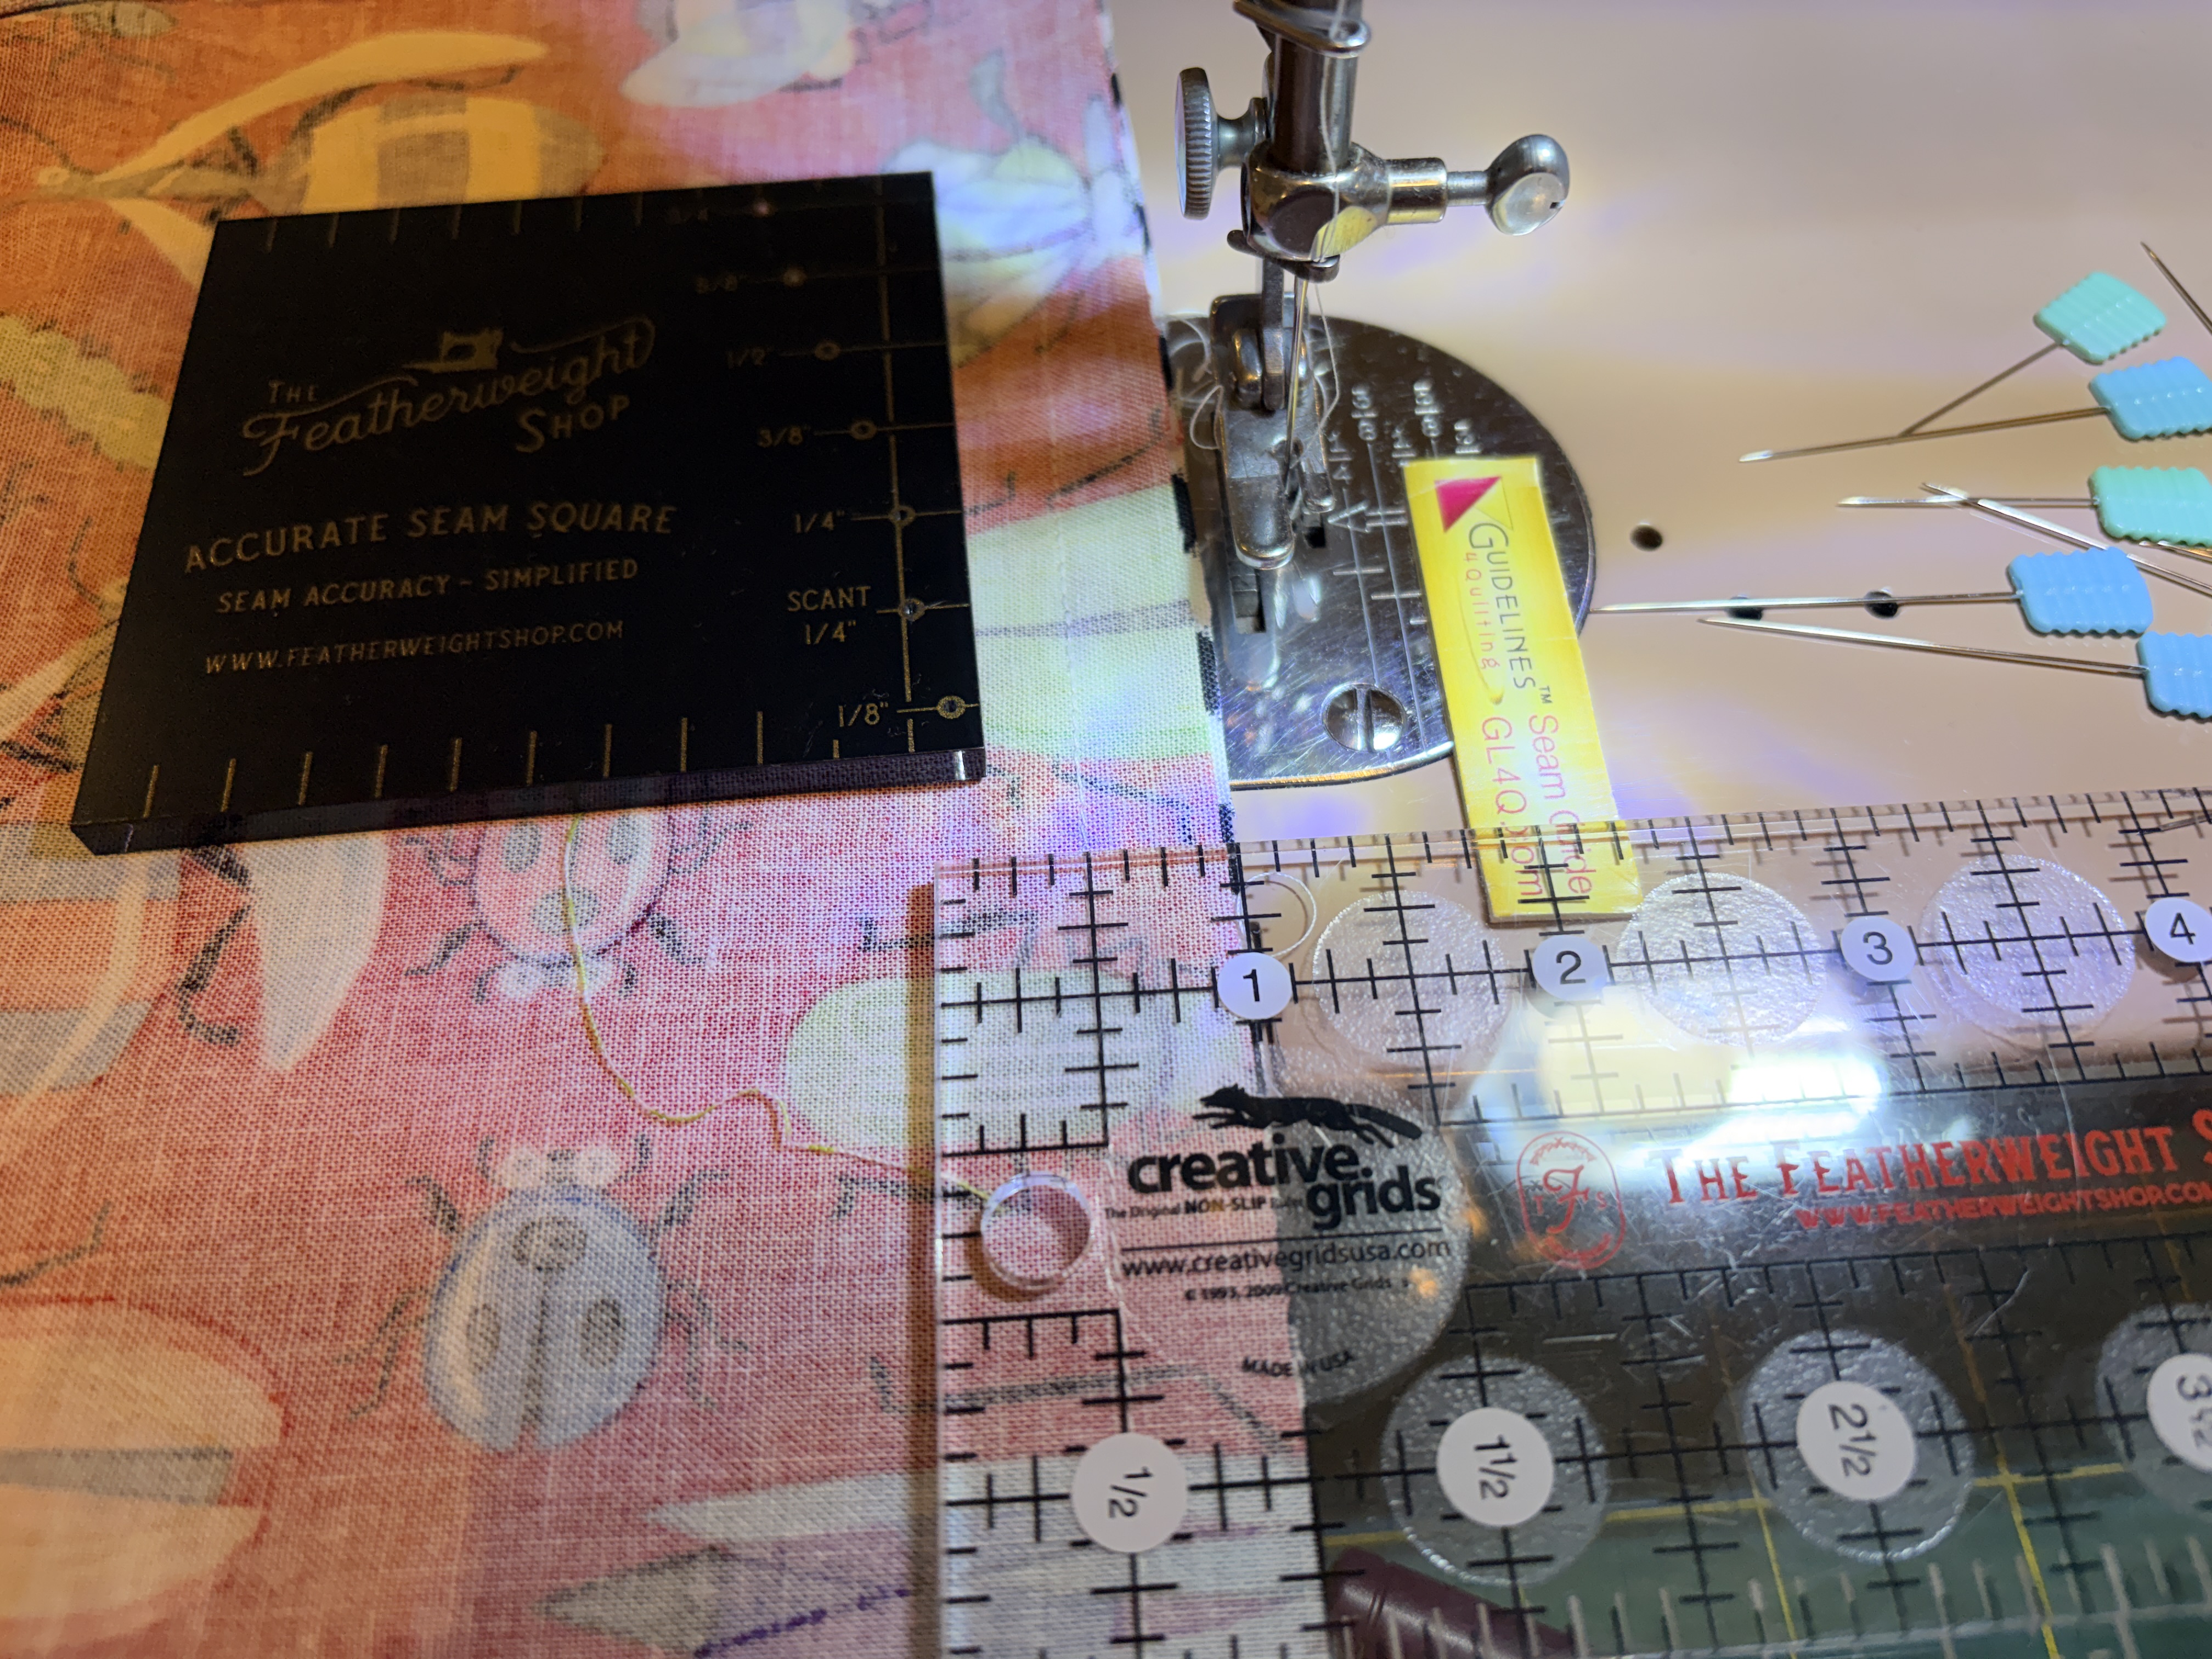
My 301A was made in Anderson, South Carolina in 1957. She came to me via the Florida Panhandle, where my niece found her at a yard sale for $125.00. She was farm fresh, but still had the original bobbin case, set of presser feet and foot controller in the trapezoid carry case. There’s no telling how long this sewing machine had been in someone’s shed or attic. Outside of a spa day, the most useful updates Miss Carmella’s received have been the acrylic extension table, stick on thread cutter, walking foot, and FW Shop seam square/seam guide duo.
After much experimentation this past week, I’ve learned how to compensate for the lack of an adjustable needle position to achieve a scant 1/4″ seam. The original presser foot in tandem with the seam guide consistently works the best for me. The secret for me is pinning on the left side instead of the right. It does feel awkward at first, but careful pinning means my seams match and no points on HSTs and FG are cut off.
FYI – the acrylic extension table is from Taylor Made Tables and the stick on bee thread cutter is from Lori Holt. Besides an LED light bulb, the only addition was a set of matching crocheted spool pin doilies from a local maker.
Miss Carmella is ready to complete our quilt top over this July 4th weekend!
Enjoy the fireworks, food and fellowship while you stay cool in the heat!