
My kitchen is in dire need of new potholders. Thanks to home and car insurance renewals this past month, I’m going to have DIY if I want new ones. I already have all the materials, including the heat resistant batting, in my sewing room. For inspiration, I headed to Pinterest. I kept seeing a really cute round potholder with a pocket and hanging loop. All of pins directed me to various blogposts, which in turn redirected me to purchase a pattern for $10.95. No thanks. I’ll try drafting my own. While I used Adobe Illustrator to create my 8″ circle and pocket piece, you do not need a computer to draft your own pattern templates.
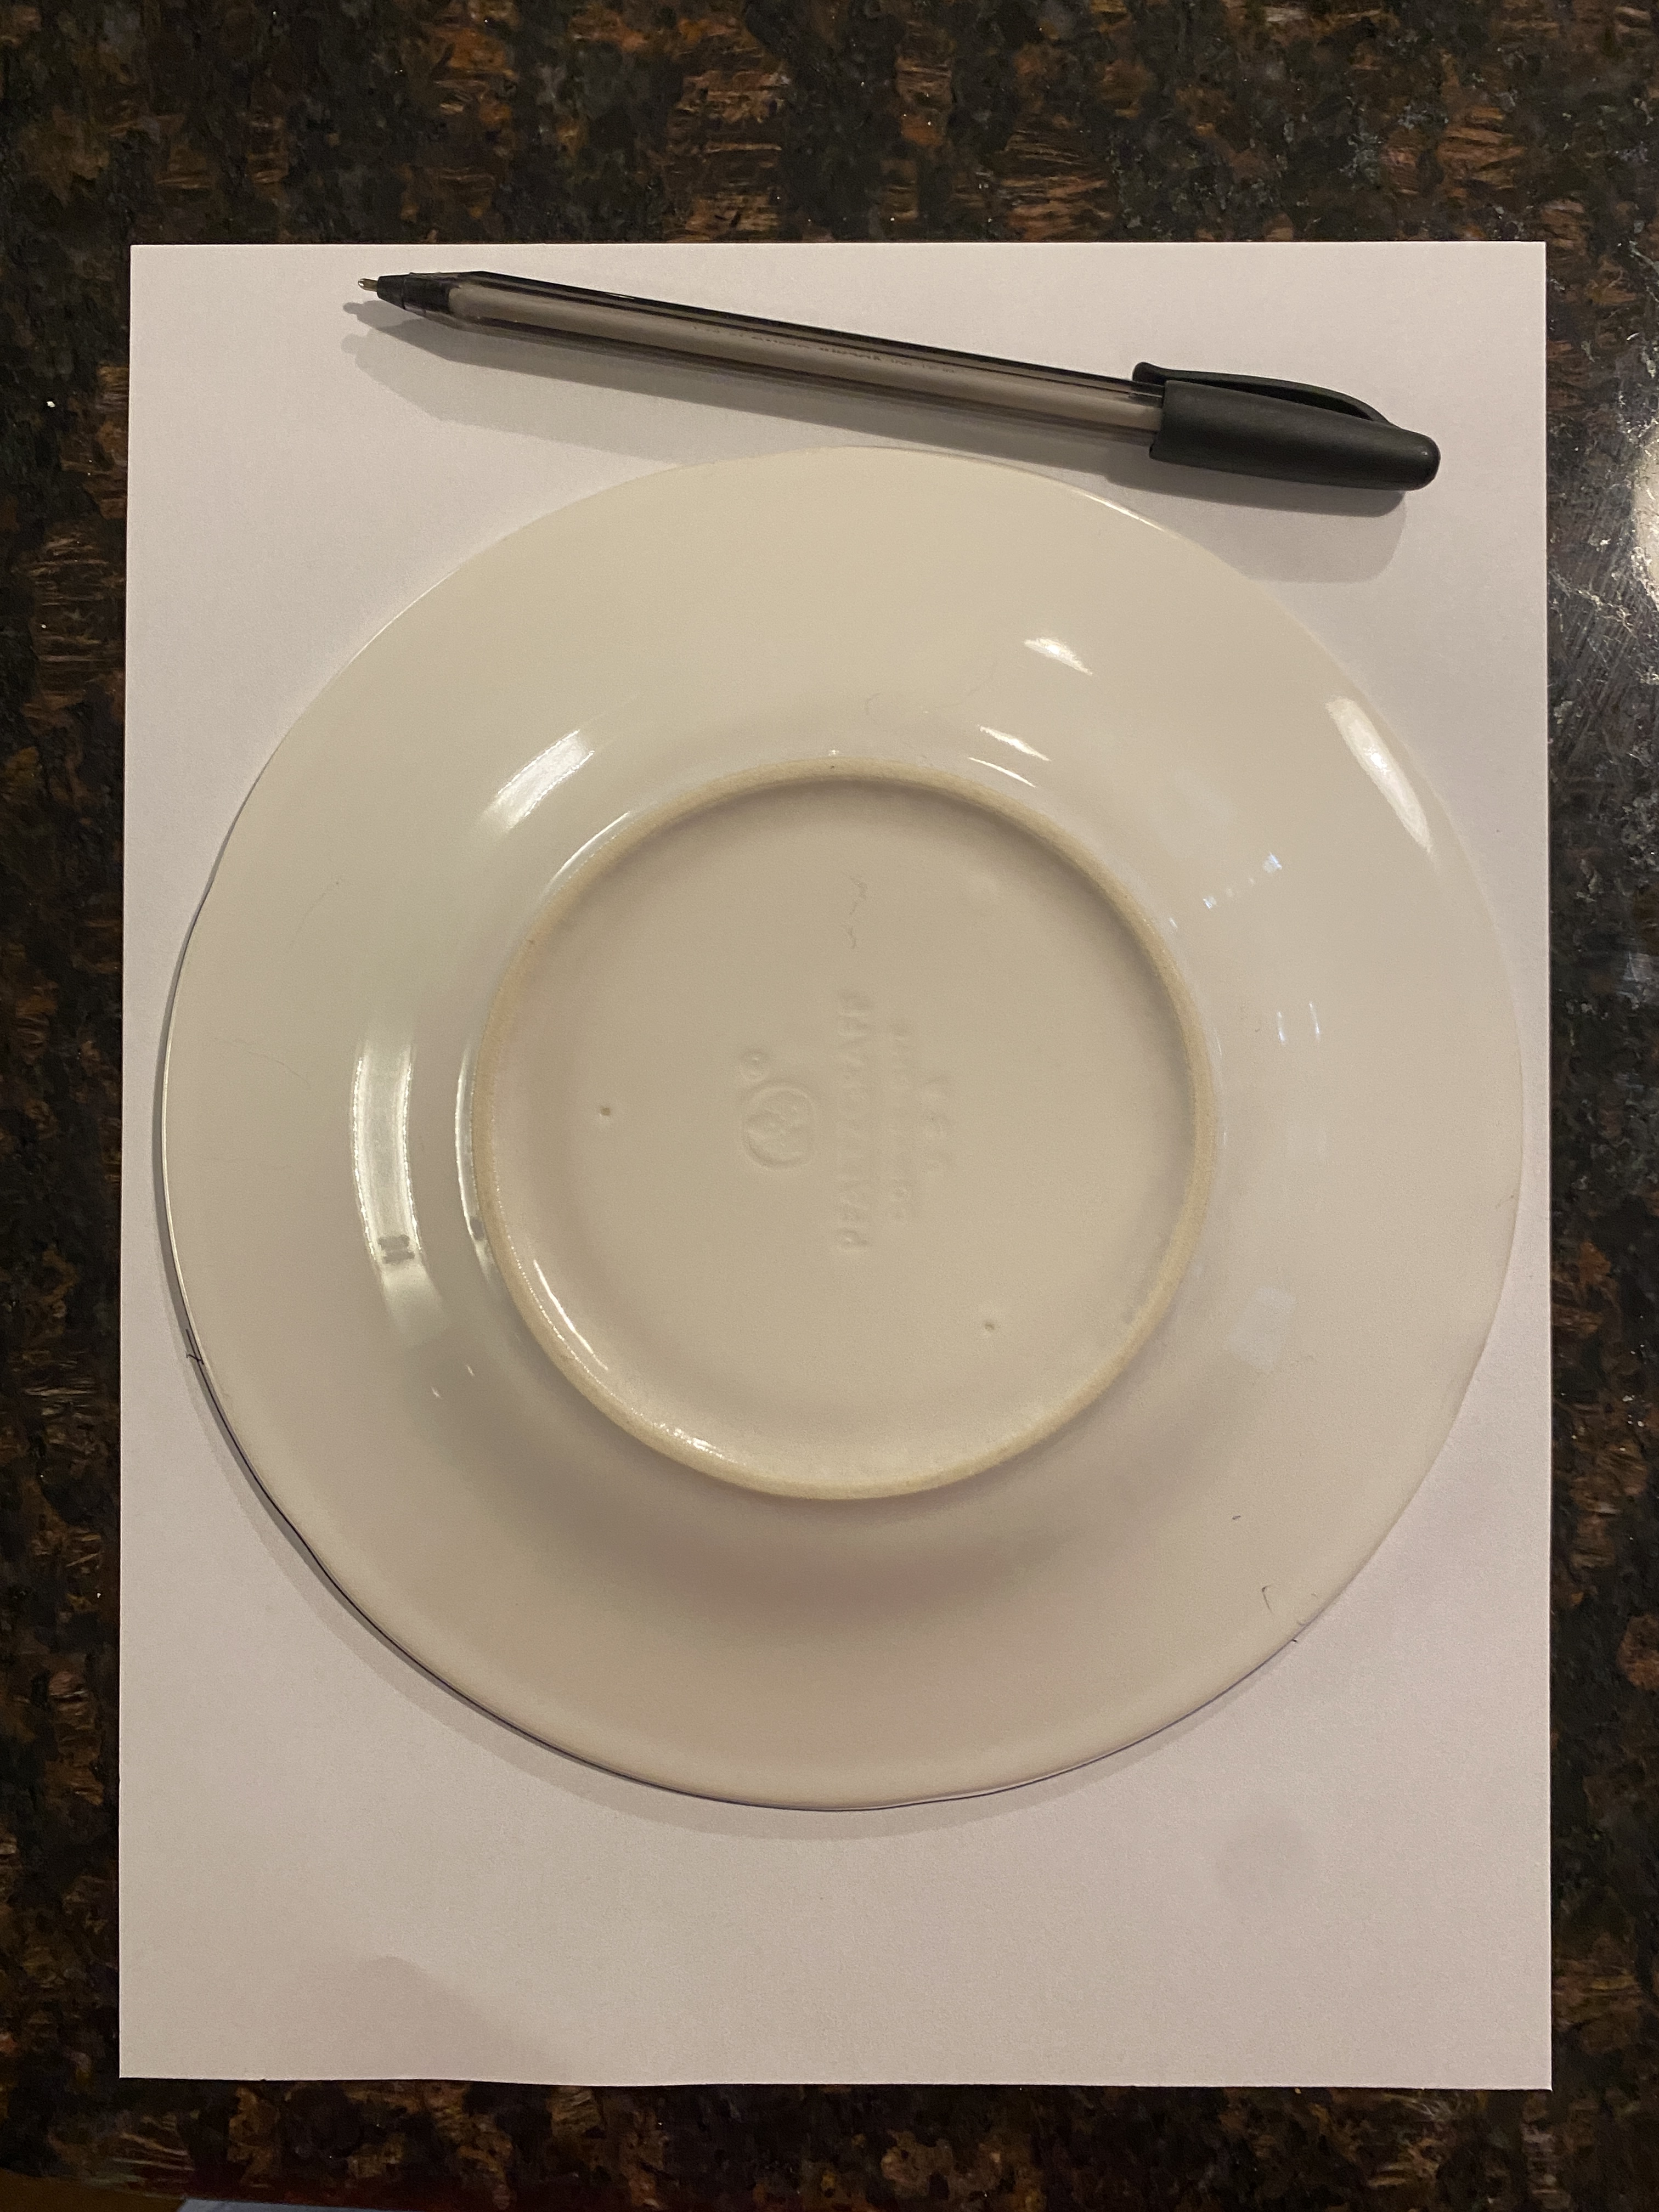
There’s an old-school, analog method for drafting your own patterns. It involves pen, paper, a ruler and usually something round. A round potholder is 8″ in diameter. Head to your kitchen: a luncheon plate is usually 8″ in diameter. Or try the lid to a large pot, a mid-size skillet or a 2-2.5 quart round casserole dish. Your lid can be a little under/over 8″.
You’ll need two circles – one circle per page. I traced around a luncheon plate to make my circles.
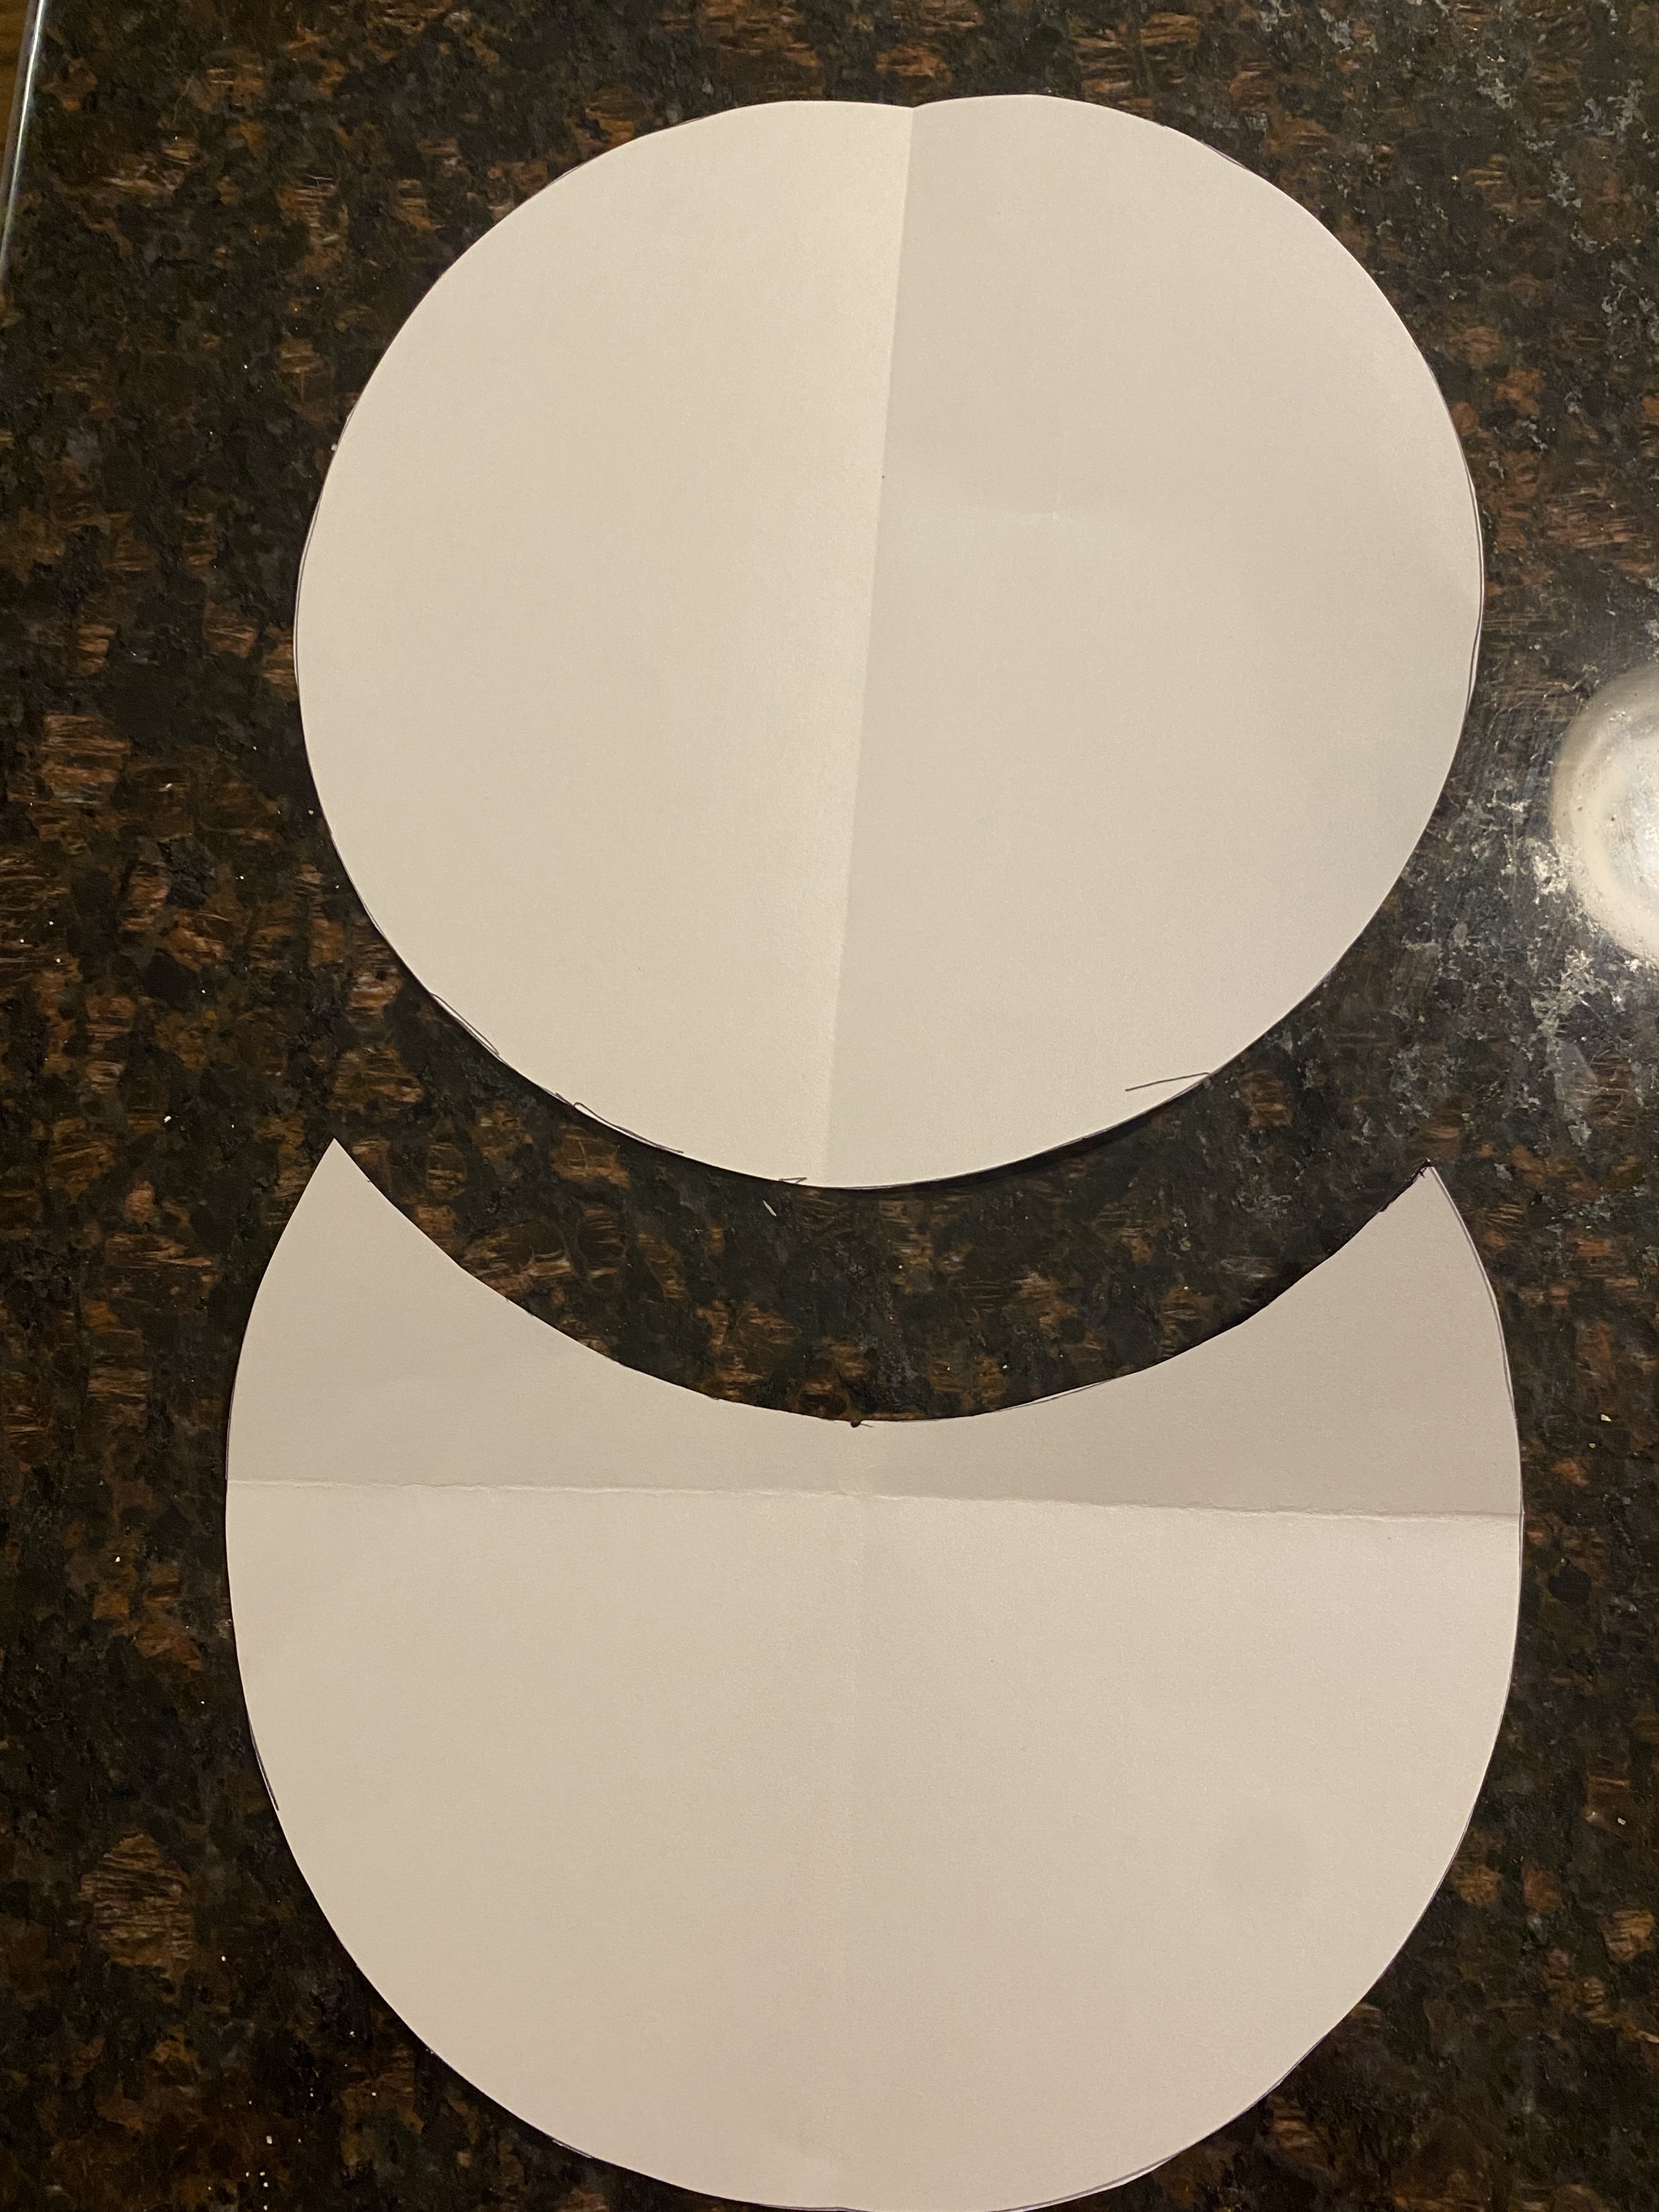
Cut out one of the circles. Leave the other circle intact (as a full-sheet of paper). Fold each circle in half lengthwise and make a crease along the fold.

On the full-sheet circle, place a ruler along the crease and make a mark approximately 4.5″ from the bottom. Place the cut circle on top of the full-sheet circle. Align both circles along the crease. Slide the cut circle up until the bottom of that circle meets the mark you made at the 4.5″ point on the other circle. Confirm that your creases are still aligned all the way to the top (fold down the top circle a bit to check). Trace the bottom of the circle to form the top arc of the moon shaped piece that will be the pocket template for your round potholder.

Cut out your moon shaped piece. You should now have two pattern templates.
What else do you need per potholder?
- (4) 9-1/2″ squares of coordinating fabrics
- (2) 9-1/2″ squares of Insul-Bright or Insul-Fleece
- (2) 9-1/2″ squares of cotton batting
- (1) 2-1/2 x 5-1/2″ strip for hanging loop (optional)
- Approximately 45″ of 2-1/2″ bias binding
Basic construction notes:
a) Make 2 quilt sandwiches – one for the main body and one for the pocket. Include a piece of Insul-Bright/Insul-Fleece and a piece of cotton batting in each sandwich. Quilt as desired – a 1″ grid is commonly used in kitchen textiles.
b) Cut out the body and pocket pieces using the templates you drafted.
c) Add binding to curve of pocket piece using your preferred method.
d) Place pocket piece on top of body, align and baste in place.
e) Make hanging loop, fold in half and baste in place at center top on front or back of potholder.
f) Attach bias binding back to front and sew down – this video will be VERY helpful.
g) Flip up the hanging loop and stitch in place to secure (optional).
Here’s a helpful tutorial for an oval shaped potholder, but it’s essentially the same as for a round potholder with a pocket.
Helpful hints:
– Use a longer stitch length (3.5 mm) when quilting and topstitching.
– A left bi-level foot (or quilt binding foot) will help keep topstitching uniform when applying binding back to front.
– If the binding has a difficult time turning to the front and providing enough coverage, try grading the seam allowance along where the pocket and body are sewn together.
