Seam guides for vintage straight-stitch sewing machines
Lately, I’ve been working on my Silver Lake quilt, which is a fund raiser for the Virginia Quilt Museum. Pat Sloan sponsored a QAL earlier in the year, but I’m just now able to get to it. So far, I’ve pieced all the blocks on my Elna 450 using a scant 1/4″ seam allowance, as the test block using the full 1/4″ seam allowance came up a wee bit short.
Modern, computerized sewing machines have us spoiled. It’s so easy to adjust your needle position with 1-2 clicks to set it for a perfect scant 1/4″ seam allowance. Not so easy with a vintage, straight stitch sewing machine! You can’t move the needle, so you must compensate by moving the seam guide or by using a specialty scant 1/4″ foot.
With the way my Singer 301A was built, the specialty slant shank scant 1/4″ foot yields a full 1/4″ seam allowance. It’s not a fluke. I purchased the same exact foot from two different vendors and experienced the same result each time. More than one technician has told me that it’s just the way my machine was made. If I need a scant 1/4″ seam, I was advised to use the original presser foot and a seam guide.
So, what solution did I come up with?
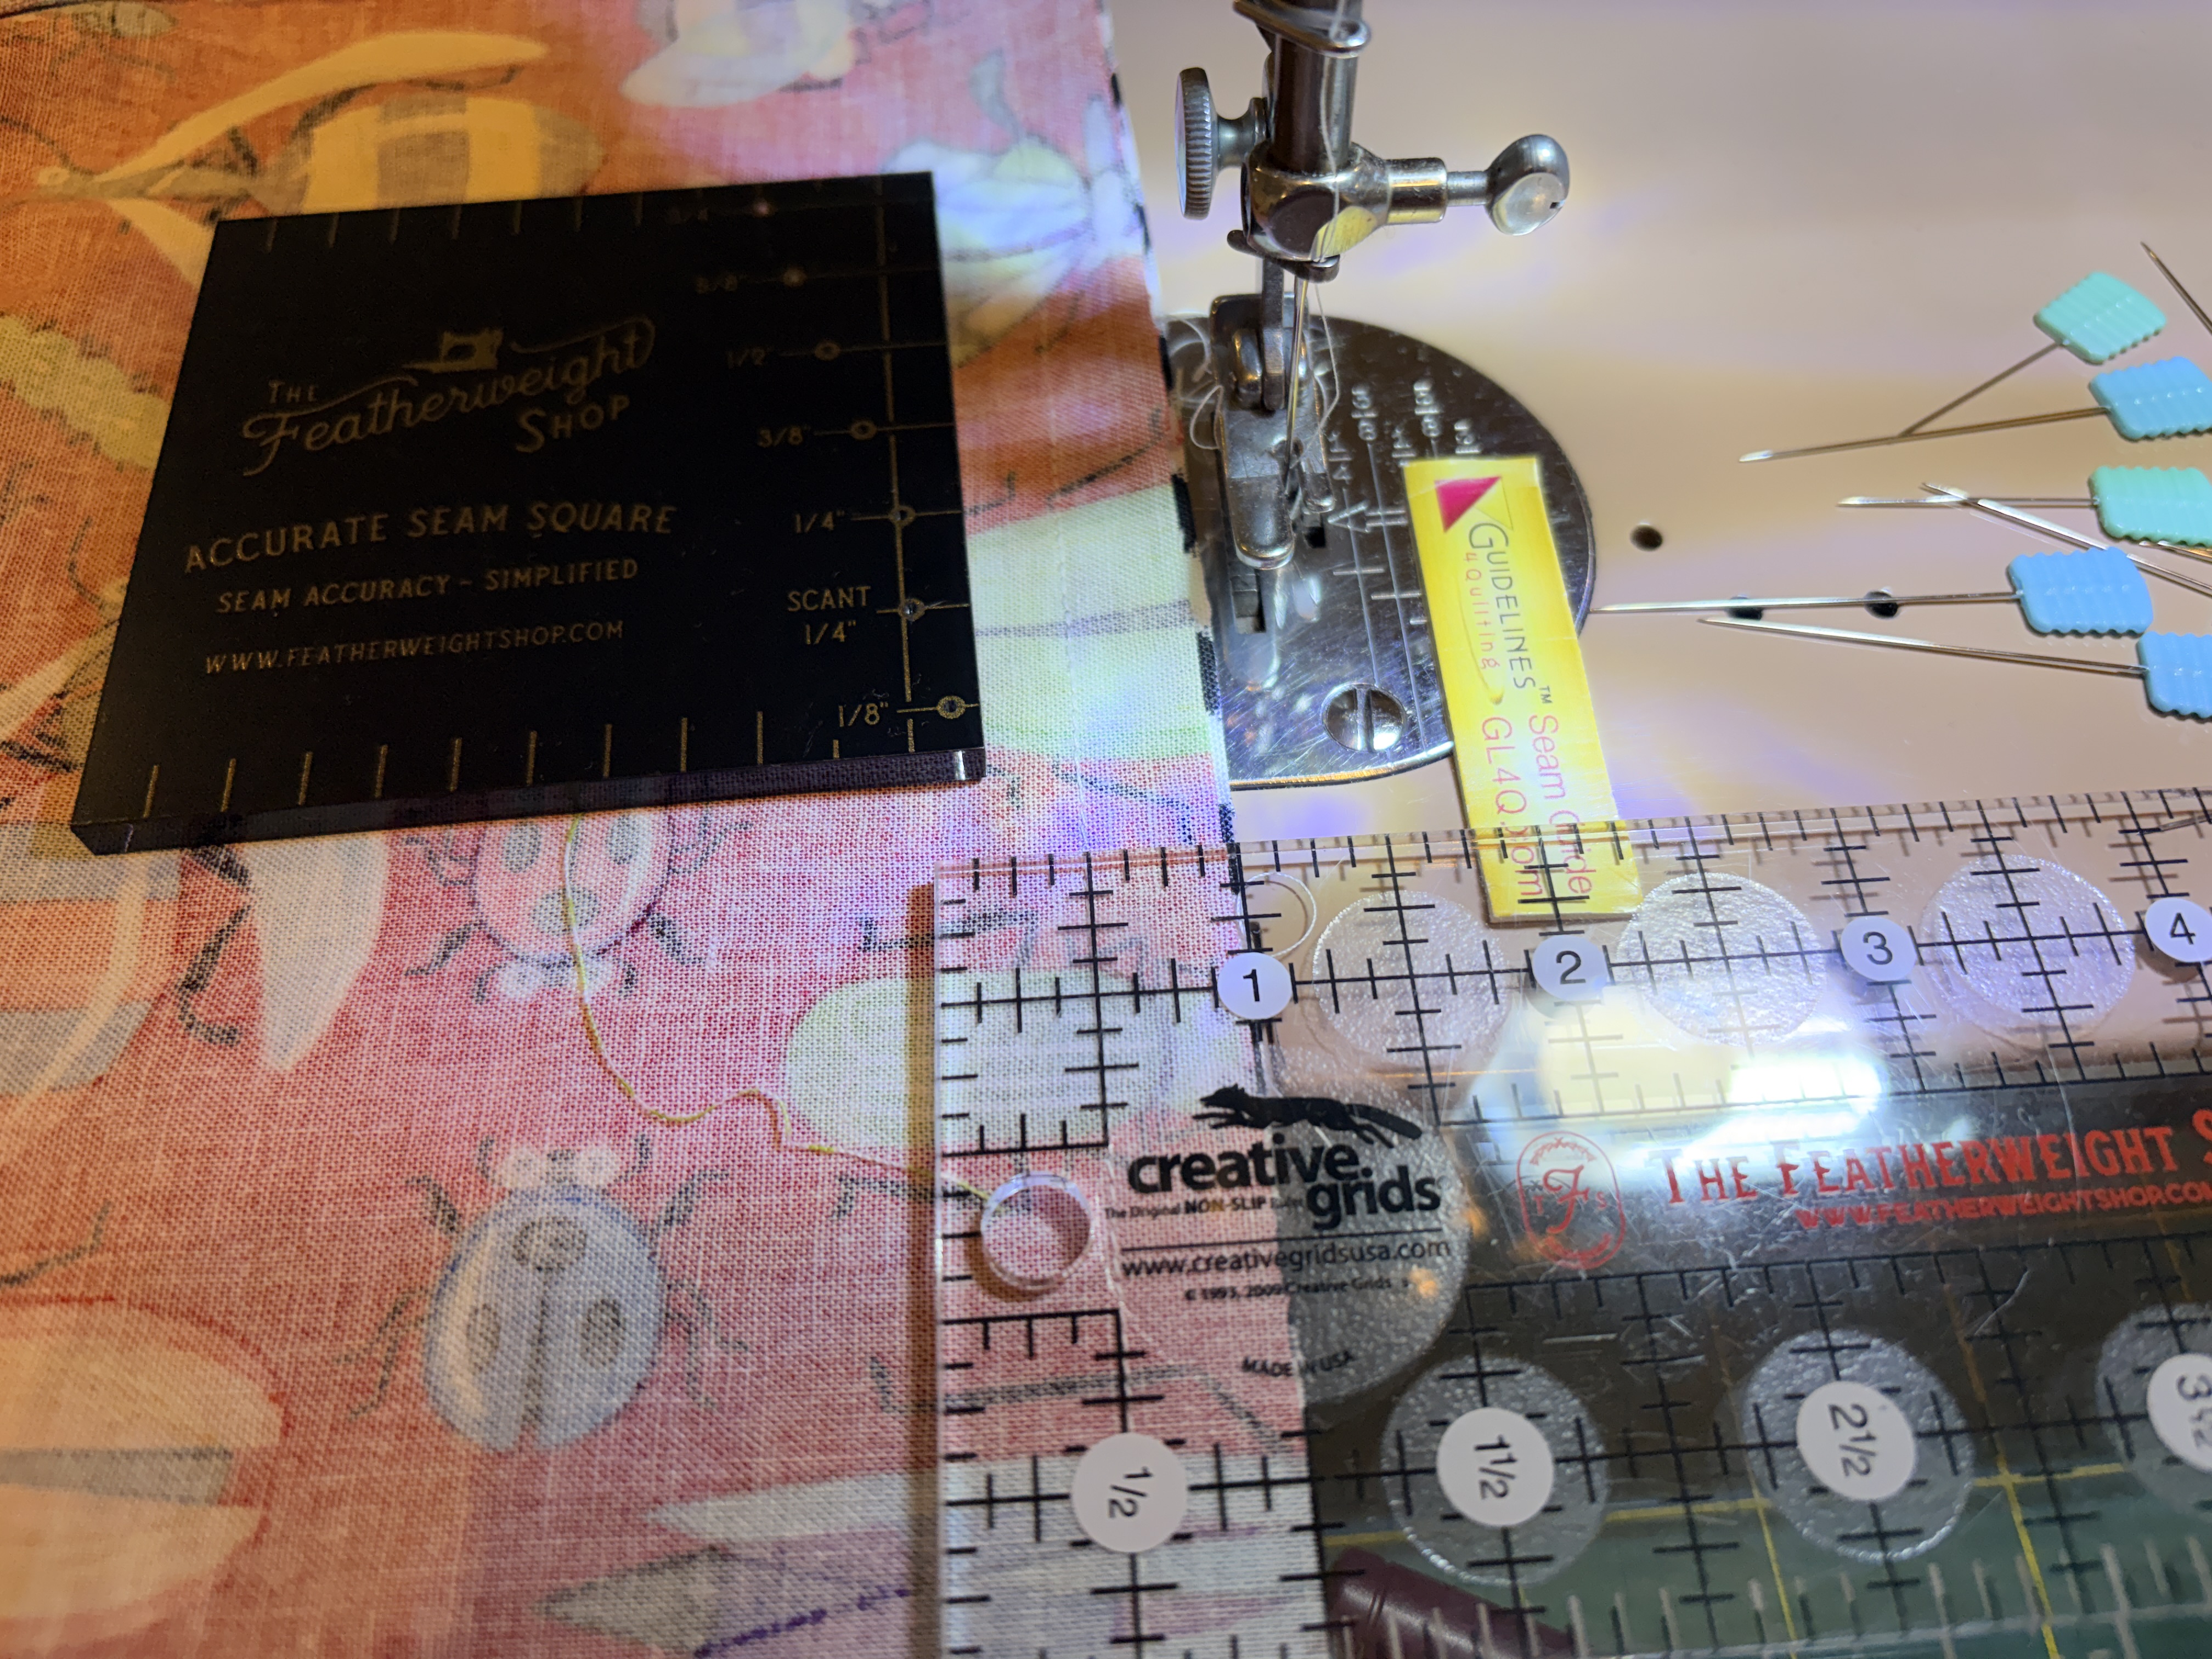
I use a Seam Square from The Featherweight Shop as the measuring device to set any seam guide.
(1) If I am chain piecing or can pin parallel to the fabric edge, I’ll use the Seam Guide from The Featherweight Shop or a cute magnetic one I picked up at a local quilt shop.
(2) If I need to pin perpendicular to the fabric edge to match at specific points, I like to use the little stick-on guides from Guidelines 4 Quilting along with the Magic flathead pins from Taylor Seville. The guide is just high enough to act as the fabric bumper, while still allowing the pins to pass over. (A thin stack of sticky notes will also work).
I’ve also tried various 3-D printed slant shanks with snap on feet. If someone can design one with a slightly thinner shank, I’ll be happy to test it out for you.