Basically, a “quilting plan” helps you convert more flimsies into finished quilts. It can be as general or detailed as you wish.
Your quilting plan might be to send the top to a longarm quilter. If so, there’s some prep work you’ll still need to do before delivering the top and backing fabric to the longarm quilter. Consult your longarmer for any special instructions.
If you decide to quilt the top yourself, will you do straight-line/walking foot quilting or free motion quilting? Either method requires different planning and prep.
Personally, my quilting plans for FMQ are more detailed than straight line designs using my walking foot. I write my quilting plans down in a 5″x8″ journal. I’ll sketch the top, add in any inspiration photos or quilting details, make notes on the quilting design, spacing, thread, needle, bobbin, etc., along with my plan to divide and conquer maneuvering the quilt sandwich through my machine (I have 11″ to the right of the needle). Right now, my FMQ is to use the same design all over my quilt. As my skills grow, I’ll add semi-custom details in the sashing and borders. Those will be indicated on my quilting plan. It’ll definitely be a while before I reach the stage where each individual block is custom quilted, with each unit having a separate quilting design – like the photo below I took of a quilt at the Omaha Quilt Show .
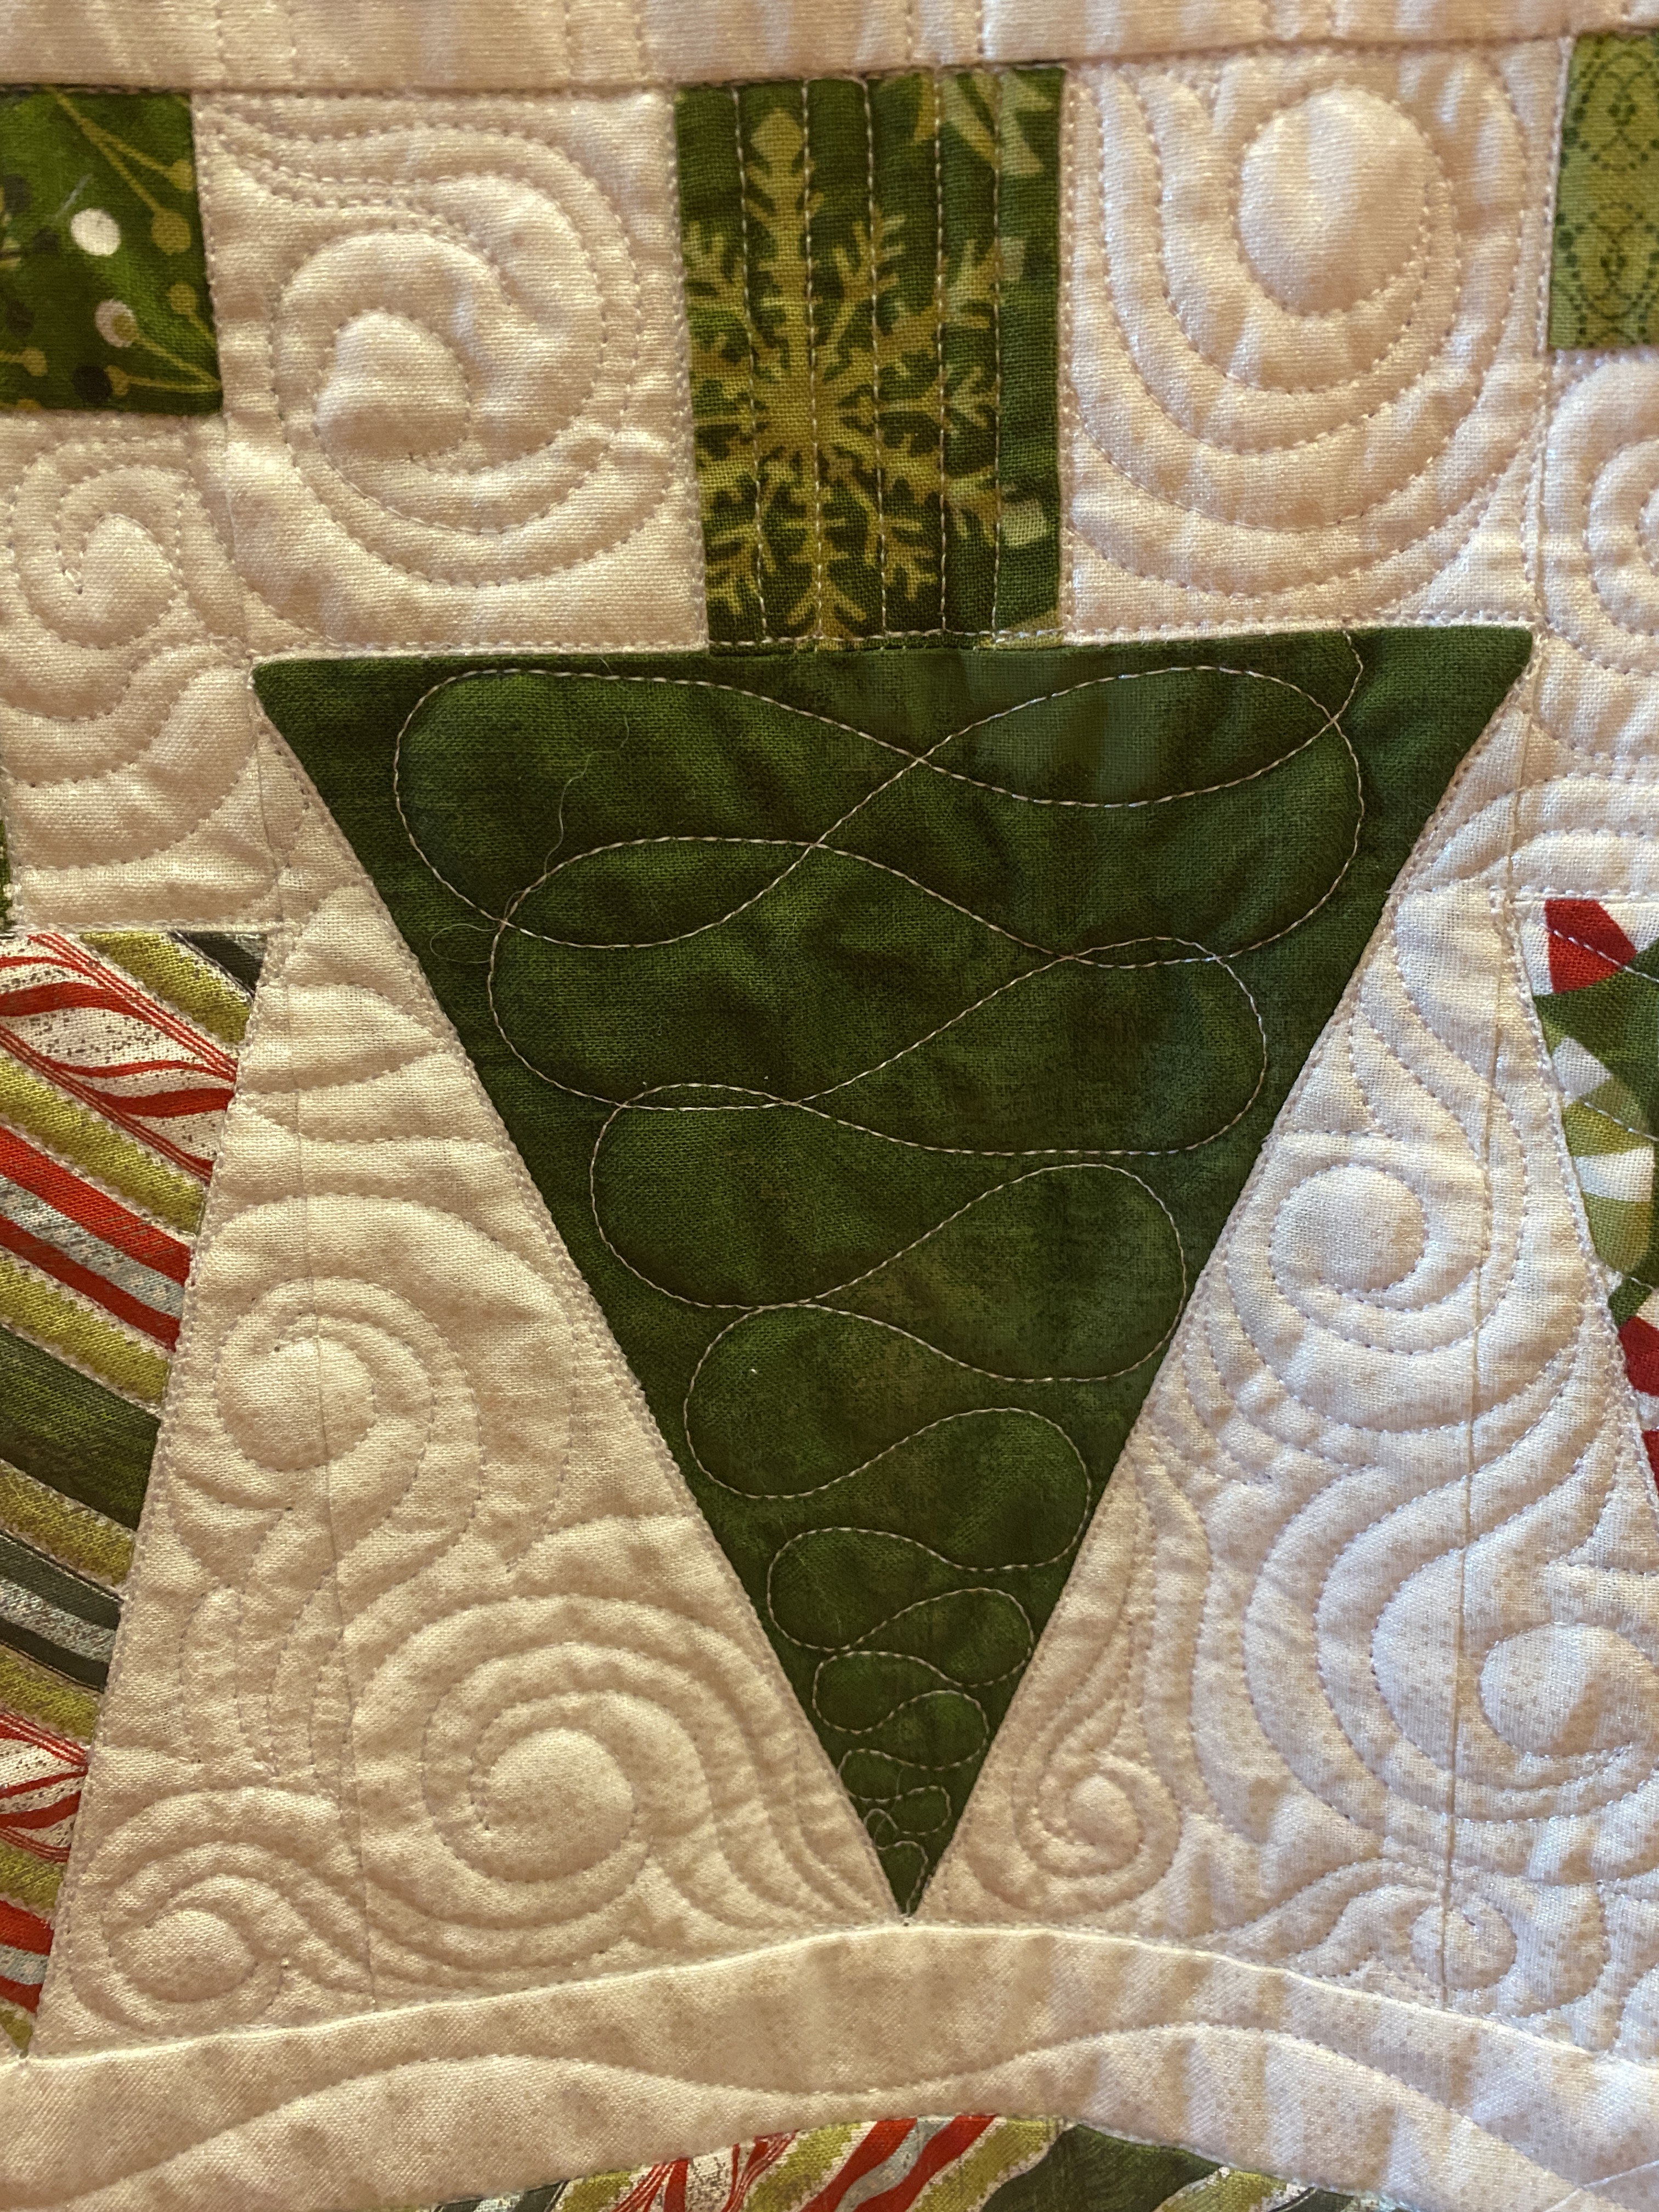
Close-up of quilt showing detailed custom quilting.
Next up on my quilting agenda is my husband’s retirement quilt. Yes, it’s two years after the fact, but I couldn’t decide on the quilting design. I really wanted to do this one all by myself rather than sending it out. I finally saw a quilting design I liked in a collection of straight line quilting designs, but couldn’t figure out how to stitch it. My gut told me this was the design, so I waited. Recently, some YouTube video I streamed had a segment of someone demonstrating how to quilt that exact design. Well, duh! Things finally clicked. Sadie & I will be basting that quilt this afternoon.
