Believe it or not, this type of memory pillow is probably the easiest of all to make as the button placket serves as the closure. Essentially, you cut a square to the desired size + 1/2″, place fabrics right sides together and sew all the way around. Turn inside out, give it a good press and insert a pillow form. Instant memory pillow! Here’s a tutorial that explains the process in greater detail, in case you need it.
Construction Notes:
- This pillow is 16″ square. Most L/XL men’s shirts will yield a 16″ square pillow.
- Consider interfacing the front sections of shirts that are loosely woven or made of thin fabric. Pellon SF-101 is my go-to interfacing.
- Align the button placket and baste the top and bottom edges before stitching.
- Use a 3/8″ seam allowance and finish the edges by serger or sewing machine.
- Be aware that the button placket will likely be off-center if you want the entire chest pocket to show.
- Take the time to match plaids along the sides. A walking foot is your BFF.
- If you like to taper the edges of the pillow to avoid bulk at the corners, I recommend NOT doing it on this particular type of pillow – especially if you have an overstuffed pillow form.
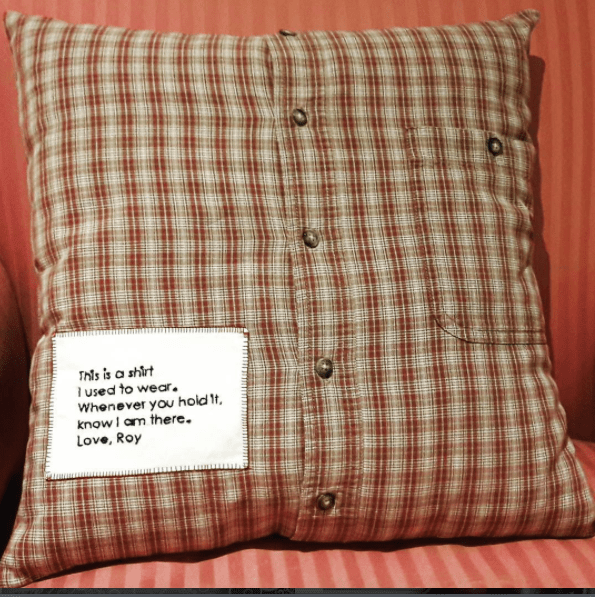
Inscription Label:
This particular label is hand embroidered because I do not own an embroidery machine. The font is Century Gothic. The verse was printed on fabric using my inkjet printer and stitched using perle cotton. Cost and turnaround time are the reasons I decided to DIY.
You do have lots of other options if you abhor hand stitching: DIY on your embroidery machine (lucky you!). Design your own stitch pattern or buy a digital embroidery file for a couple of bucks. Having someone else make the label is also an option, but it will set you back $8-$15 per label.
