 My husband had some long sleeved t-shirts that he took back to the store to trade for short-sleeved versions. However, there was one long-sleeved t-shirt left in a beautiful shade of blue that he couldn’t find in a short-sleeve version. You know what’s coming next right?
“Honey, can you make this a short-sleeved t-shirt?” hubby asked. Sure, I thought, I’ll just whip out my cover stitch machine – NOT! I do not own a cover stitch machine and iI’s been AGES since last sewed on knit fabrics…but not with my 3160QDC. Unlike my 6600, this sweet little machine will tackle knit fabrics without puckering – provided you set the machine correctly.
Here’s what I did:
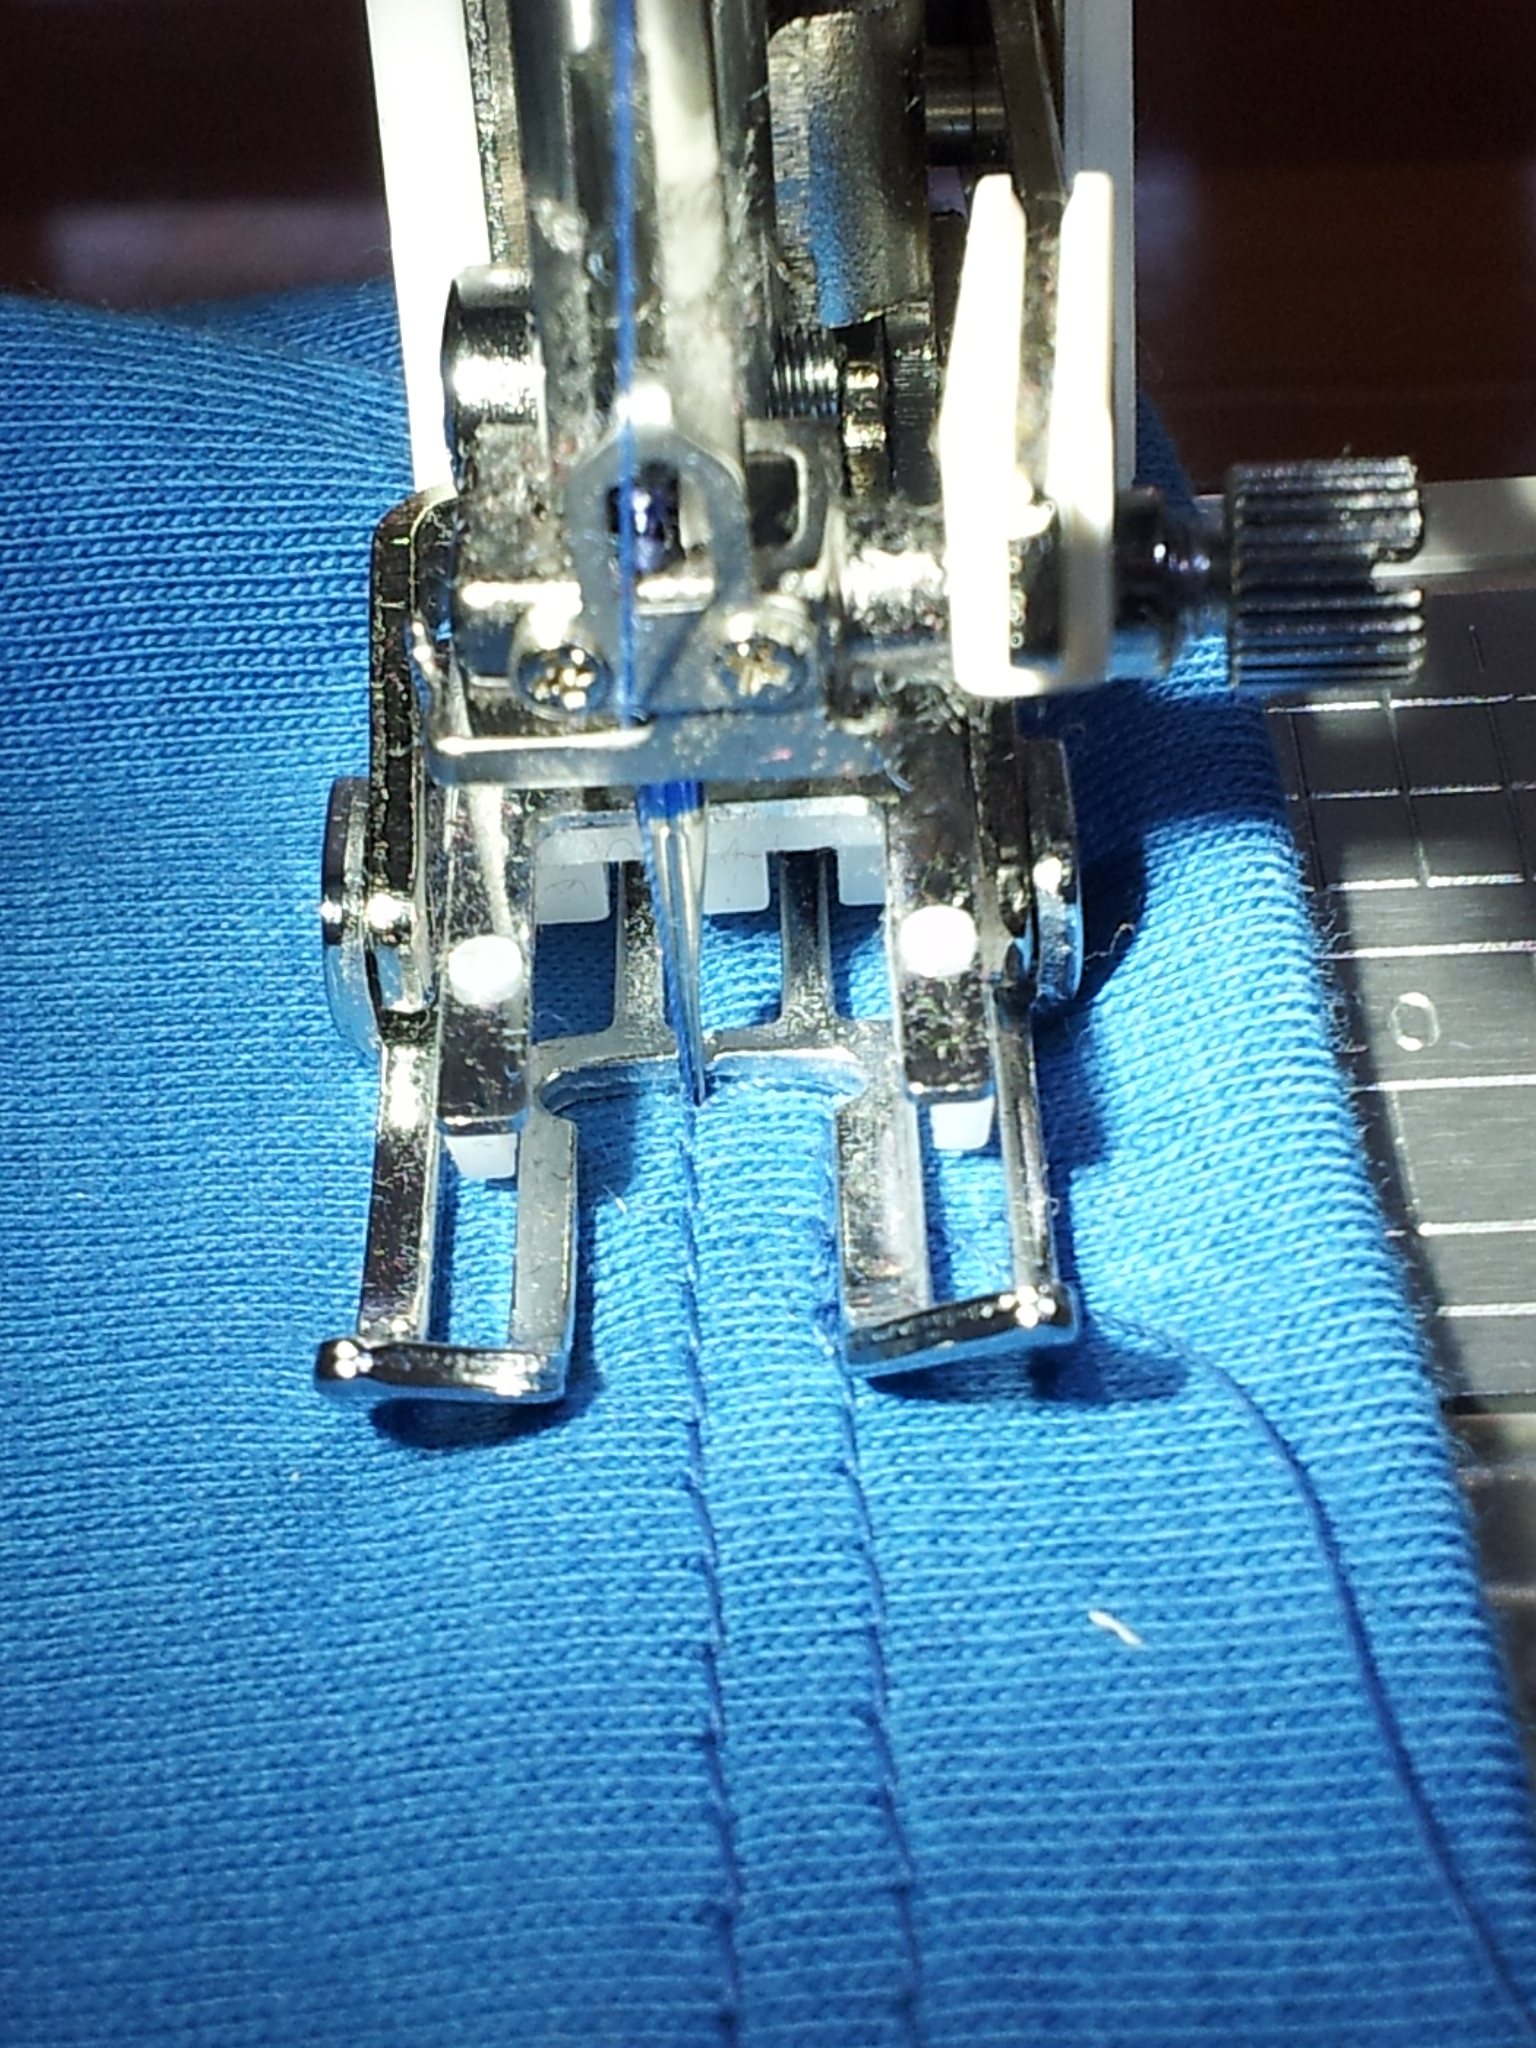
Stretch (blue tip) needle in size 75/11 or 80/12
Straight stitch with stitch length of 3.5, center needle position
Walking foot
Mettler Metrosene thread
Foot pressure adjusted to 4 (or 2 if you only have 3 settings)
Turned up a 1″ hem on the sleeve. I didn’t have a twin stretch needle handy, so I sewed the right side first using the “10” mark on my needle plate as the guide. To sew, the second row of stitching, I let the previous row of stitching ride just on the inside edge of the right toe of the walking foot. I trimmed any excess fabric with my applique scissors. Worked like a charm!
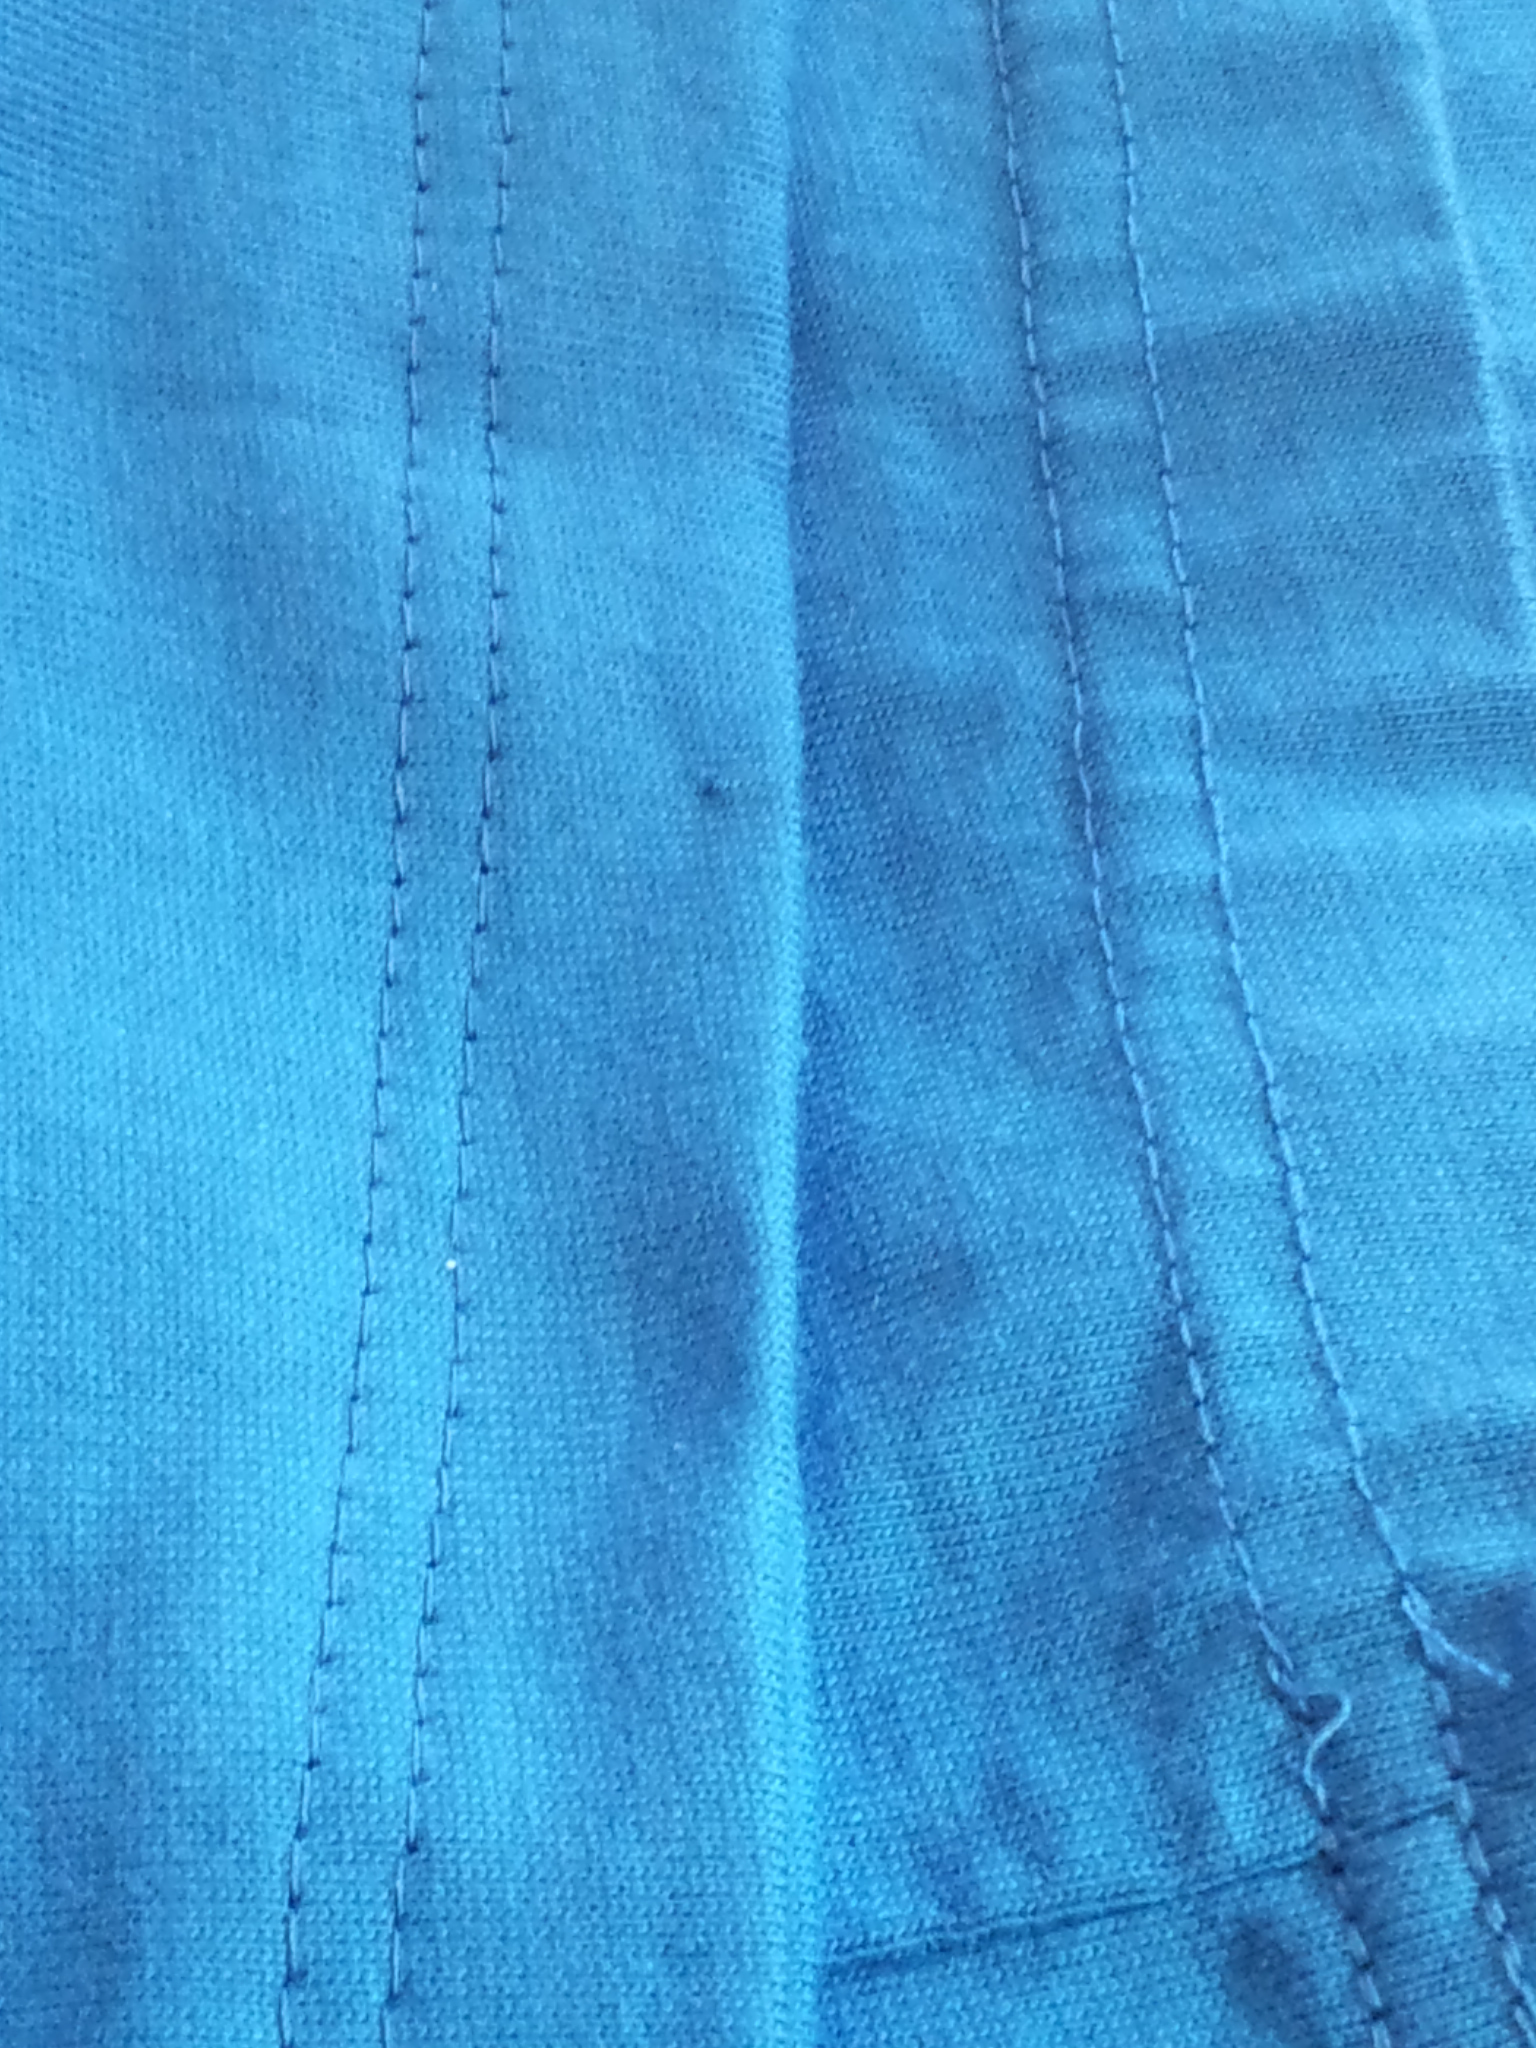
Here you see the newly hemmed sleeve on the left compared with the factory sewn bottom of the t-shirt. Not too shabby, huh? I think my stitching looks much neater than the factory sewn hem. Don’t you? To make the distance between the lines of stitching truly mimic the RTW hem, I could have moved the needle to the left just a little bit to make the distance wider between the rows of stitching. Something to keep in mind for the future…but I’m pleased with how it turned out.