Revisiting cross-stitch after a L-O-N-G hiatus

Cross-stitch was really popular when hubs and I got married many moons ago. Eventually, the quilting bug bit and I set my cross-stitch supplies aside. However, there’s this one unfinished project that’s left me frustrated every time I pull it out to work on it.

I took the unfinished project to my Friday sewing group at the library. Their recommendations: (1) stitch using a really bright task lamp and a pair of slightly stronger reading glasses. 2) DO NOT RIP OUT any existing stitching. Merely blend the four colors (which are one shade apart) in that section as best I can and keep on going. Wise advice. I’ve made noticeable progress.

At the JK Quilts 2025 spring retreat, one of the daily projects featured a tulip cross-stitch design with Sulky 12 wt thread over 14 ct Aida fabric. I didn’t actually start the project until after I returned home, but I’ve actually enjoyed cross-stitching again! I like the sheen and feel of the Sulky thread and not having to manage 6 strands of traditional DMC floss. (A single thread of 12 wt thread equals 2 strands of traditional DMC floss). The 14 ct white/off white Aida cloth was much easier for me to see with standard reading glasses and overhead lightling.

If you like to stitch for a good cause, the Haven 2026 Charity Quilt & Stitch Along with Fat Quarter Shop has a new start date – Friday, July 3rd! Find all of the updated details here. This means you still have time to order a quilt kit or pull from your stash (and your friends’ stashes)!

This morning, I pulled supplies from my stash to make the cross-stitch version of Haven. I need a small, portable handwork project for upcoming travel and shortened summer sew days at the library. I’ll actually stitch it using Sulky 12 wt thread over 14 ct Aida cloth. Other than white, there are no exact DMC to Sulky matches for this project on the color conversion chart.

Here are the color substitutions I made using Sulky 12 wt thread already on hand:

Navy: Color 1199 – Admiral Navy Blue
Dark Blue: Color 1095 – Turquoise. (the stitched sample has more of a teal look to me than blue)
Light Blue: Color 1205 – Medium Jade (same reason as above)
Green: Color 1156 – Light Army Green
White: Color 1001 – White

Sulky – DMC conversion chart (free download) from Sulky website.
Sulky 12 wt petites color chart (free download) from Sulky website.

Serious x-stitchers may be interested in the Sulky 12 wt petites color card (with actual thread samples) that is available for $25.00 from the Sulky website.
Practice makes you better

Not perfect, but better.

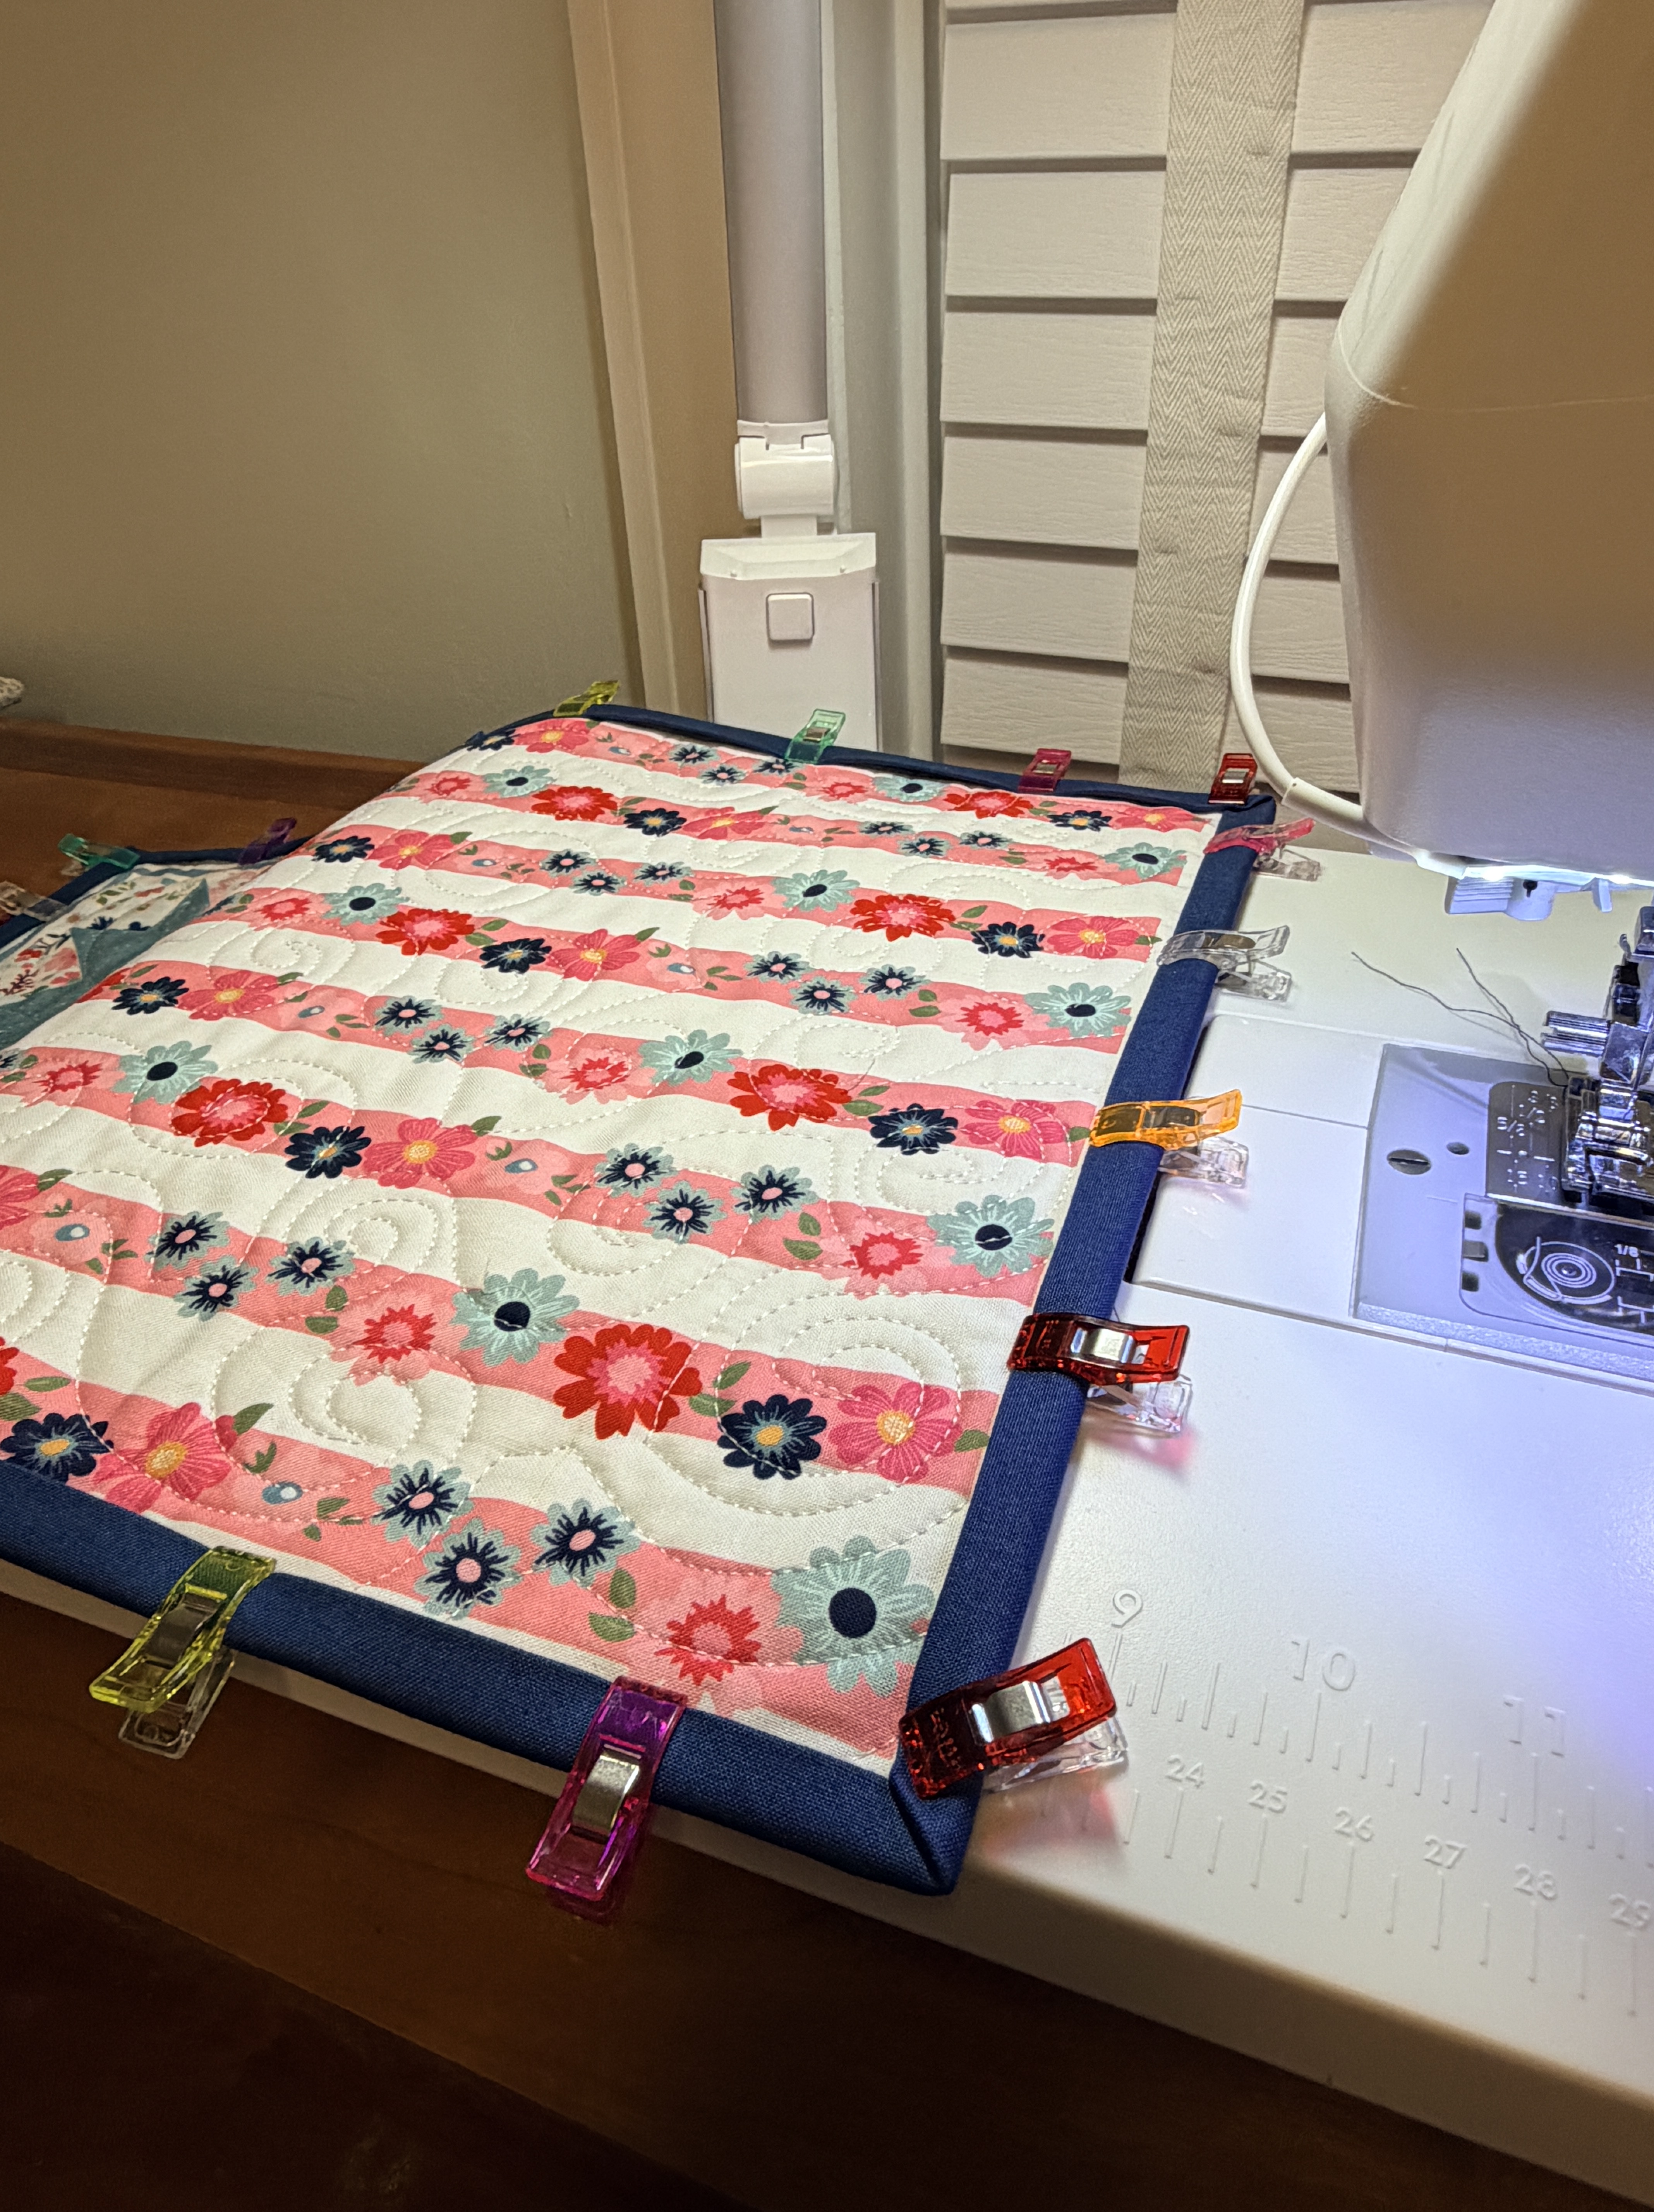
After several practice quilt sandwiches, it was time to do FMQ swirls on a *real* project. I unearthed a Moda placemat panel that had been part of the swag bag at last year’s JK Quilts spring retreat. I prepped the quilt sandwiches at sew day on Wednesday. Quilted them on Friday. Four placemats are now ready to bind.

Learning to FMQ with on my Elna 782 with the ASR requires a different set of skills – not good, not bad – just different. The payoff has been a more consistent stitch length when doing FMQ. I still get occasional long stitches (usually from moving my hands too fast when changing directions), but that’s okay. It’s part of the learning process. I actually prefer to FMQ using the start/stop button rather than the foot pedal. Still haven’t decided which particular foot I prefer to use for everyday FMQ. My next FMQ will be on a project made using the fusible grid interfacing. I’m going to try the “bowl” or clear view attachment to see if this works any better with all of the seamlines.

Back to Front Binding Tips:

Start with 2-1/2″ wide strips, adding 20% extra to the total length needed (just in case).
Do a mock binding layout to preview where any binding seams may fall – preferably no seams at the corners. Adjust as needed.
Sew using a 3/16″ seam allowance, joining ends using your favorite method.
Press sewn binding away from the back side.
Roll binding to the front side and glue baste in place, leaving corners for last.
Set corners and clip in place.
Let sit for 1/2 hour or overnight so glue can dry.
Stitch using a straight stitch with tie-off option and Janome Bi-level Left presser foot. (Note: the foot is advertised for 5-7mm machines, but I think it offers more flexibility with the 7mm widith machines. That said, my Elna 450 is a 5mm width machine. I set SW = 0 and SL= 3.0. Sew slowly with the needle down function engaged. )

DIY sliding mat for free motion quilting

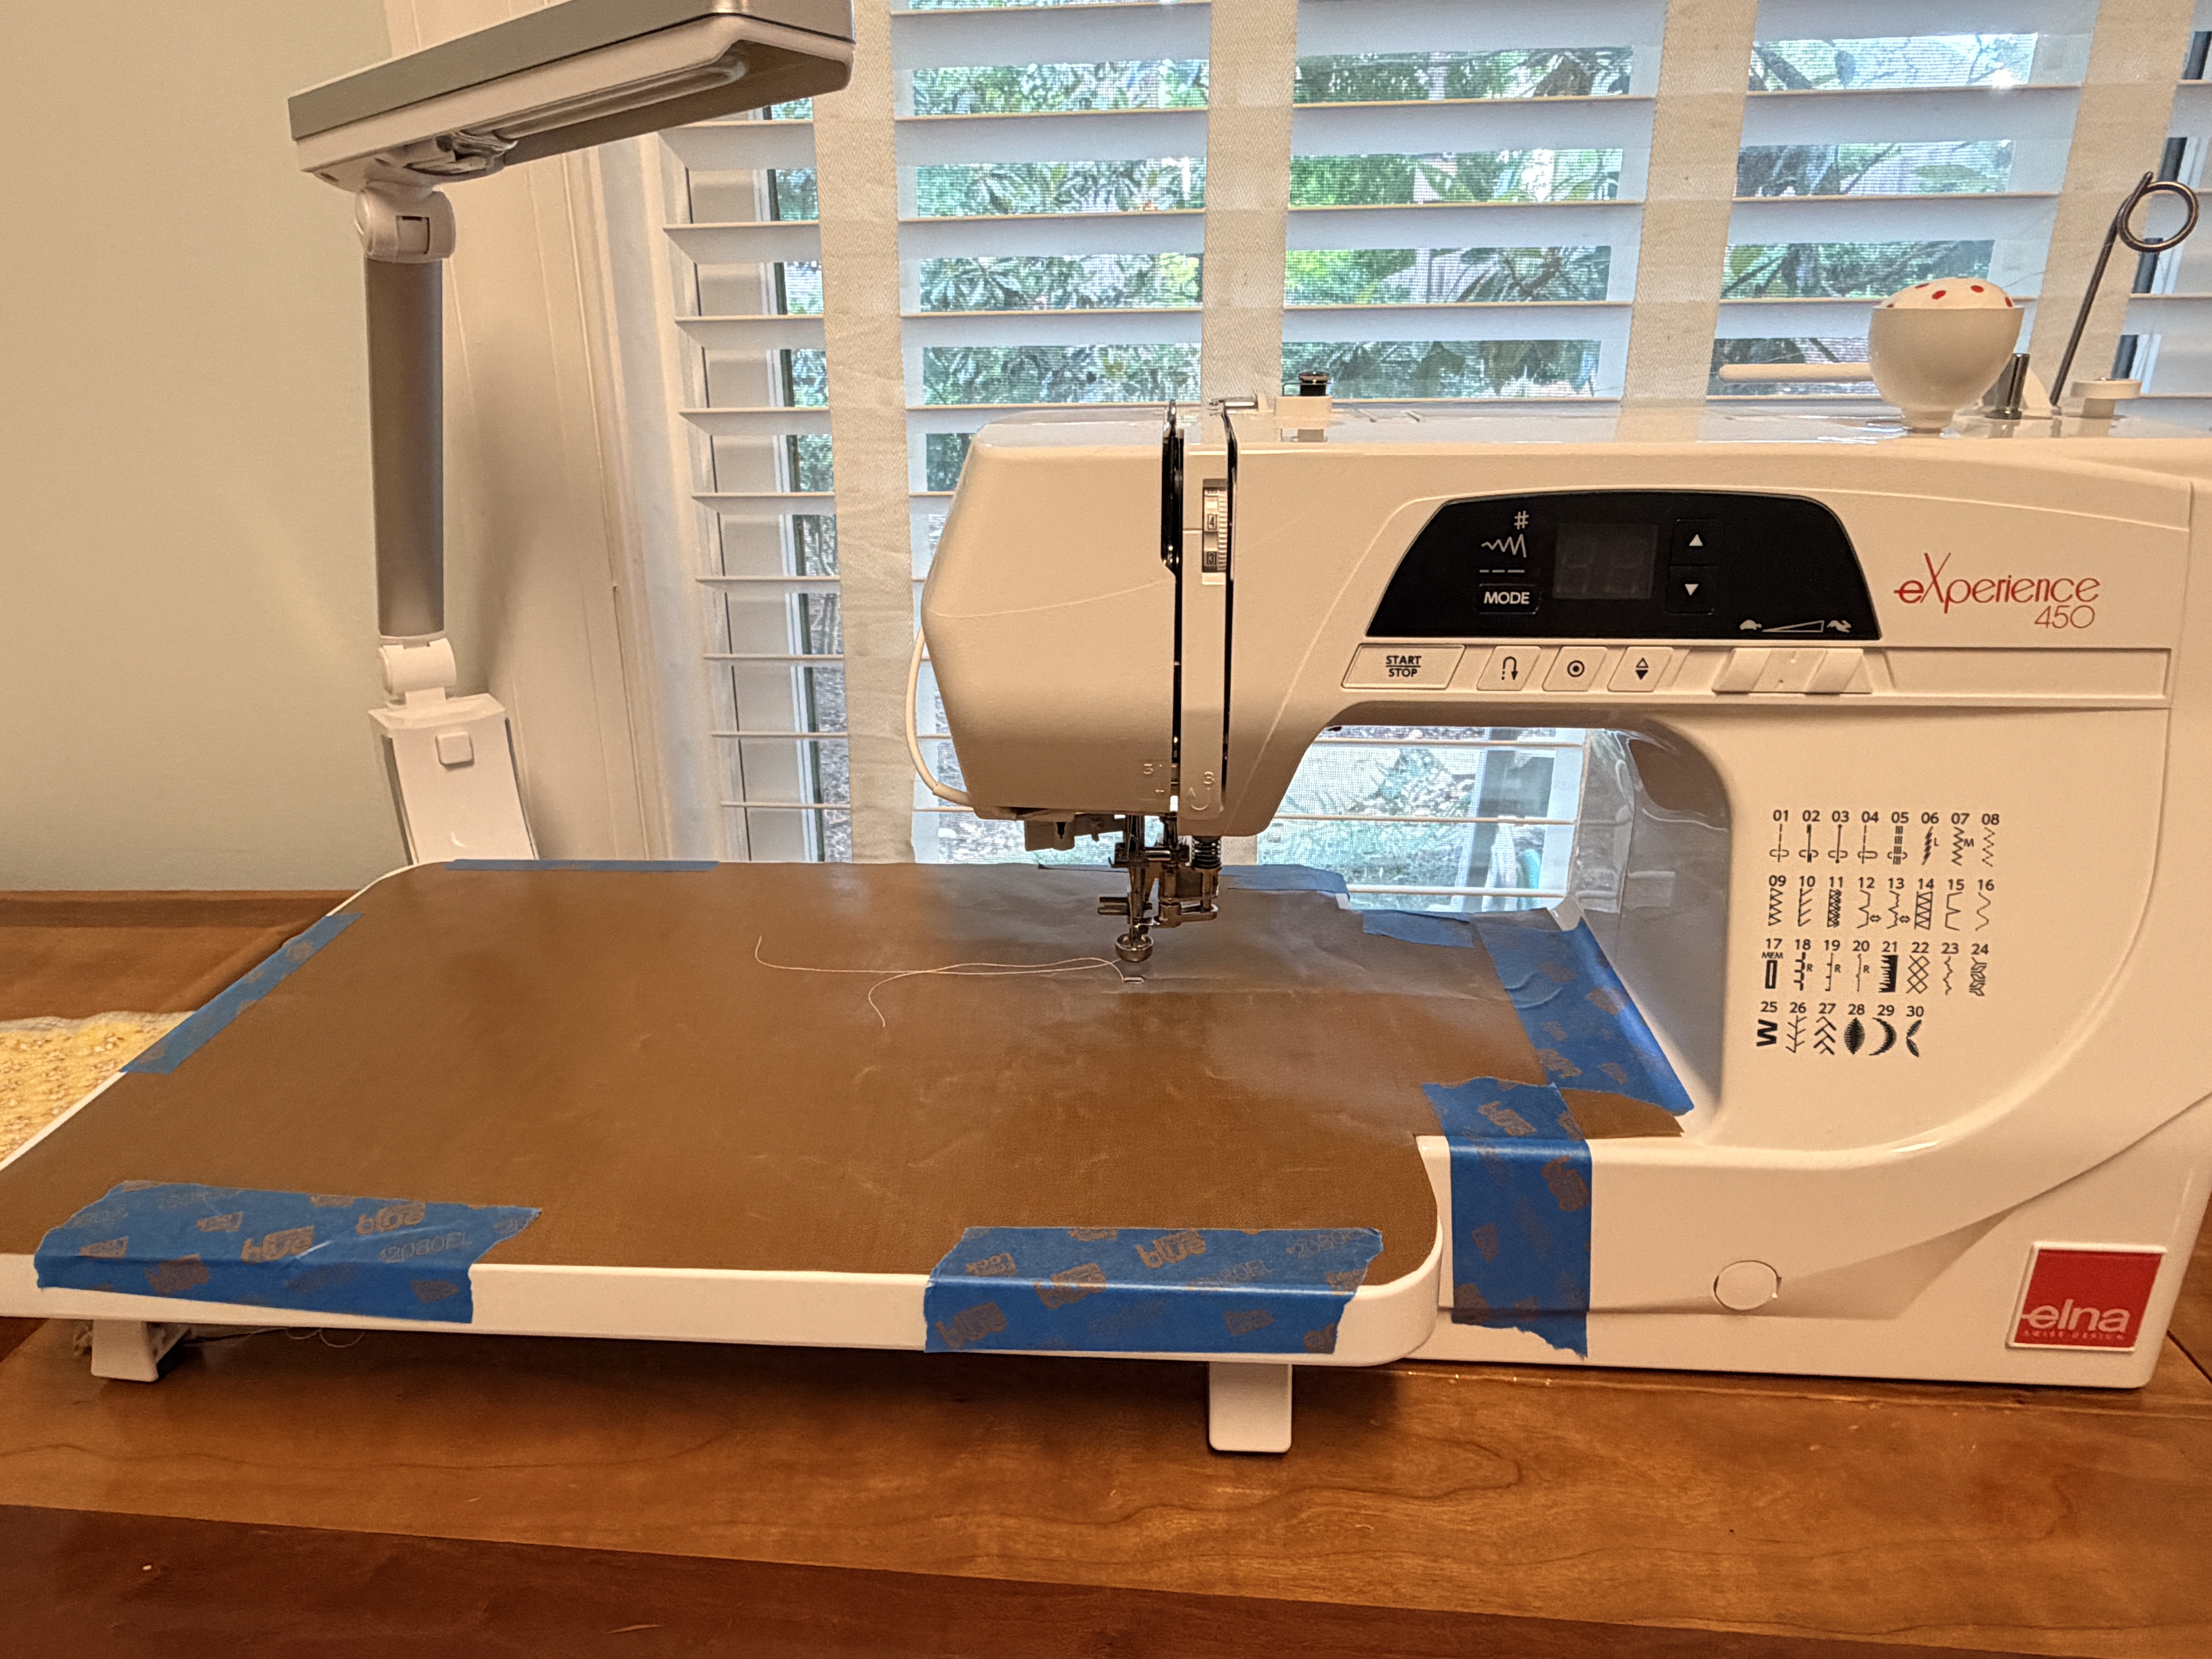
DIY slider mat for FMQ. Not pretty, but it works great!

Quilters have a number of options for creating a slick surface on their machine bed to facilitate easier free motion quilting. A slider mat (aka Supreme Slider) and teflon spray are two options. I have a Supreme Slider to use with my larger machine in the Horn Quilter’s Dream cabinet. The queen size works great with my machine and required no cutting to achieve a perfect fit.

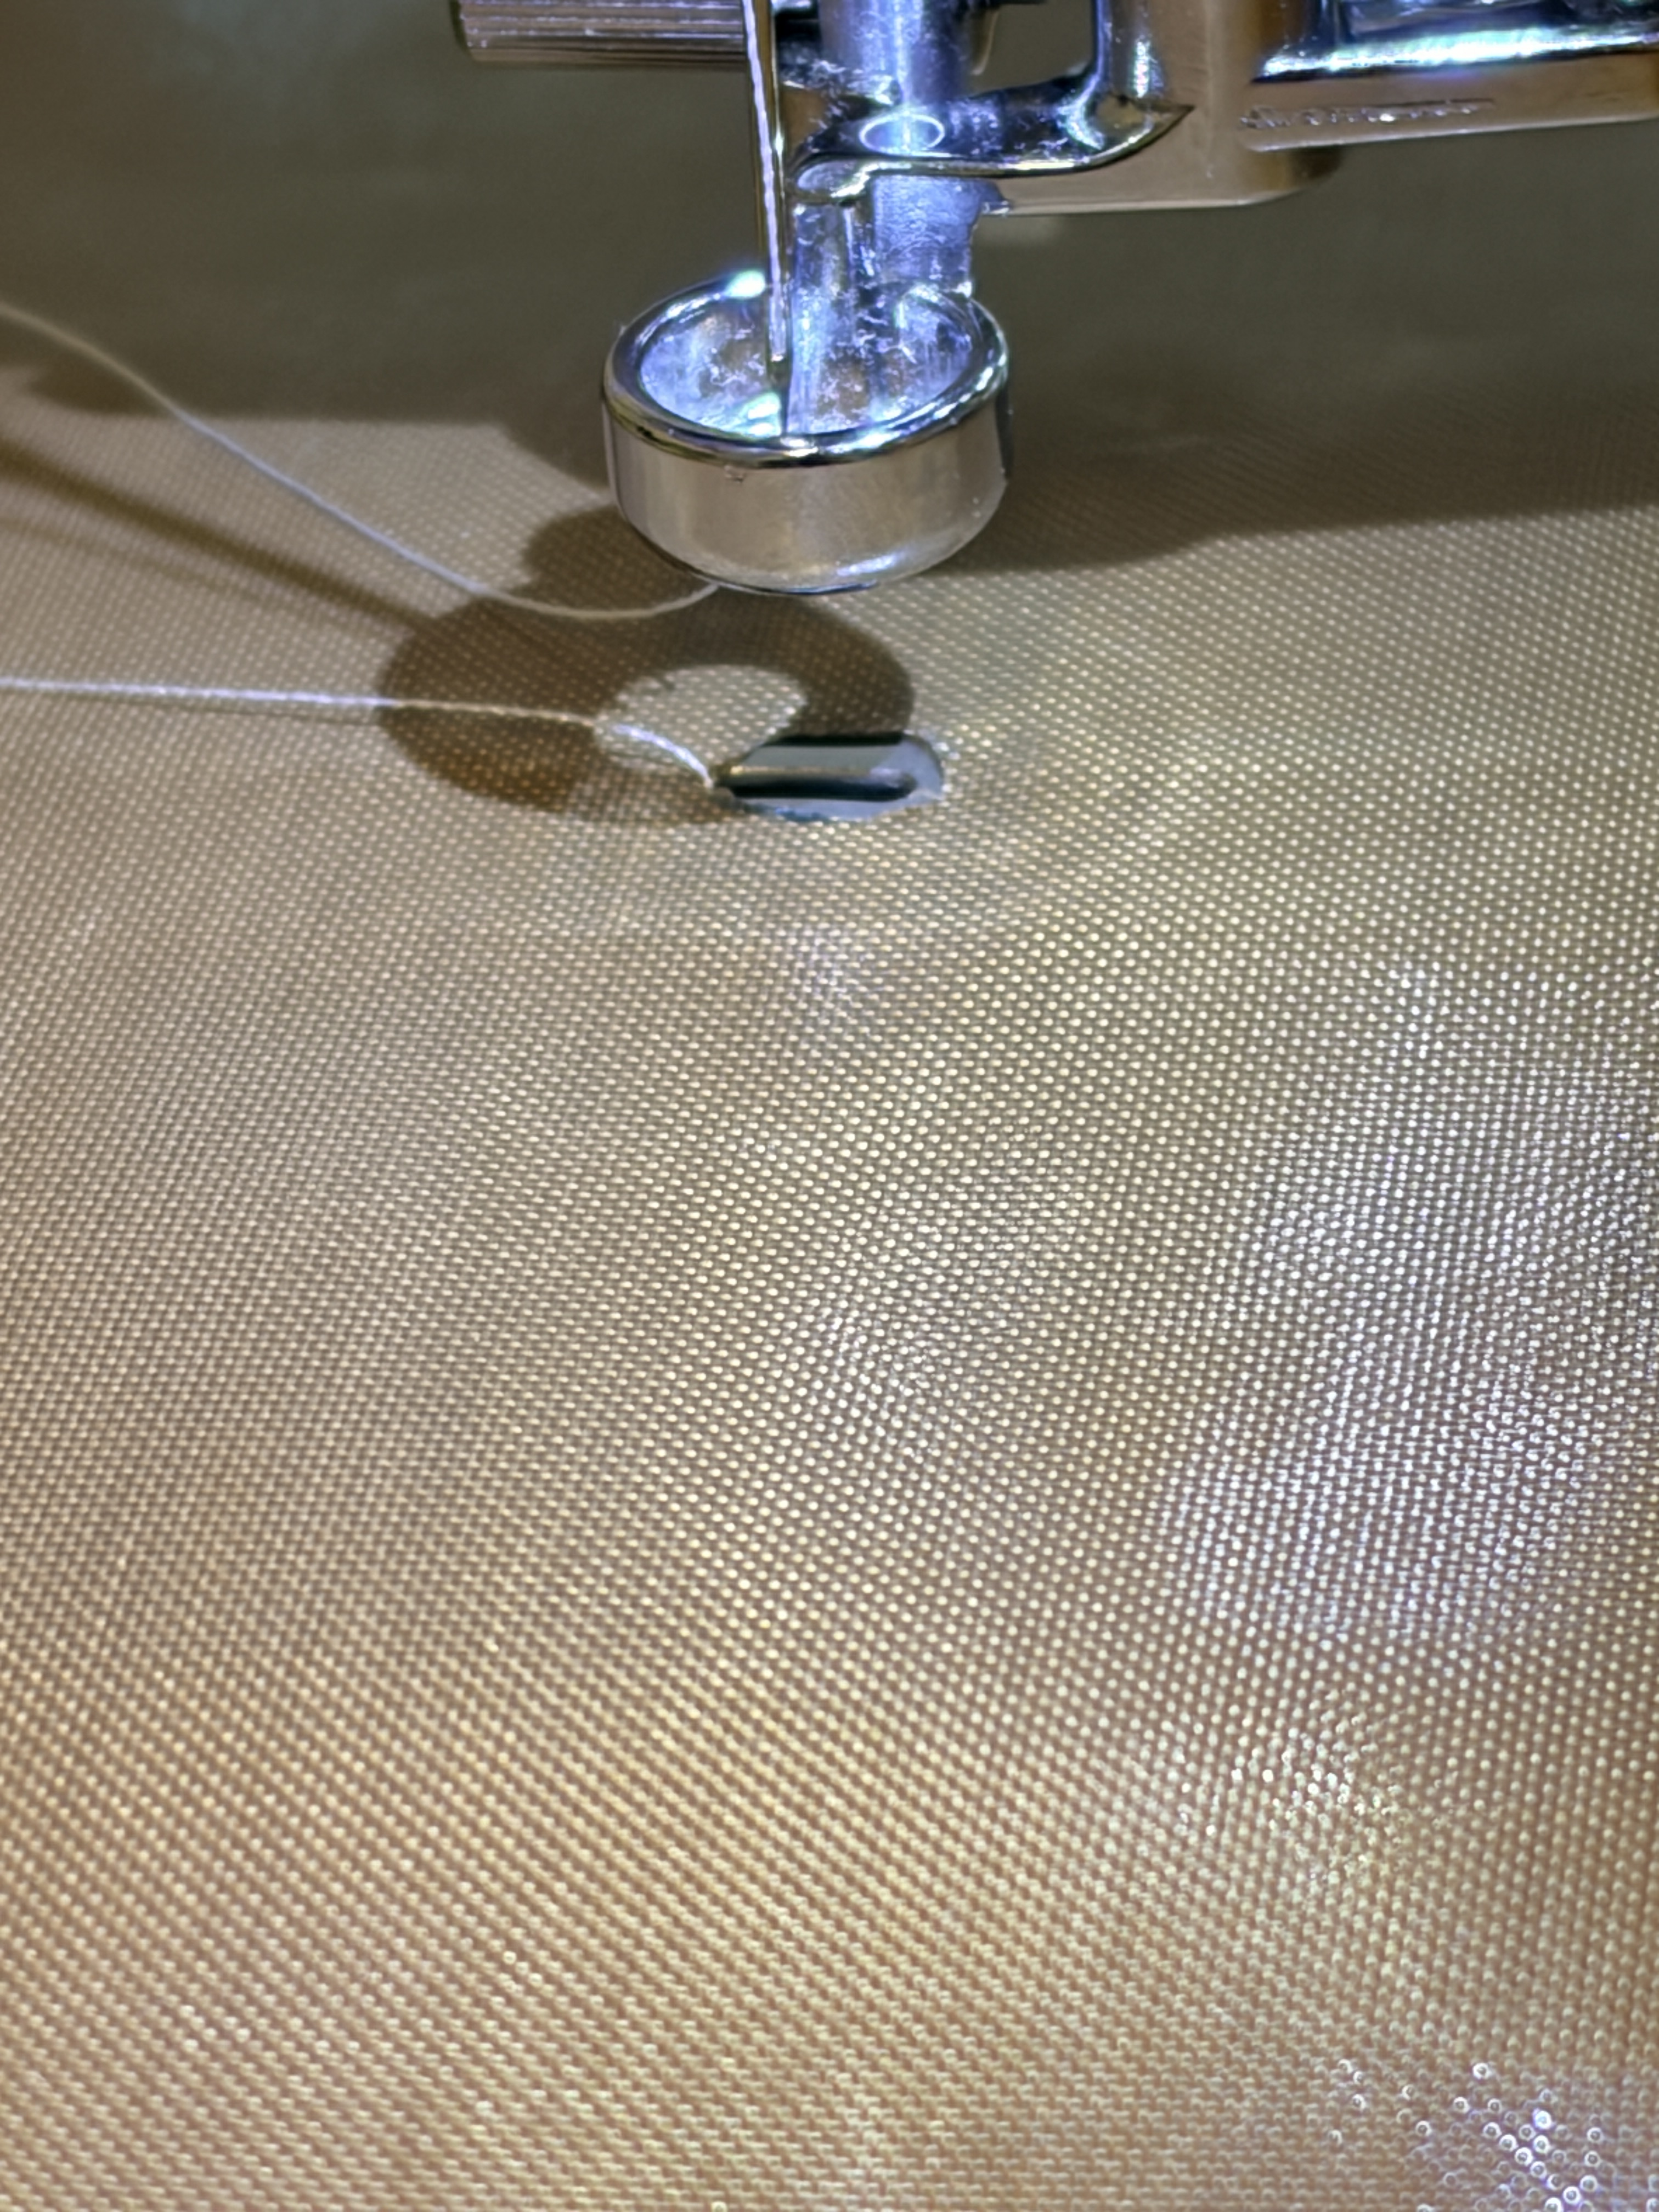
Using a wide extension table to FMQ while at a class or retreat may require that you trim your slider mat to size. This was the case with my Elna 450. I didn’t wish to spend $30-$40 for another mat. Instead, I took a thin oven liner mat (already on hand) and rough cut it to size. I marked the needle opening by running the sewing machine needle through the exact spot several times and later cut out a thin circle with super sharp scissors. I taped the mat in place and did the detail cuts around the curved edges and the inset to the right of the needle.

Next step was to test things out. I enlarged the needle hole slightly and trimmed up the inset areas a little bit more. Applied fresh painter’s tape to hold the mat in place and began to FMQ. Smooth as butter with no fabric catching anywhere!

Total cost: FREE because I had an extra pack of ThreadNanny oven liners from Amazon in my stash. I use them for applique projects requiring fusible interfacing or glue.

Close up of needle hole area in my DIY slider mat.

Curious about my settings for FMQ on the Elna 450?

Convertible FMQ foot with ruler work attachment (personal preference)
Blue dot (or low tension) bobbin case
Feed dogs lowered
Upper tension set at 4
Topstitch needle in 80/12 or 90/14
Glide thread top and bobbin (with at least 2 extra bobbins fully wound)
Slider mat securely taped in place
Gloves

I use stitch #1 and set the speed slider about 3/4 of the way. I always warm up for 5-10 minutes on practice sandwiches to test settings before I start on a quilt.