Achieving consistent seam allowances and accurate topstitching
Accurate seam allowances play a vital role in the successful outcome of any project. A 1/4″ seam allowance is standard in quilting and most smaller sewn projects like zipper pouches and placemats. Topstitching is one of those little sewing extras that takes an item from homemade to handmade. If you make bags, zipper pouches, journal covers, placemats, fabric boxes, bookmarks, lanyards, etc., you’ll find find 1/8″ topstitching in your project.
What’s the best way to achieve consistent seam allowances and accurate topstitching?
Experiment with the different feet that came with your machine. Practice, practice, practice.
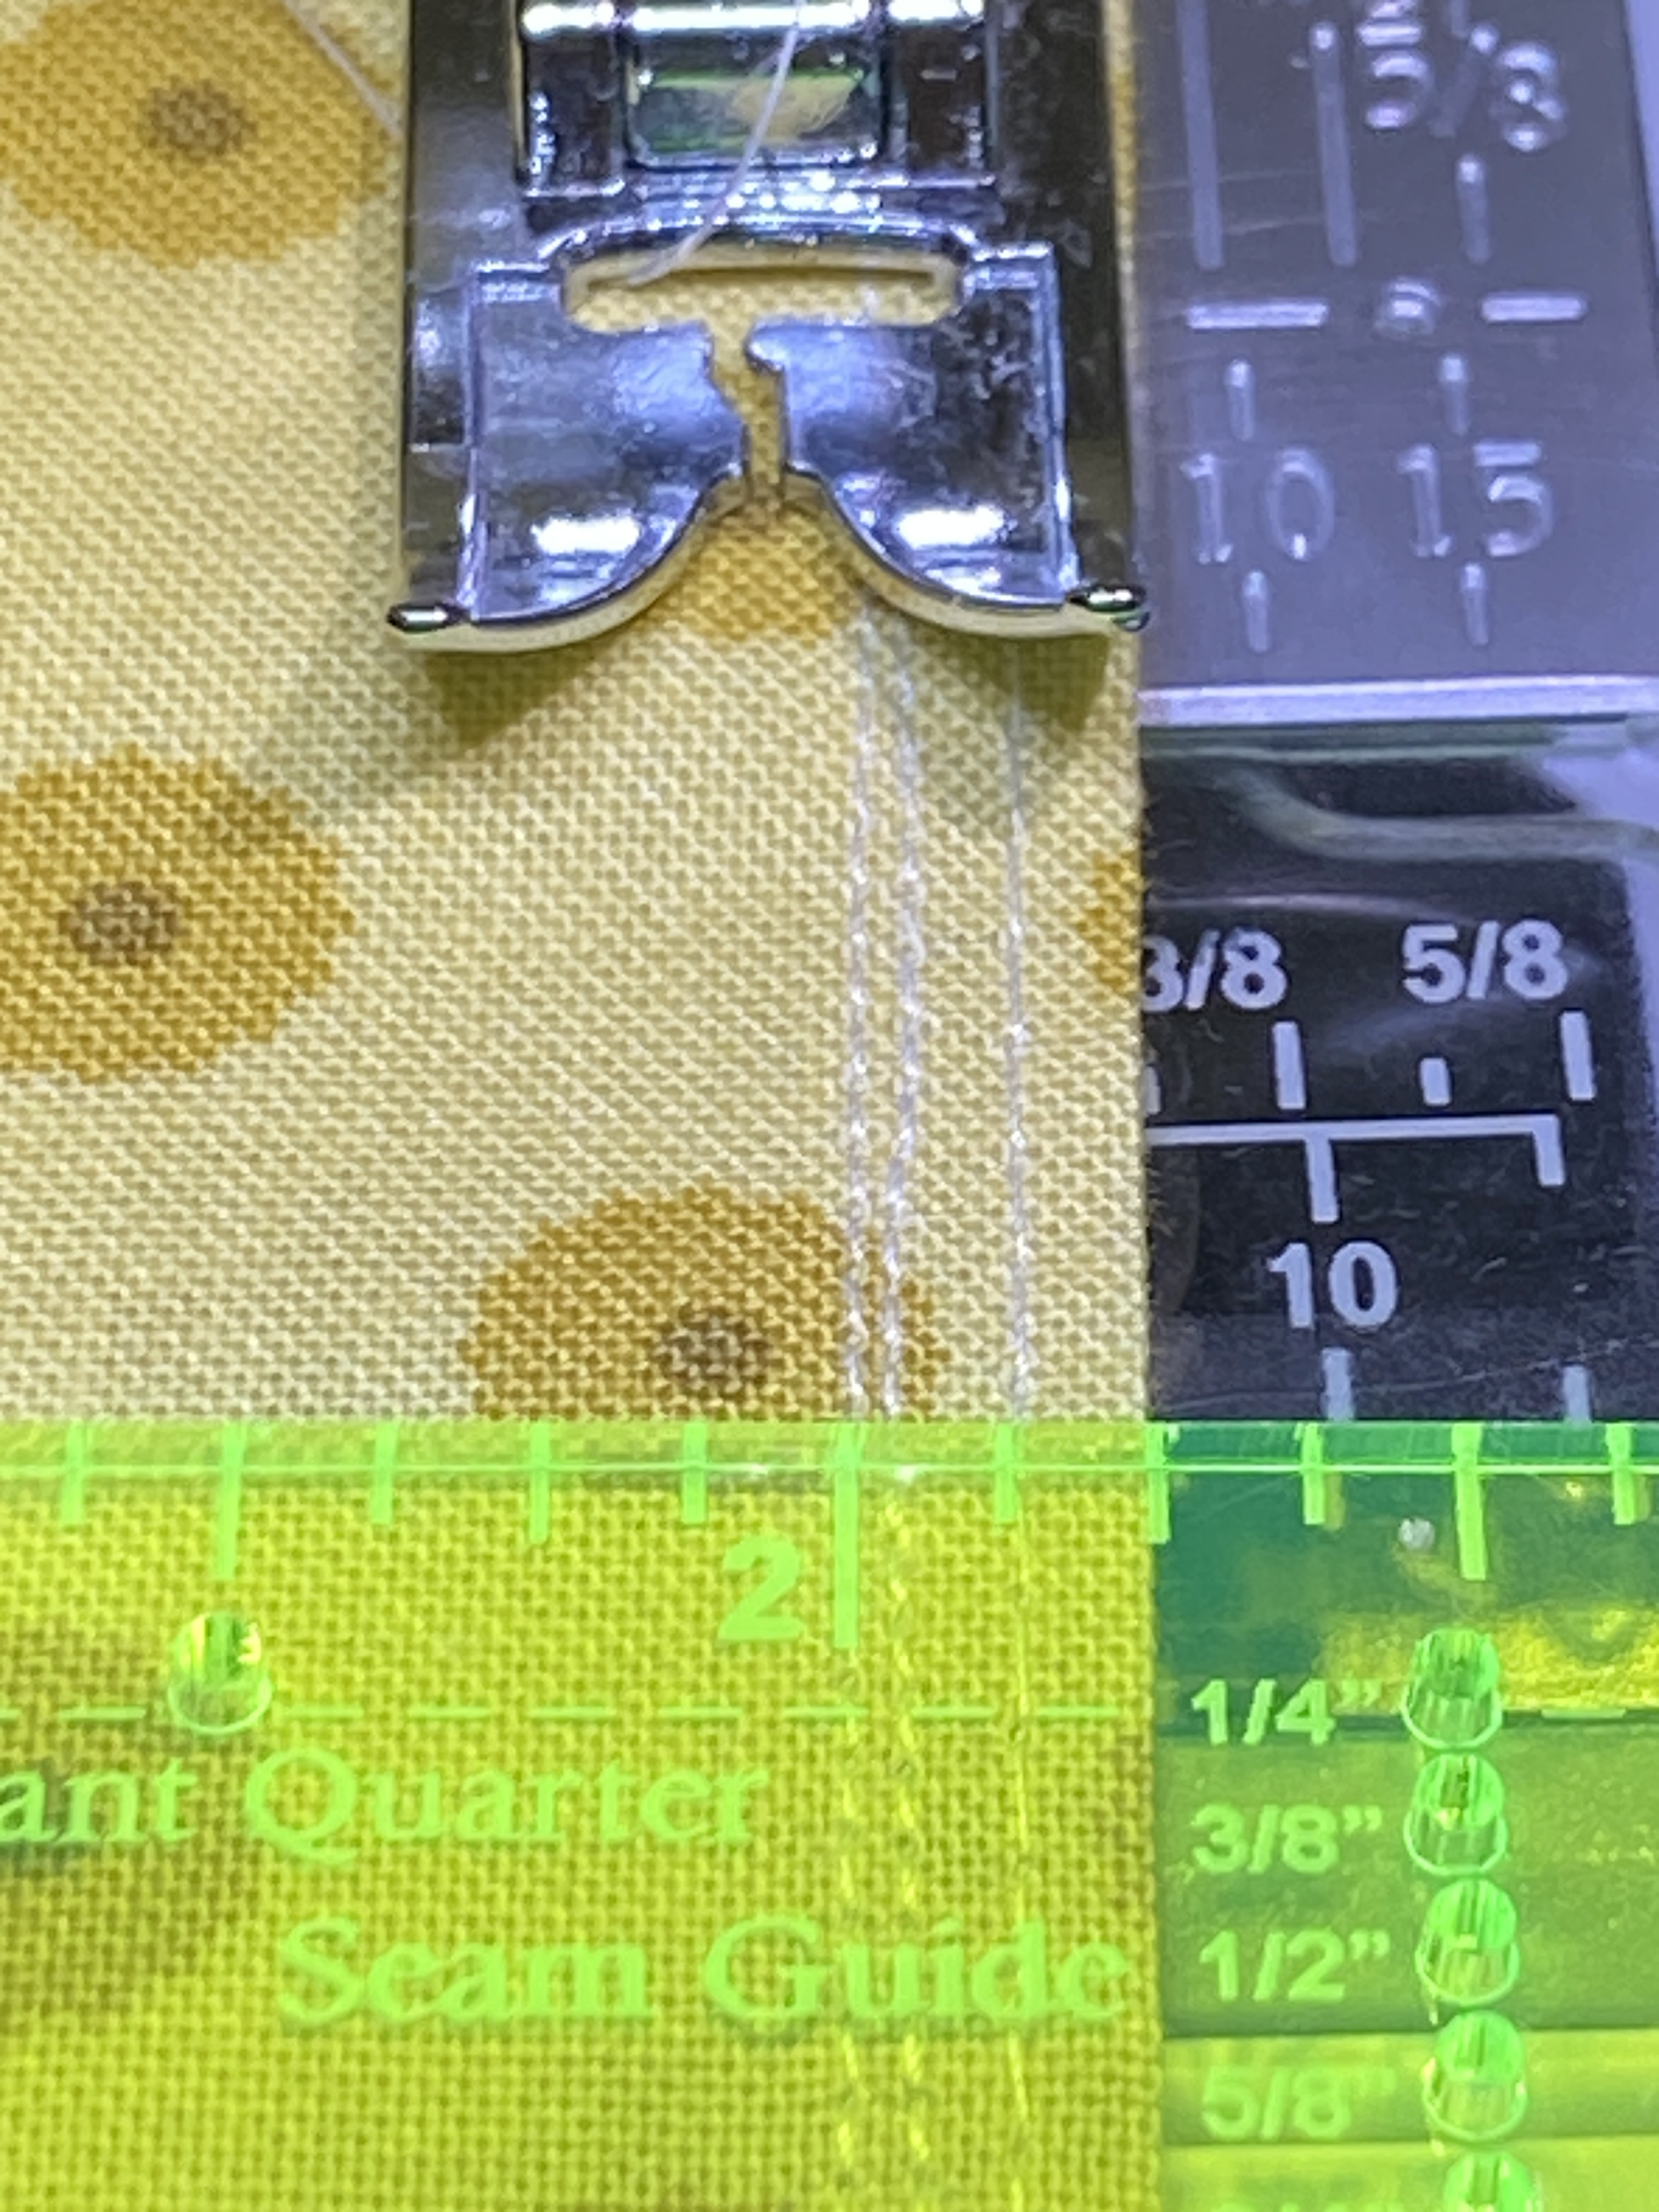
Perhaps your all-purpose presser foot looks like the one in this picture. Here, I’m showing a 1/4″ seam, scant 1/4″ seam and an 1/8″ topstitch. All were made using the foot that came with the machine. Use the edge of the presser foot as the guide for 1/4″ seams and adjust the needle position (change the stitch width) accordingly. Use a similar approach for 1/8″ topstitching, except use the inside right toe as your seam guide (long metal lip on the right side) and adjust the needle position.
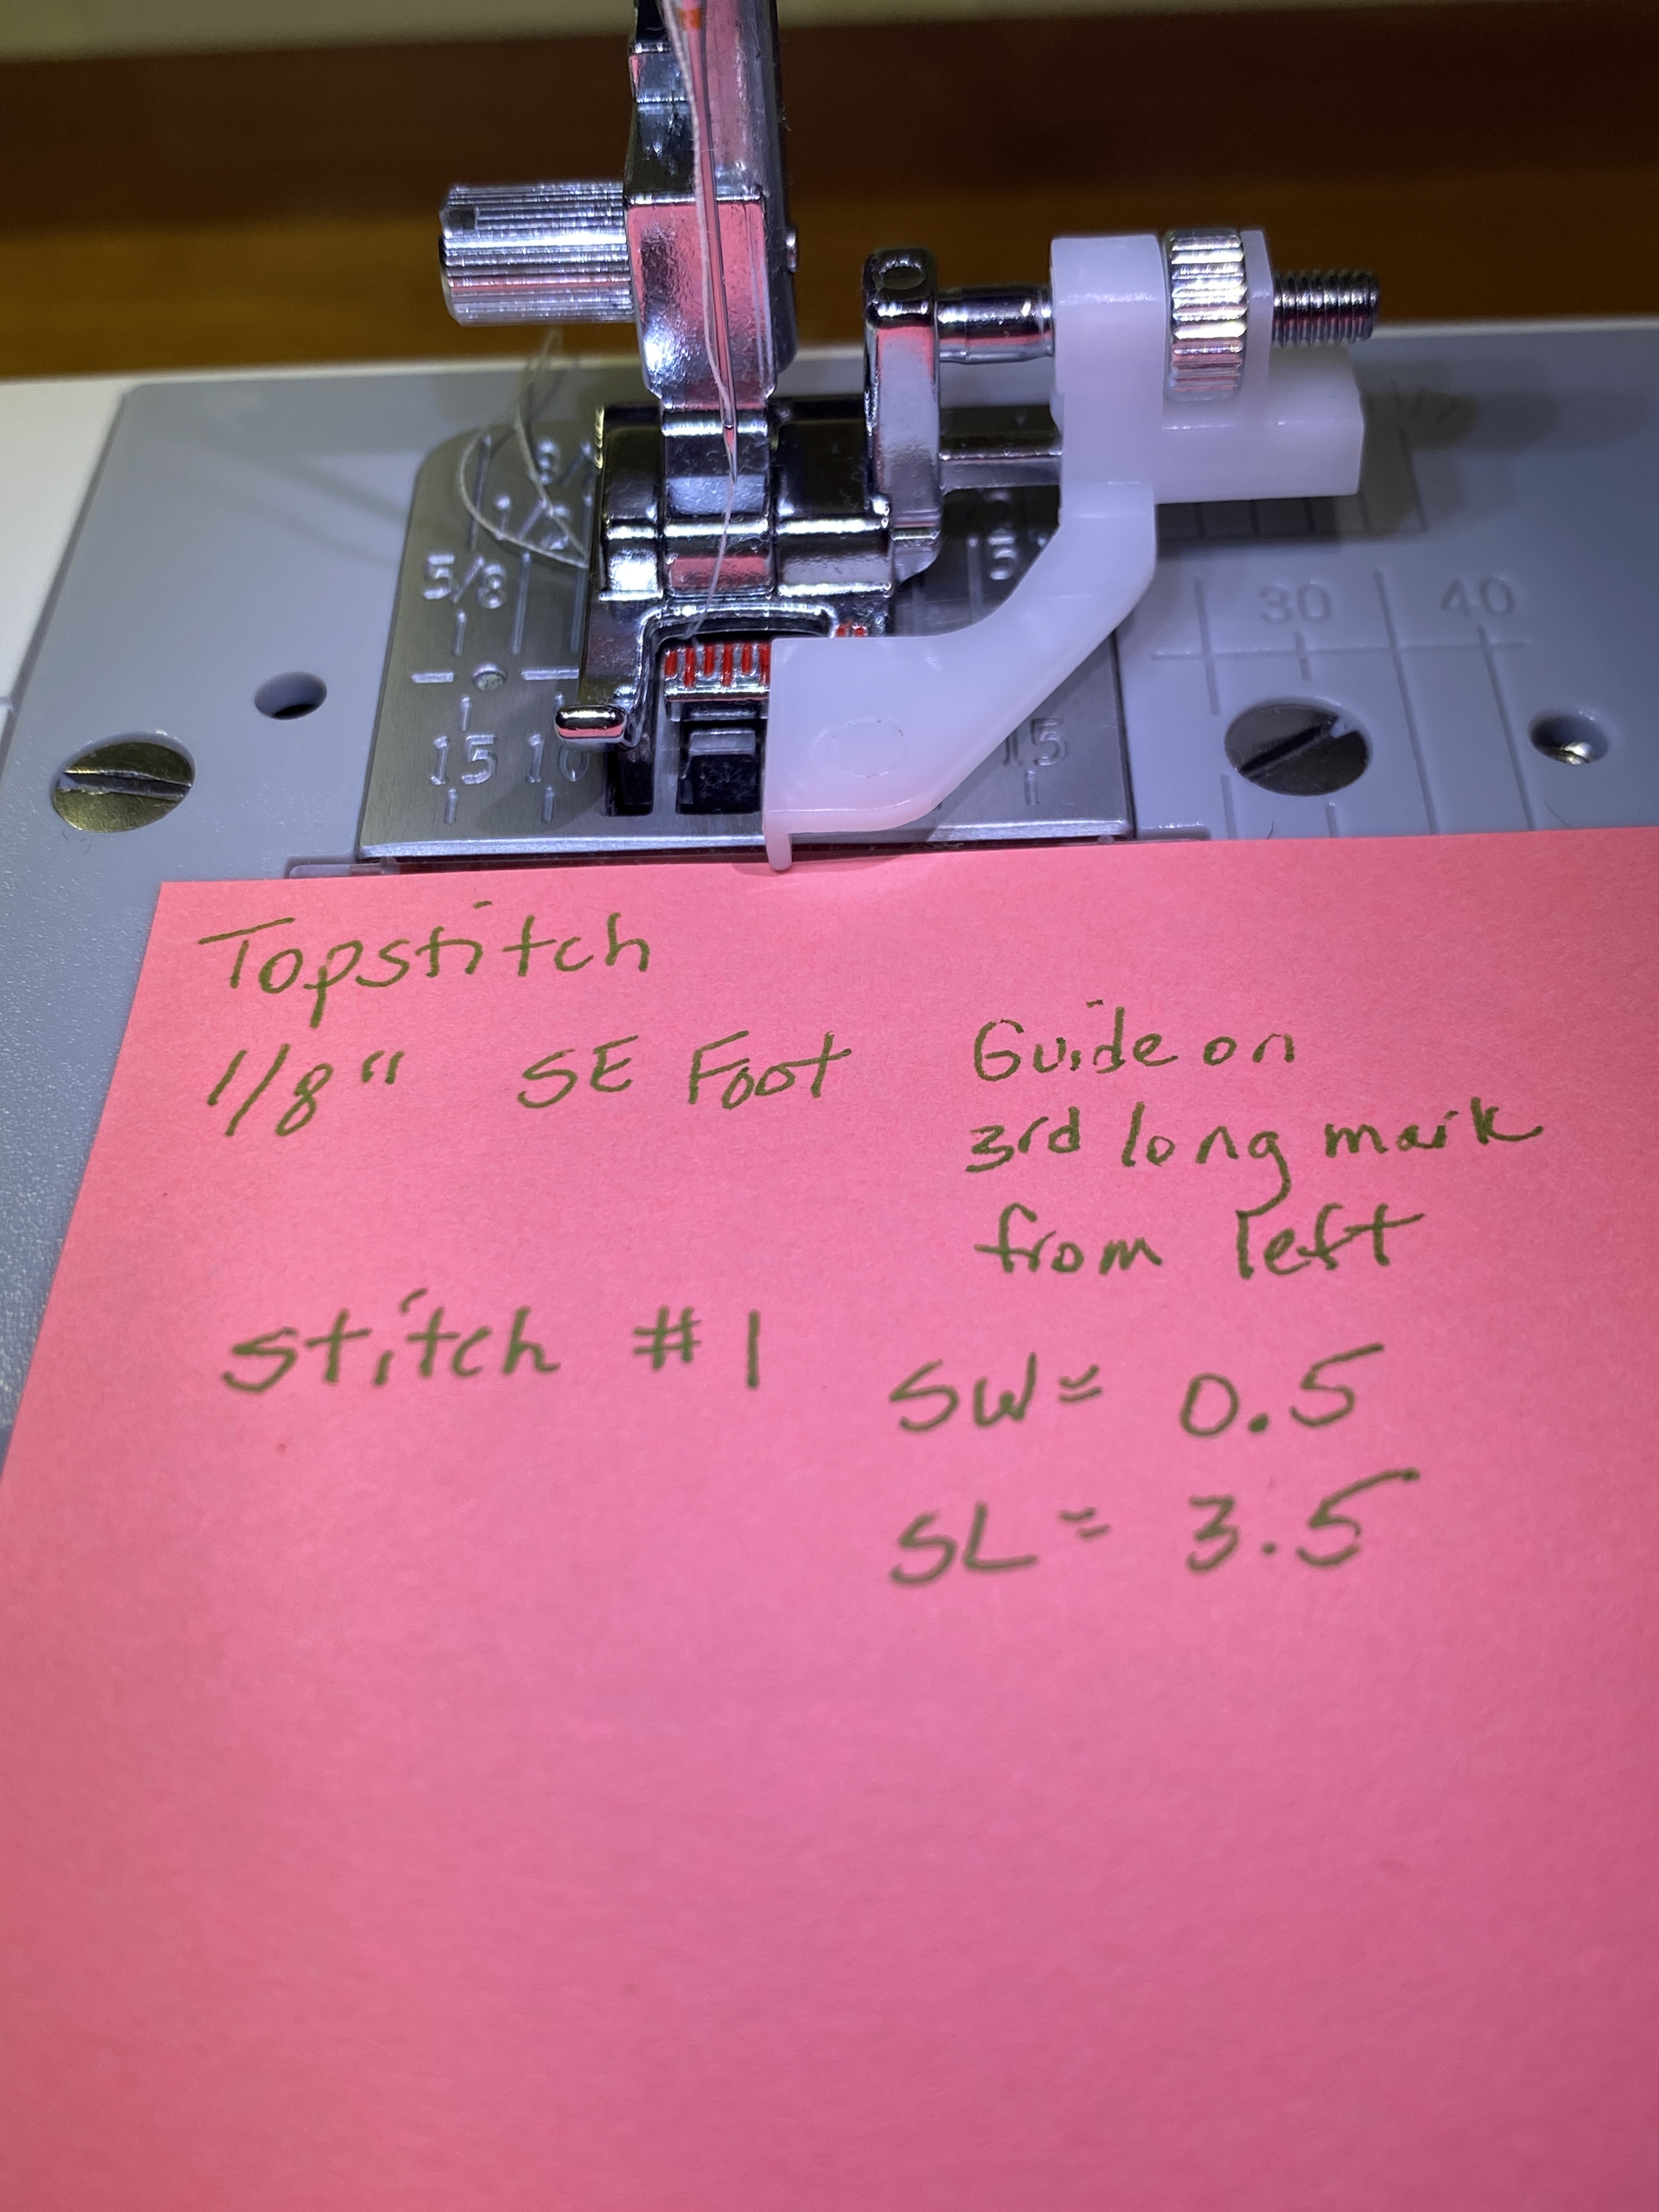
My personal favorite, and most consistent means of 1/8″ topstitching, requires a specialty foot. Janome refers to this one as the SE foot, but it’s very similar to a common blindhem foot. Here’s a an earlier post where I discuss using the Janome G blind hem foot. The Elnita EC30 pictured here has a 5mm wide stitch width, and I find the SE foot easier to use than the adjustable blind hem foot demonstrated in that post.
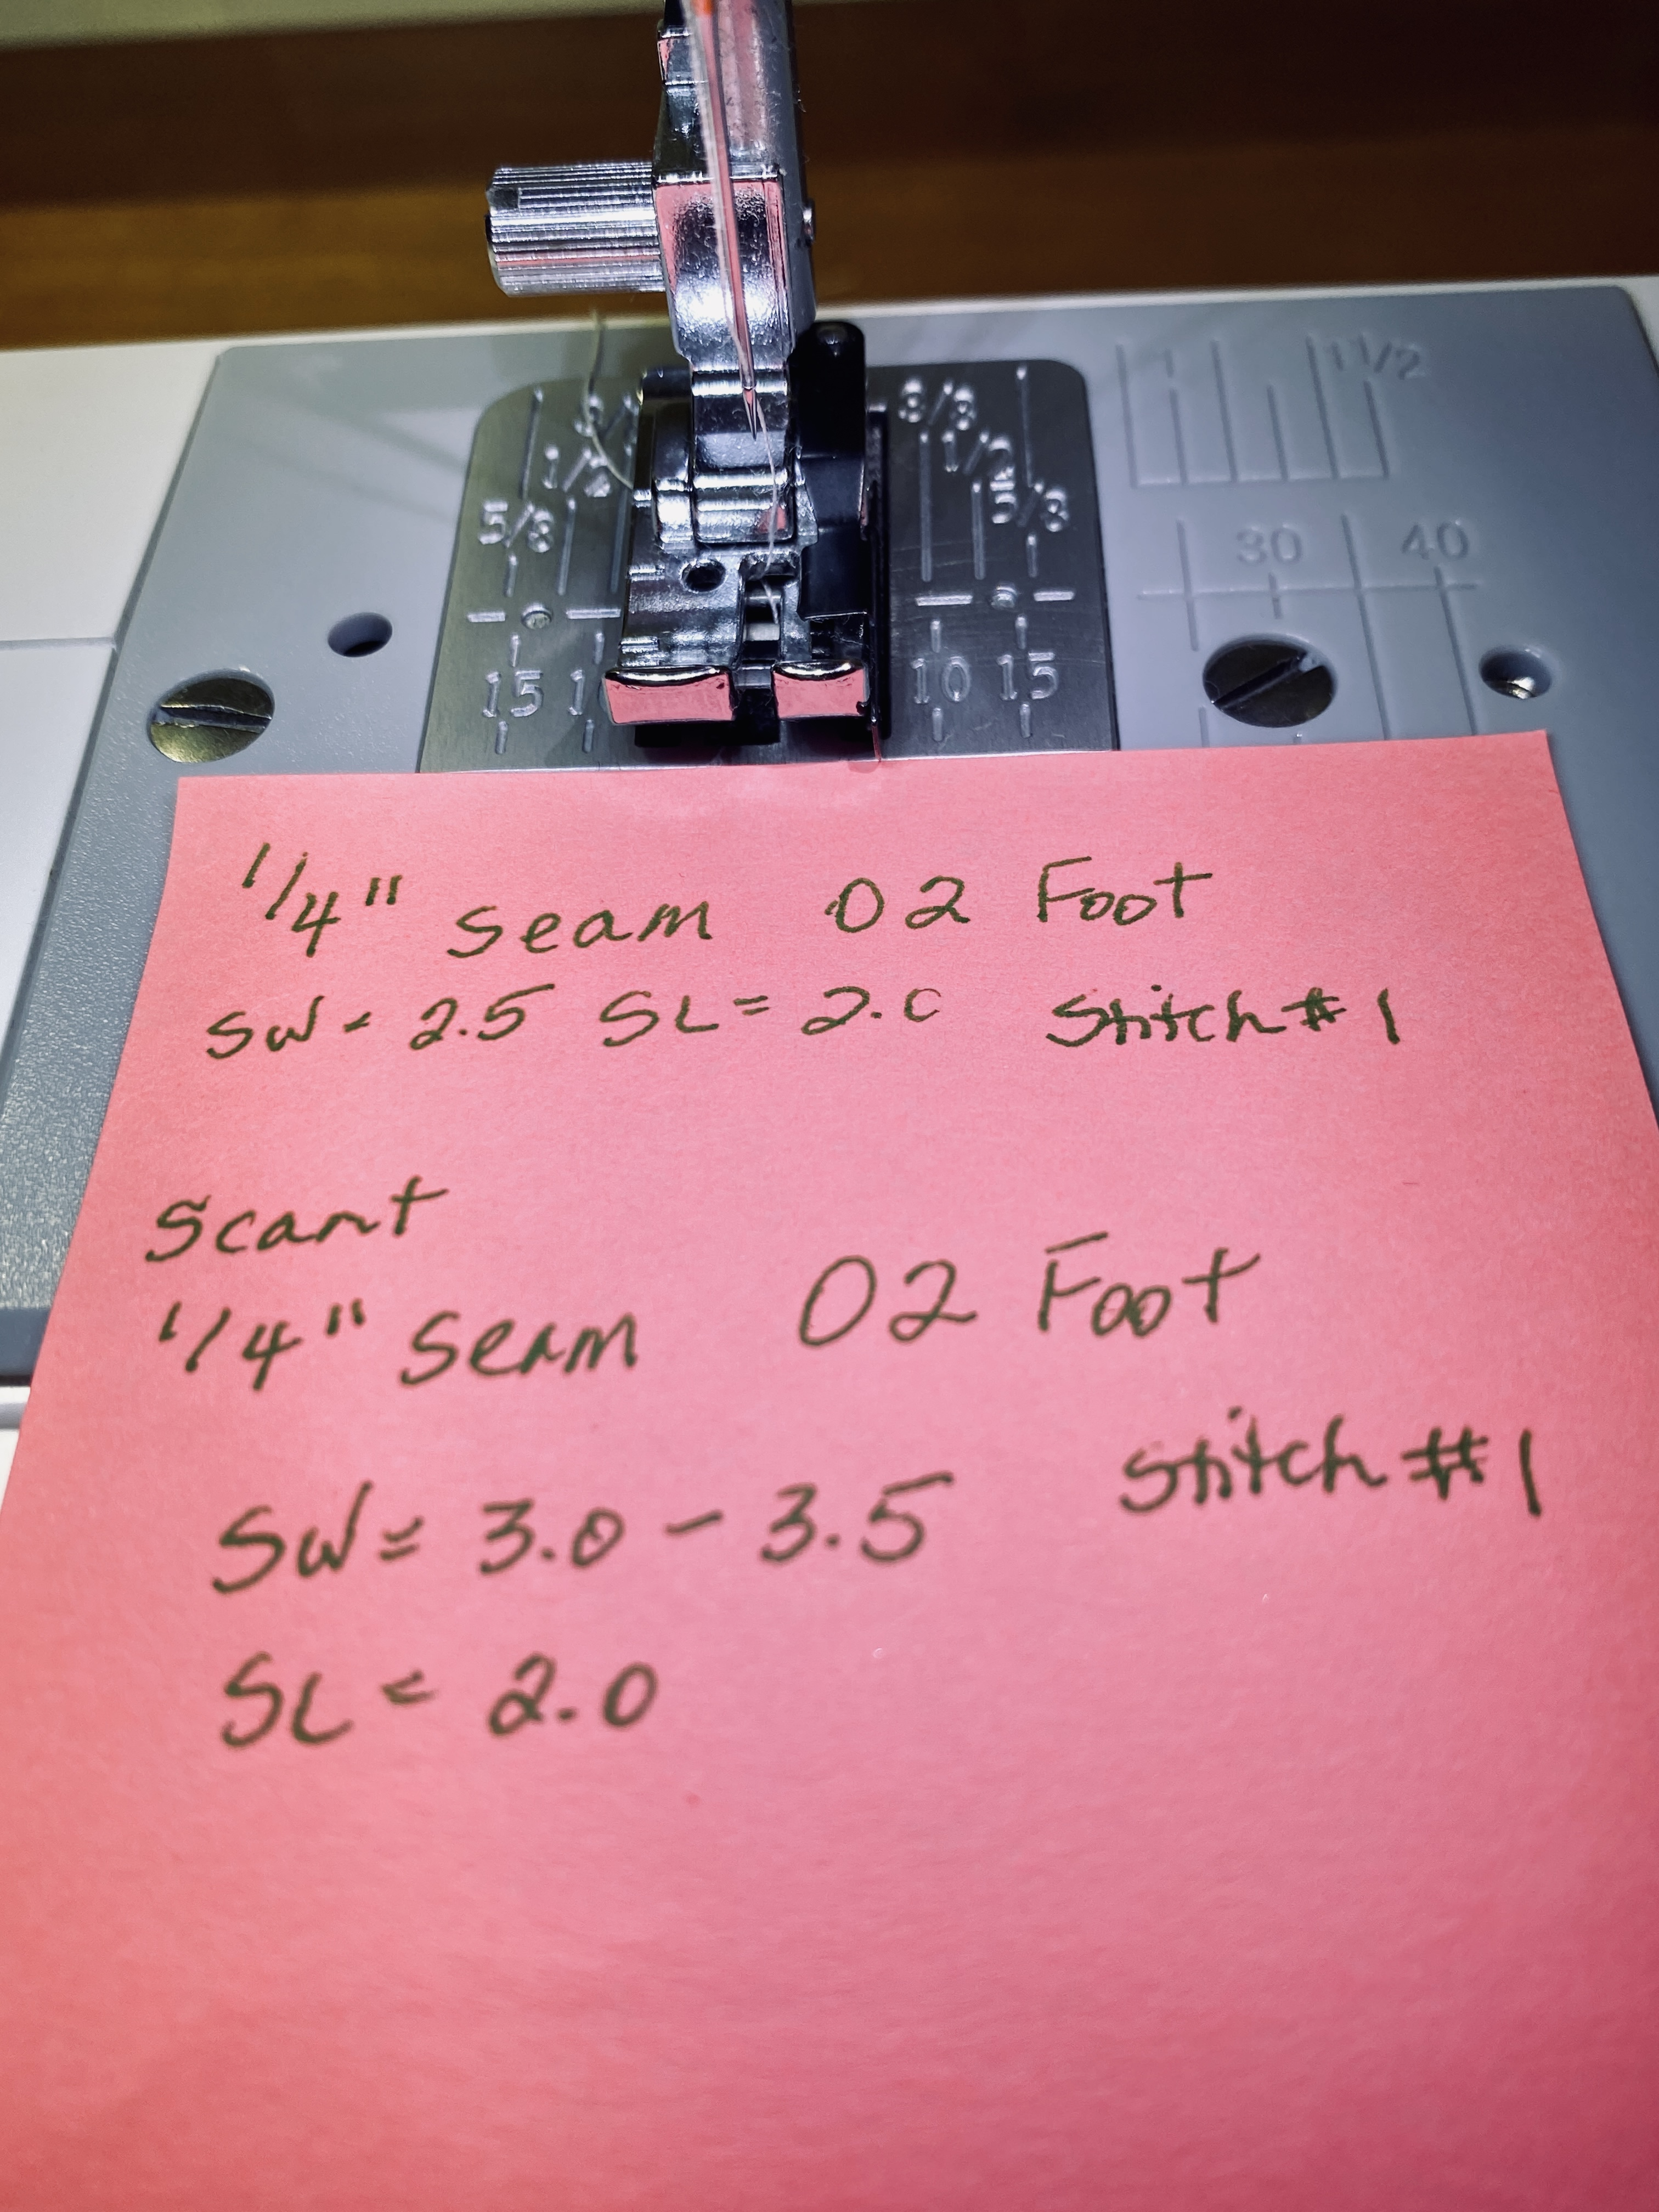
For 1/4″ seams, I do best with a guide on the right side of my presser foot (similar to topstitching). The Janome 02 presser foot delivers consistent results.
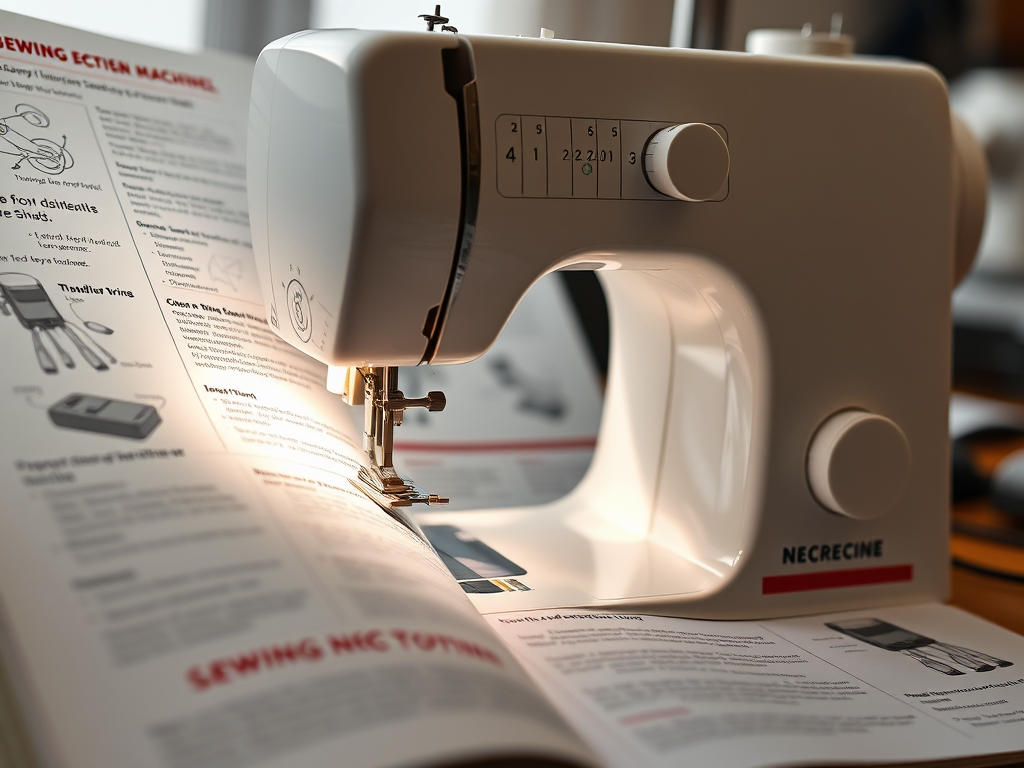
These sticky notes will be pasted inside the front cover of my sewing machine manual. Having this info at my fingertips helps me make the most of my limited sewing time.
What about vintage straight stitch machines and modern mechanical machines where you can’t adjust the needle position on a straight stitch?
- Use the original presser foot and painter’s tape on the machine bed to mark seam allowances.
- Buy a 1/4″ presser foot for your machine. Can’t find one? The Little Foot works well.
- Singer makes a Sew Easy foot with an adjustable guide. Using the inside toe as a guide with a center needle position yields a nice, consistent 1/8″ topstitch.
Experiment with the different feet and attachments out there to discover what works best for you. Another hack for vintage machines is use an old credit card along with the painter’s tape to mark seam allowances. This way you get a lip to run the edge of the fabric against and you can still use pins/clips up to a point. Beats having to pin everything to the left.