Graduation Quilt
May 28, 2016
Yesterday, while waiting to have new tires installed on my SUV, I finalized the design of a t-shirt quilt and conducted an initial phone consult with another customer. Pleased to say that after 4 years in business, I finally received a local referral from someone completely unrelated to family, friends or school/work. The person’s name she gave as the one who gave her my contact information didn’t even ring a bell. That made my day!
Basically, the process goes something like this:
Lead times vary, depending on my day job and how busy I am with other quilts in the queue. I have completed a twin-size in as little as 3 weeks (around a full-time job). Lead times during busy season (like right now with graduation) might be 8-12 weeks.
Final price depends on number of t-shirts, size of quilt, extended borders, photo blocks, pieced blocks, etc. I can give you an estimate when you first contact me; however, the final price will be determined once I see your items.
I will send you updates periodically during the process. If you have a firm deadline, please communicate this at the very beginning. Once completed, I will send you a photo of the quilt and we will make delivery arrangements at that time. Any balance due must be paid before I ship the quilt. Local customers can pay at pick-up.
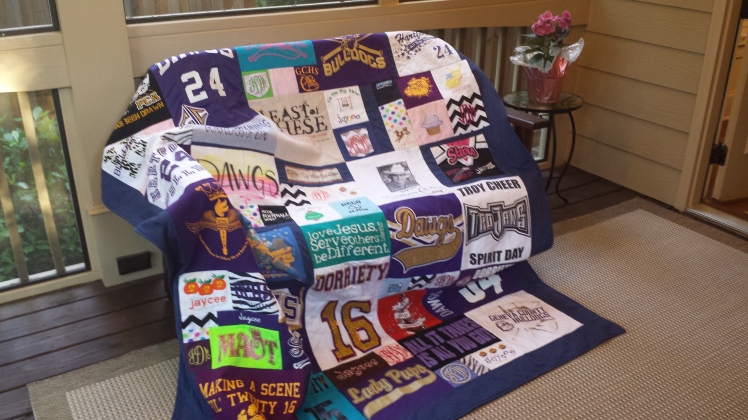
Then, enjoy your fabulous new quilt and wrap yourself up in memories!
I’m currently working a quilt using the Duck Duck Goose pattern from Summercrafter Patterns (edited my moi!).
Here are the completed duck and goose blocks . See the ducks with the yellow/white ovals? And the goose on the second row? Those blocks involved piecing with directional fabrics. It’s not difficult to do, but it does require some advance planning on your part.
SIMPLE STEPS
TOP OF FINISHED BLOCK
(Directional base fabrics should be turned in this direction!)

I often sew in the evenings after a long day at school. I don’t want to think too much about what I’m sewing. This diagram in my sewing notebook helps immensely!
**Goose block cutting changes if using directional fabric for the background**
Cut two (2) 3″ squares of each fabric for the tail feathers instead of the single square listed in the pattern directions.
