Twisty Tees Wall Quilt
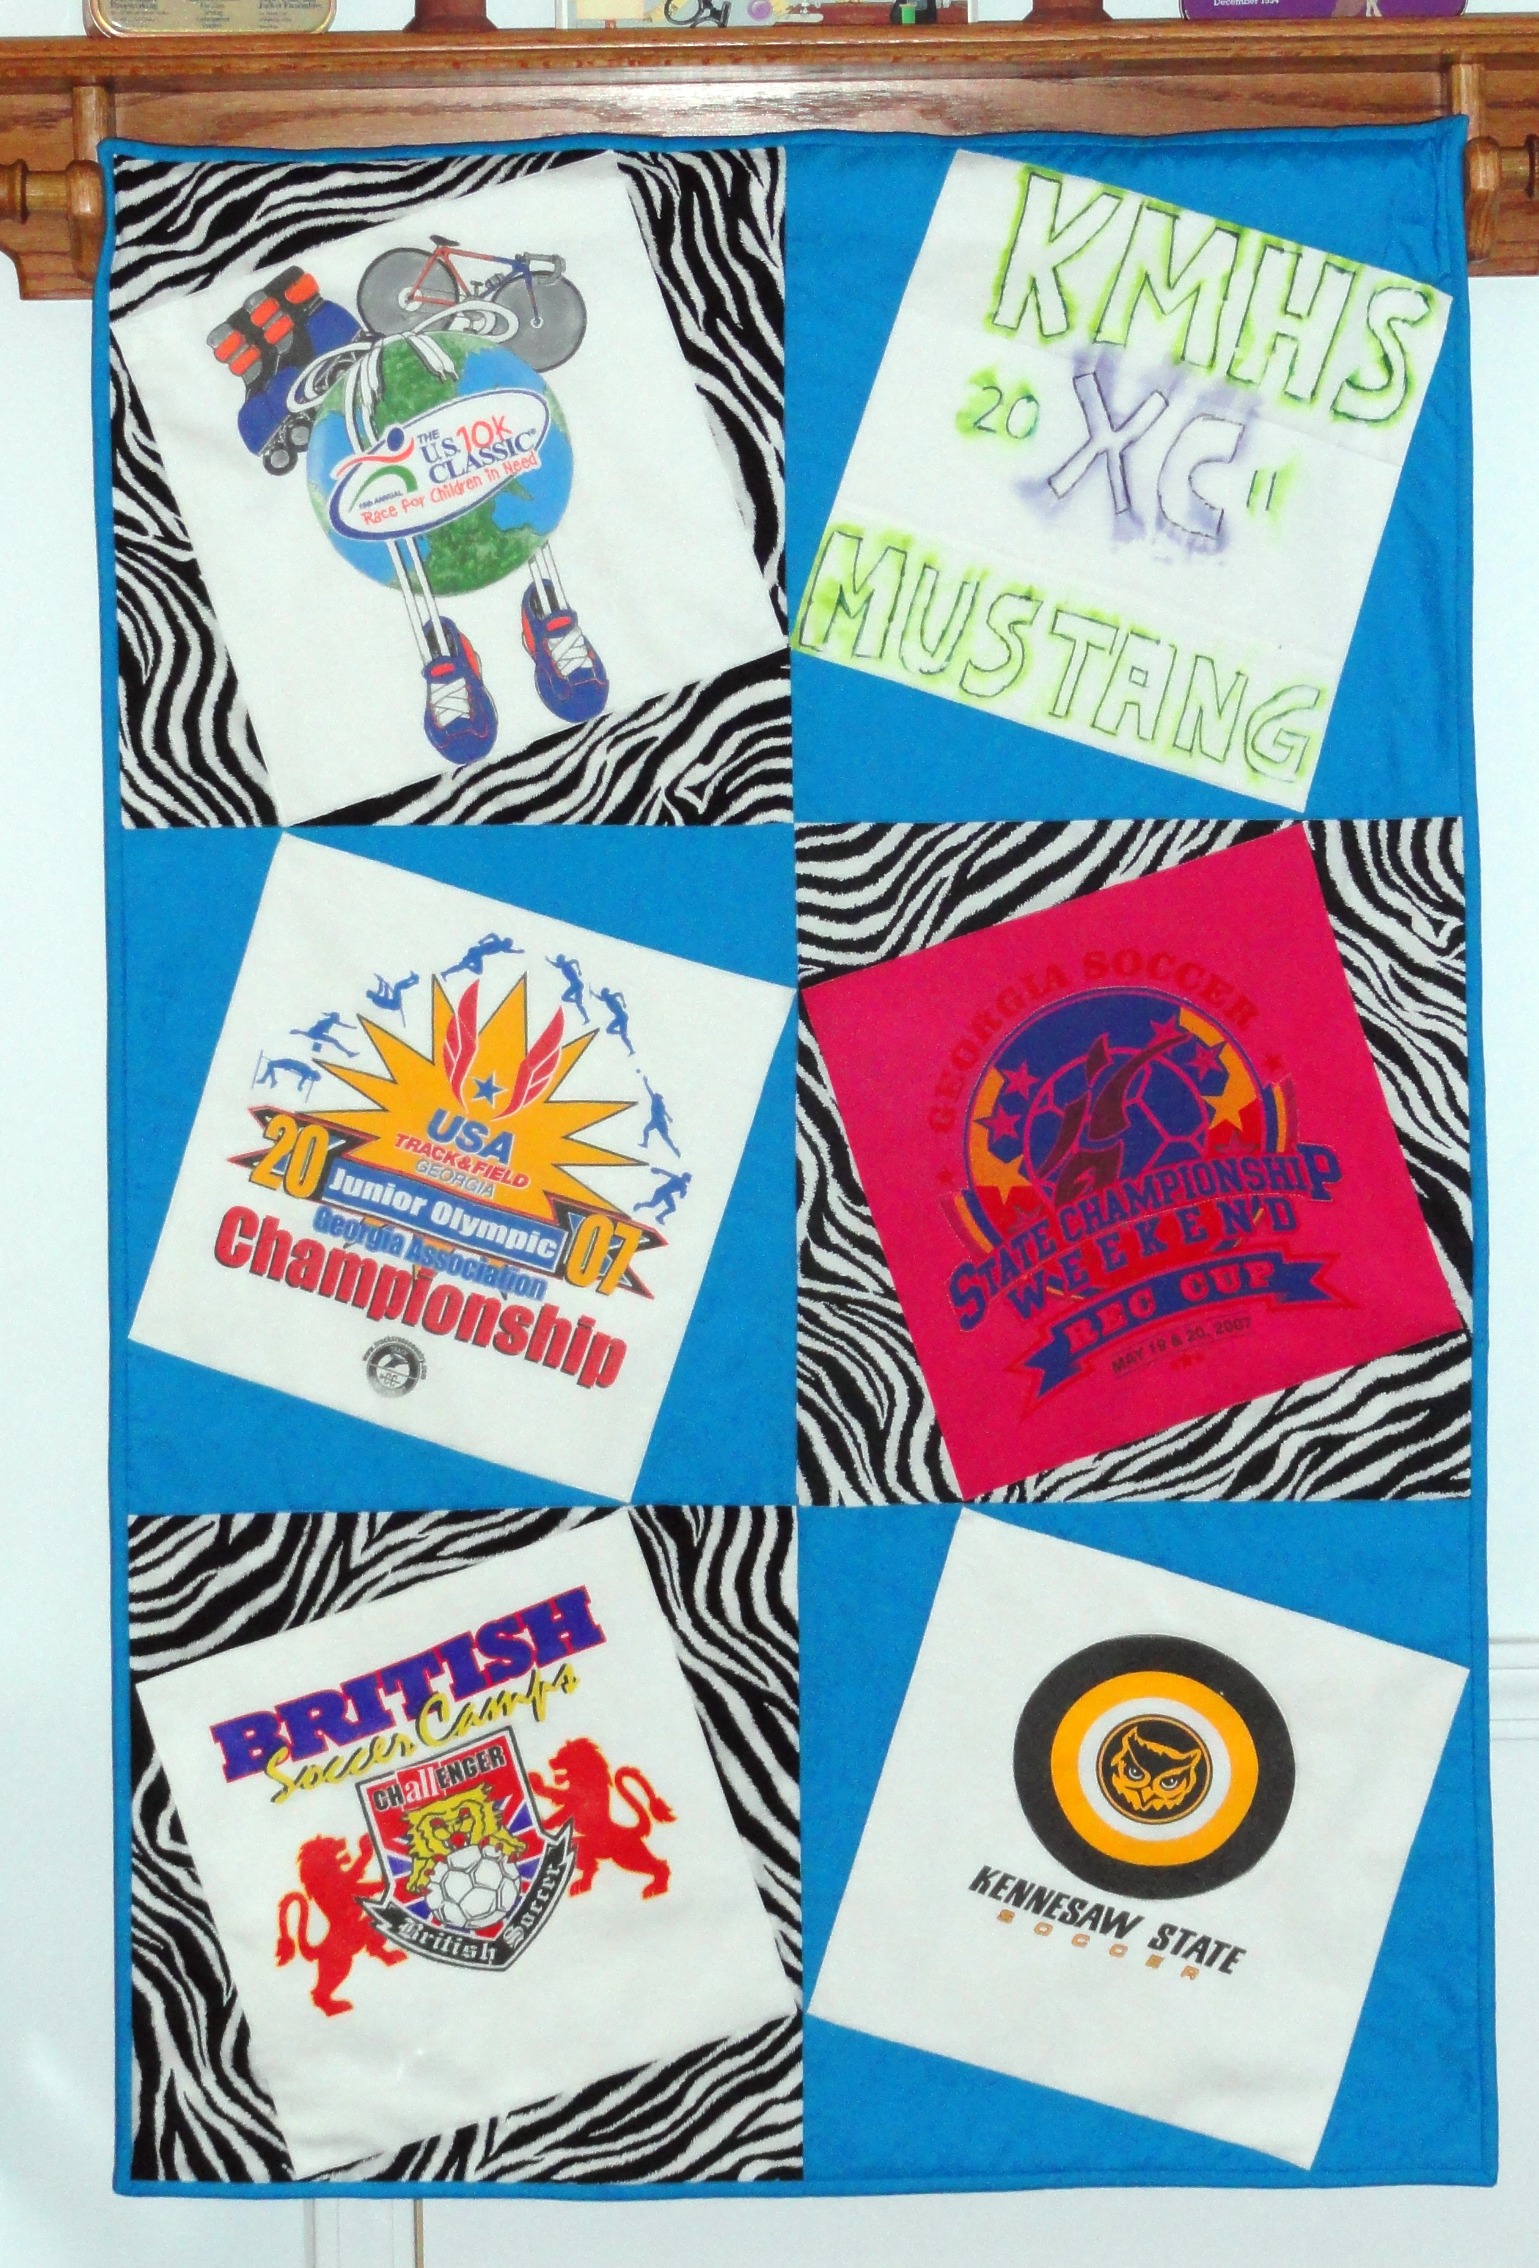
Here’s the finished quilt.  Customer was absolutely thrilled and exclaimed that this one “looked much better than the one they’d seen in a magazine”.

The finished size is 30″x45″.  The backing is done in a smaller zebra print.  The binding is hand-stitched to the back.  The batting I used is Warm & Natural which has 8″ quilting lines.  I simply picked a motif in the center of each graphic and machine quilted around that, along with ditch quilting around the inside of each t-shirt block.   It’s strictly my personal preference.  I like my t-shirt quilts to still look like t-shirts when I’m finished.  Some of the “longarm quilting” out there in t-shirt quilt land looks like an afterthought with random loops and squiggles with no regard for placement or accentuating the t-shirt graphics. My extra bit of machine stitching in the middle means block will be secure will be sturdy enough and it still looks like a t-shirt quilt, plus you can barely see the stitching unless you know where to look.

I normally launder my quilts before delivering them to the recipient.  Not this one.  See the t-shirt in the upper right hand corner?  The t-shirt came to me runs and all.  This is the result of using paint pens/markers that were not permanent or were not set properly.   Fortunately, I thought to run a damp white cloth across one of the letters before throwing it in the wash.  Nuh-uh.  I spot cleaned the marks on the pink t-shirt instead.

Future note to self – test paint pen t-shirts for color fastness before cutting up.  Offer to launder with dye set solution for an extra fee.

Some thoughts on straight line quilting on Jewel (my Janome 6600)

I finished the top and sandwiched the wall-hanging, eager to get it under the needle so I could really see how much easier it would be to machine quilt on Jewel as opposed to Pfaffie.

I was 100% correct in my assumption that the extra 3-1/2″ in the harp would make a difference.  It definitely does.

The tie-off and scissors features were much handier than I’d ever imagined.

What I did not anticipate was the slight bounce when the dual feed is engaged.  That took some getting used to.  I was merely ditch quilting seams and around the insides of the t-shirt blocks.  I used the stitch-in-the-ditch AF foot.  I obtained the best results by moving the needle position two clicks left or right of the default setting, depending on which side of the seam I was working on.  I also had to go a little slower than usual to keep the stitches from “crossing the ditch”.   I “unsewed” a fair portion of what I stitched until I got the hang of it.  The ditch foot works well for straight lines.  However, when you want to go around circles or star points, it’s difficult to see with any of the AF feet, except the open toe foot.  That is the one foot I did not buy and wish I’d gone on ahead and purchased it.  Oh well, live and learn.

Once Jewel is paced on a piece of shelf gripper and surrounded by her insert, I anticipate the bounce will lessen.

My attempt at free motion quilting will come later in the week.


T-Shirt Quilt Adventure

A co-worker asked if I could make a t-shirt wall hanging from her daughter’s track shirts.  We decided on the wonky squares design with alternating zebra and turquoise blue background fabrics.

A couple of the t-shirt graphics were too large to fit the original schematic, so I resized the block in EQ7 and printed out the foundation pattern to use as a guide.  I transferred the markings to template plastic just to be sure sure everything was centered properly.

Someone called my attention to a book titled Twist & Turn by Sharyn Craig that is all about adding wonky borders to oddball size blocks, making them a uniform size.  The book wasn’t available locally or via interlibrary loan, so I searched on the web and found some instructions for Twisted Happy Blocks.  They were a big help, but my block was much bigger than the one in her tutorial.  Apparently, the math is already done for you in the book, so I had to wing it.  After some trial and error, I figured out that two- 5″x17″ rectangles were large enough to add borders for a 15″ finished block (center block/fabric/t-shirt is approximately 12″ square).  If you cut the rectangles on the diagonal in half from upper left corner to bottom right corner, your focal item (t-shirt part) will tilt to the left.  If you cut from lower left corner to upper right corner, your focal item will tilt to the right.  Or I guess I should say, that is if you attach the borders in the order outlined in her tutorial.

Once I had the math figured out correctly AND the 15-1/2″ foundation pattern markings transferred to template plastic, everything fell into place.  Now, I have to go back to Joann’s and buy some more zebra fabric to make the 2 remaining zebra blocks.

After this much work, these templates are going into my pattern stash.  Some of you reading this may be thinking, “Duh!” at the moment.   For me, this is a huge step.  I didn’t use a commercial pattern.  I had an idea, used my EQ7 software and figured it out for myself.

Can’t wait to get this thing finished tomorrow so I can quilt it on Jewel.