Put it out in the universe…

Singer 301a sewing machines

One of my former coworkers always used to say, “Put it out in the universe and see what happens.” Tell other people what you desire and just maybe you’ll be lucky enough to get it.

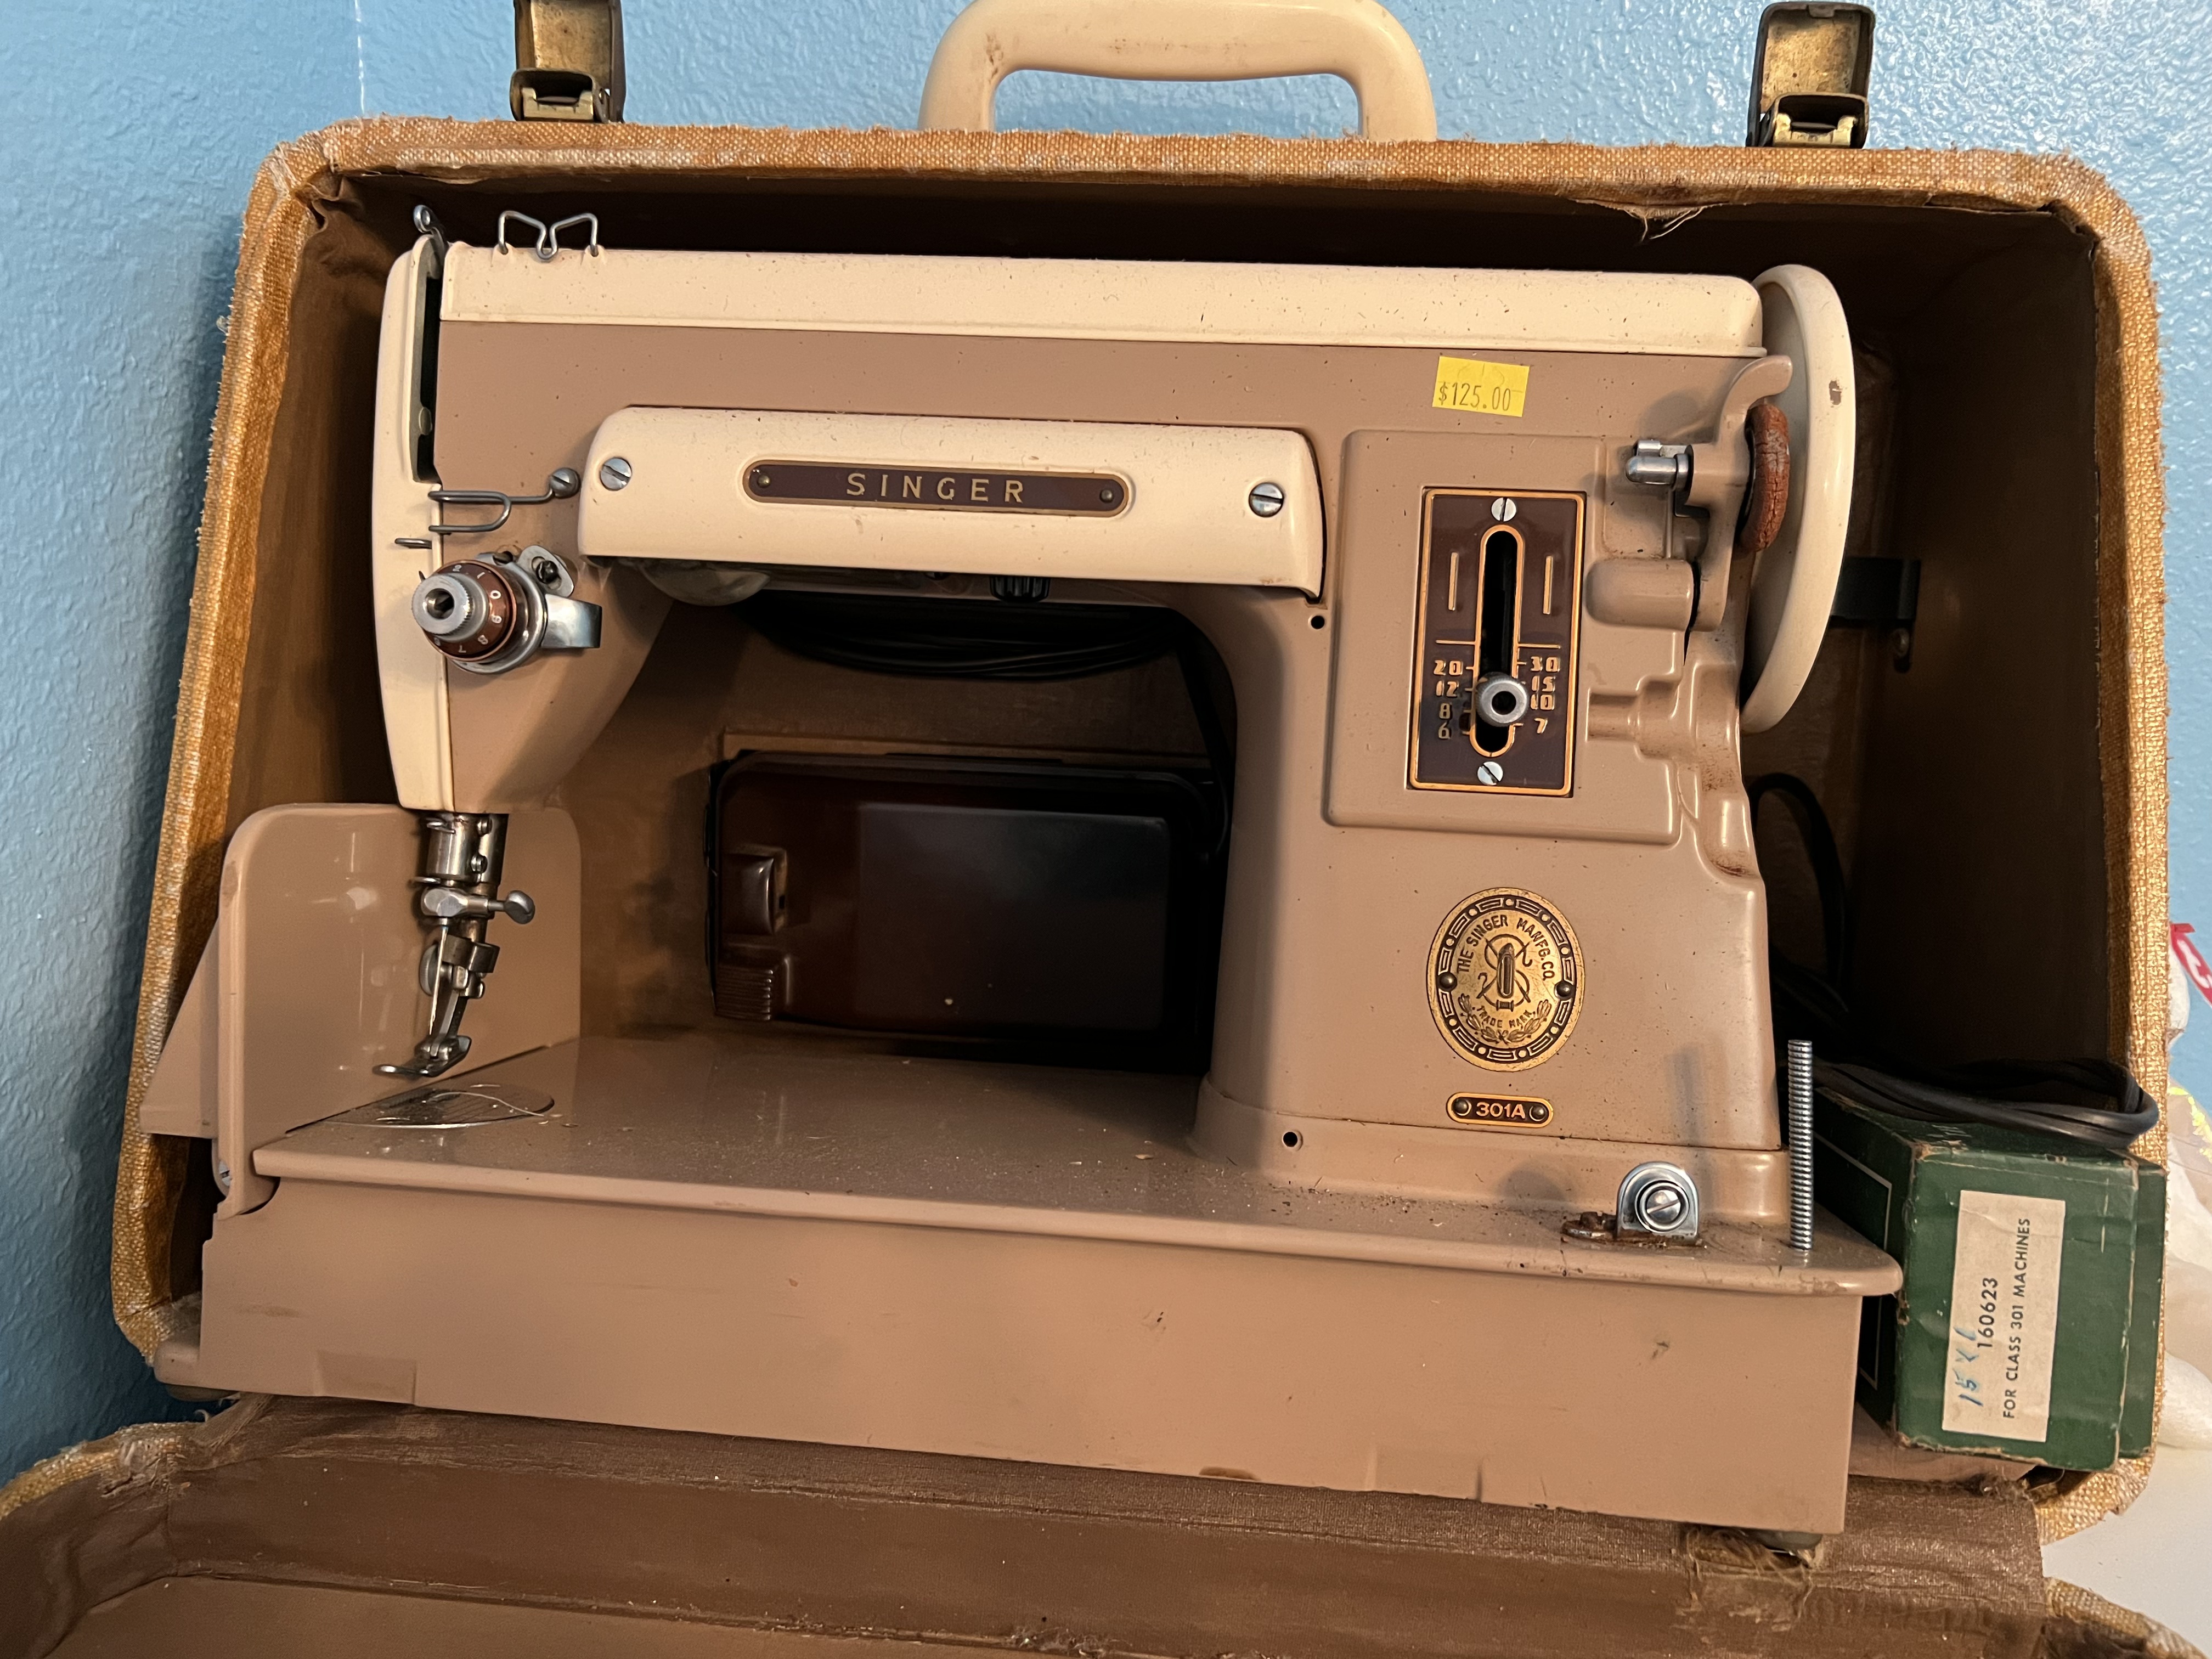
When my SIL and I attended the vintage sewing machine workshop back in August, we both remarked that we’d like to take one of Ray’s Singer 301 classes. Only one slight hiccup – she has a 301 (black long-bed) and I don’t. A lot of Featherweight owners also have a 301, but I didn’t feel the need to acquire one – unless an LBOW model (beige/white short bed) came my way at a really attractive price.

Well, today I acquired one.

My niece found this machine at a local estate sale. Seems her mom had relayed that I was looking for an old beige/white Singer sewing machine. All the parts, including the bobbin case, are there. Dunno if she runs, but for the price, I’m willing to take a chance. I’ll get her at Christmas when we go down to see hubby’s family.

The other interesting coincidence is I have a box of Singer slant shank accessories that I picked up while helping clean out a sewing room for a house flipper.

Charitable Quilting

Today was our first in-person quilt guild meeting since July! Our October program typically focuses on community service efforts by guild members during a particular year. Representatives from several of the organizations for whom my quilt guild donates quilts, placemats and pillowcases spoke about how our donations are utilized to assist their clients – the elderly, veterans, kids in hospitals/hospice and kids in foster care. It was wonderful to hear positive feedback, not only from the organizations themselves, but also in notes from actual recipients as shared by the representatives. A number of charity quilts were turned in at today’s meeting. An impromptu “Quilts on Parade” was the finale where members walked around showcasing all the quilts that had been turned in this morning. It was awesome!

Notes I made from the various speakers on how I can better help them with my donation item efforts:
Ryan’s Case for Smiles (pillowcases): (1) no flange on pillowcase, (2) French seam construction seems to hold up best to frequent laundering and (3) need pillowcases for ‘tweens & teens.

Meals on Wheels (placemats) – (1) seasonal and theme placemats are a big hit, (2) veteran/patriotic themes are needed and (3) great way to use up your orphan blocks

Family & Children’s Services (quilts) – (1) kids in foster care choose their own quilt from the stash DFACS keeps on hand and (2) the majority of kids currently served in my local area are girls, ages 10 & up.

Going forward, I’ll focus my efforts on throw quilts suitable for girls 10 & up and pillowcases for girls and boys of the same age group. I’ll turn the collaborative patriotic blocks my students made last year into placemats for Meals on Wheels to distribute to the veterans they serve. I’ll also start setting aside larger cuts of fabric I know I won’t use. These fabrics will get donated to Community Service and assembled into kits for other quilters to take and turn into charity quilts. Next time, I’ll plan on attending a guild charity sew-day event.

One of the reasons I joined this guild is because of its strong tradition of community service. That is right up in my wheelhouse as volunteering/giving back is one of my core pursuits.

Spooky treat bags

Today’s Crafternoon activity: small fabric totes that resemble gift bags. We used glow-in-the-dark fabric for the bag lining. Look at the corner treatment – too cute! Pinterest is a great source of project inspiration.

Making the bags took us about 1.5 hours with me cutting/fusing all the project pieces ahead of time. While grateful for the makers who freely share on YouTube, most instructions are not kid-friendly. I simply modified the construction sequence to make it easier for the littles and then recalculated the fabric requirements to make my version of the treat bag. I need to tweak the instructions a little more and then I’ll share them in a future post. There are so many awesome ways to personalize this simple gift/treat bag.

Finished size of our project? Approximately 6″ x 6″ x 3″.