Be your own designer – start simple
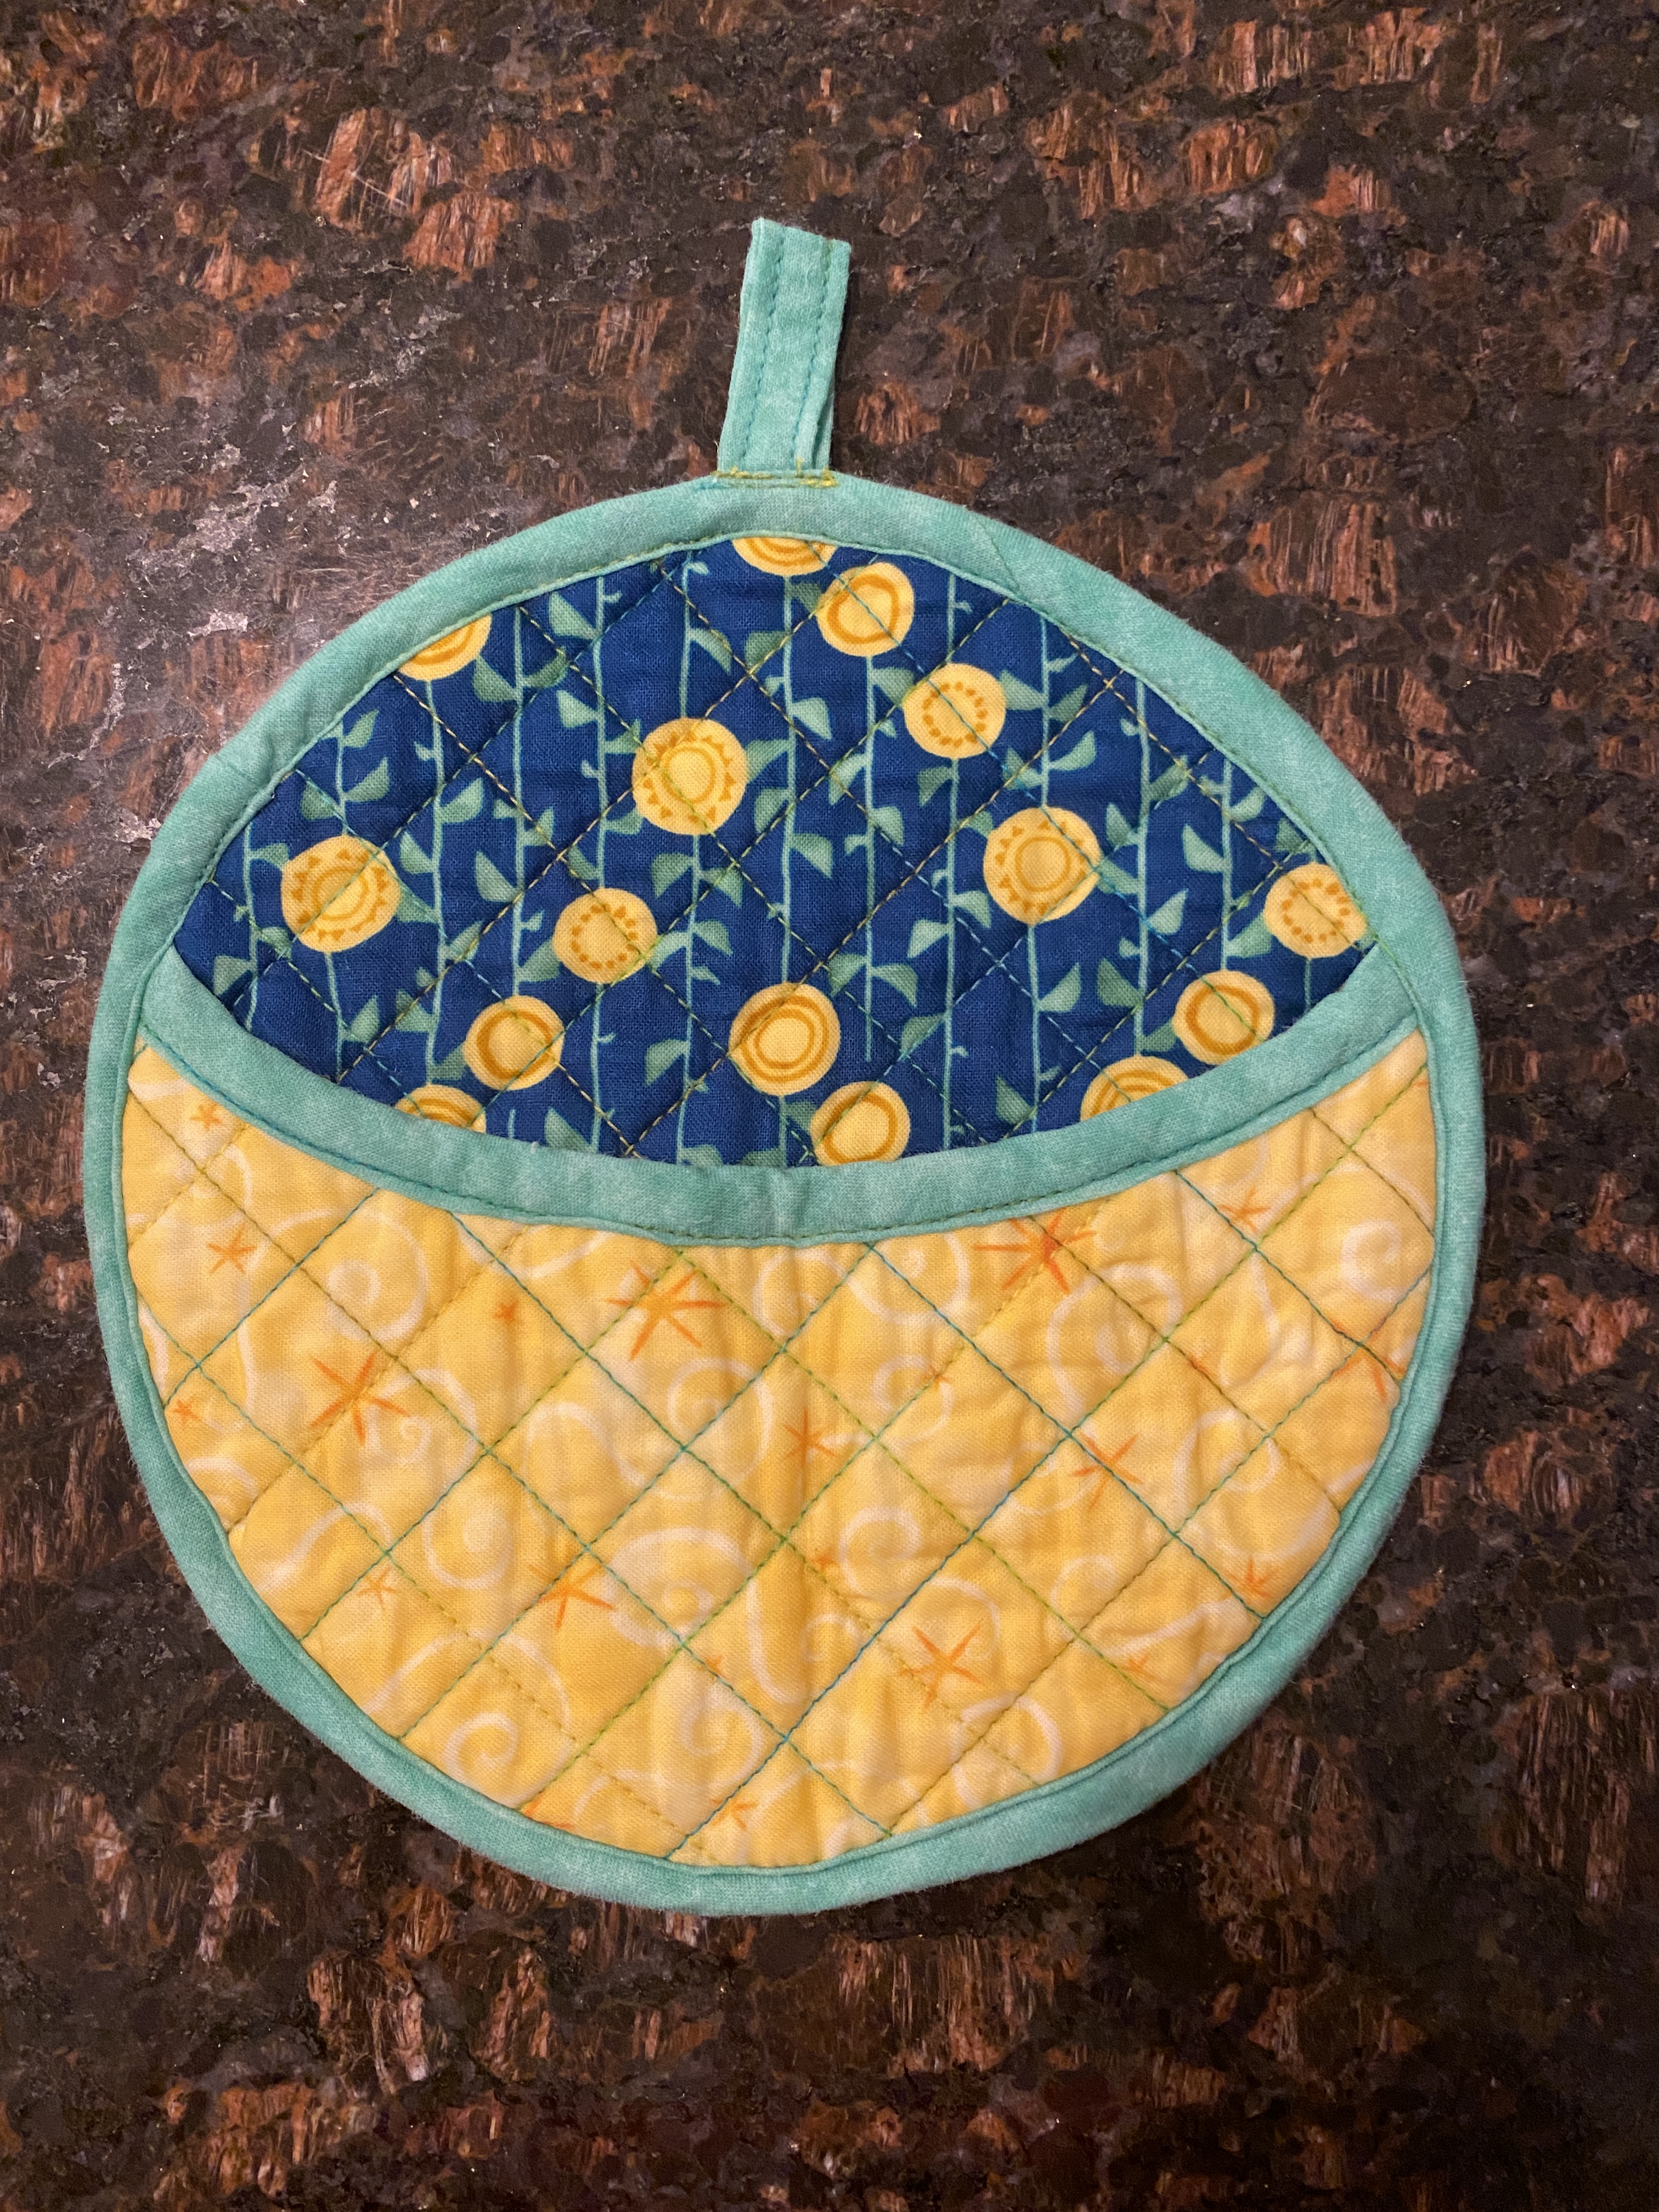
Round potholder – first attempt at using Adobe Illustrator to create pattern templates. Note to self – need to raise and soften curve of pocket piece.

My kitchen is in dire need of new potholders. Thanks to home and car insurance renewals this past month, I’m going to have DIY if I want new ones. I already have all the materials, including the heat resistant batting, in my sewing room. For inspiration, I headed to Pinterest. I kept seeing a really cute round potholder with a pocket and hanging loop. All of pins directed me to various blogposts, which in turn redirected me to purchase a pattern for $10.95. No thanks. I’ll try drafting my own. While I used Adobe Illustrator to create my 8″ circle and pocket piece, you do not need a computer to draft your own pattern templates.

There’s an old-school, analog method for drafting your own patterns. It involves pen, paper, a ruler and usually something round. A round potholder is 8″ in diameter. Head to your kitchen: a luncheon plate is usually 8″ in diameter. Or try the lid to a large pot, a mid-size skillet or a 2-2.5 quart round casserole dish. Your lid can be a little under/over 8″.

You’ll need two circles – one circle per page. I traced around a luncheon plate to make my circles.
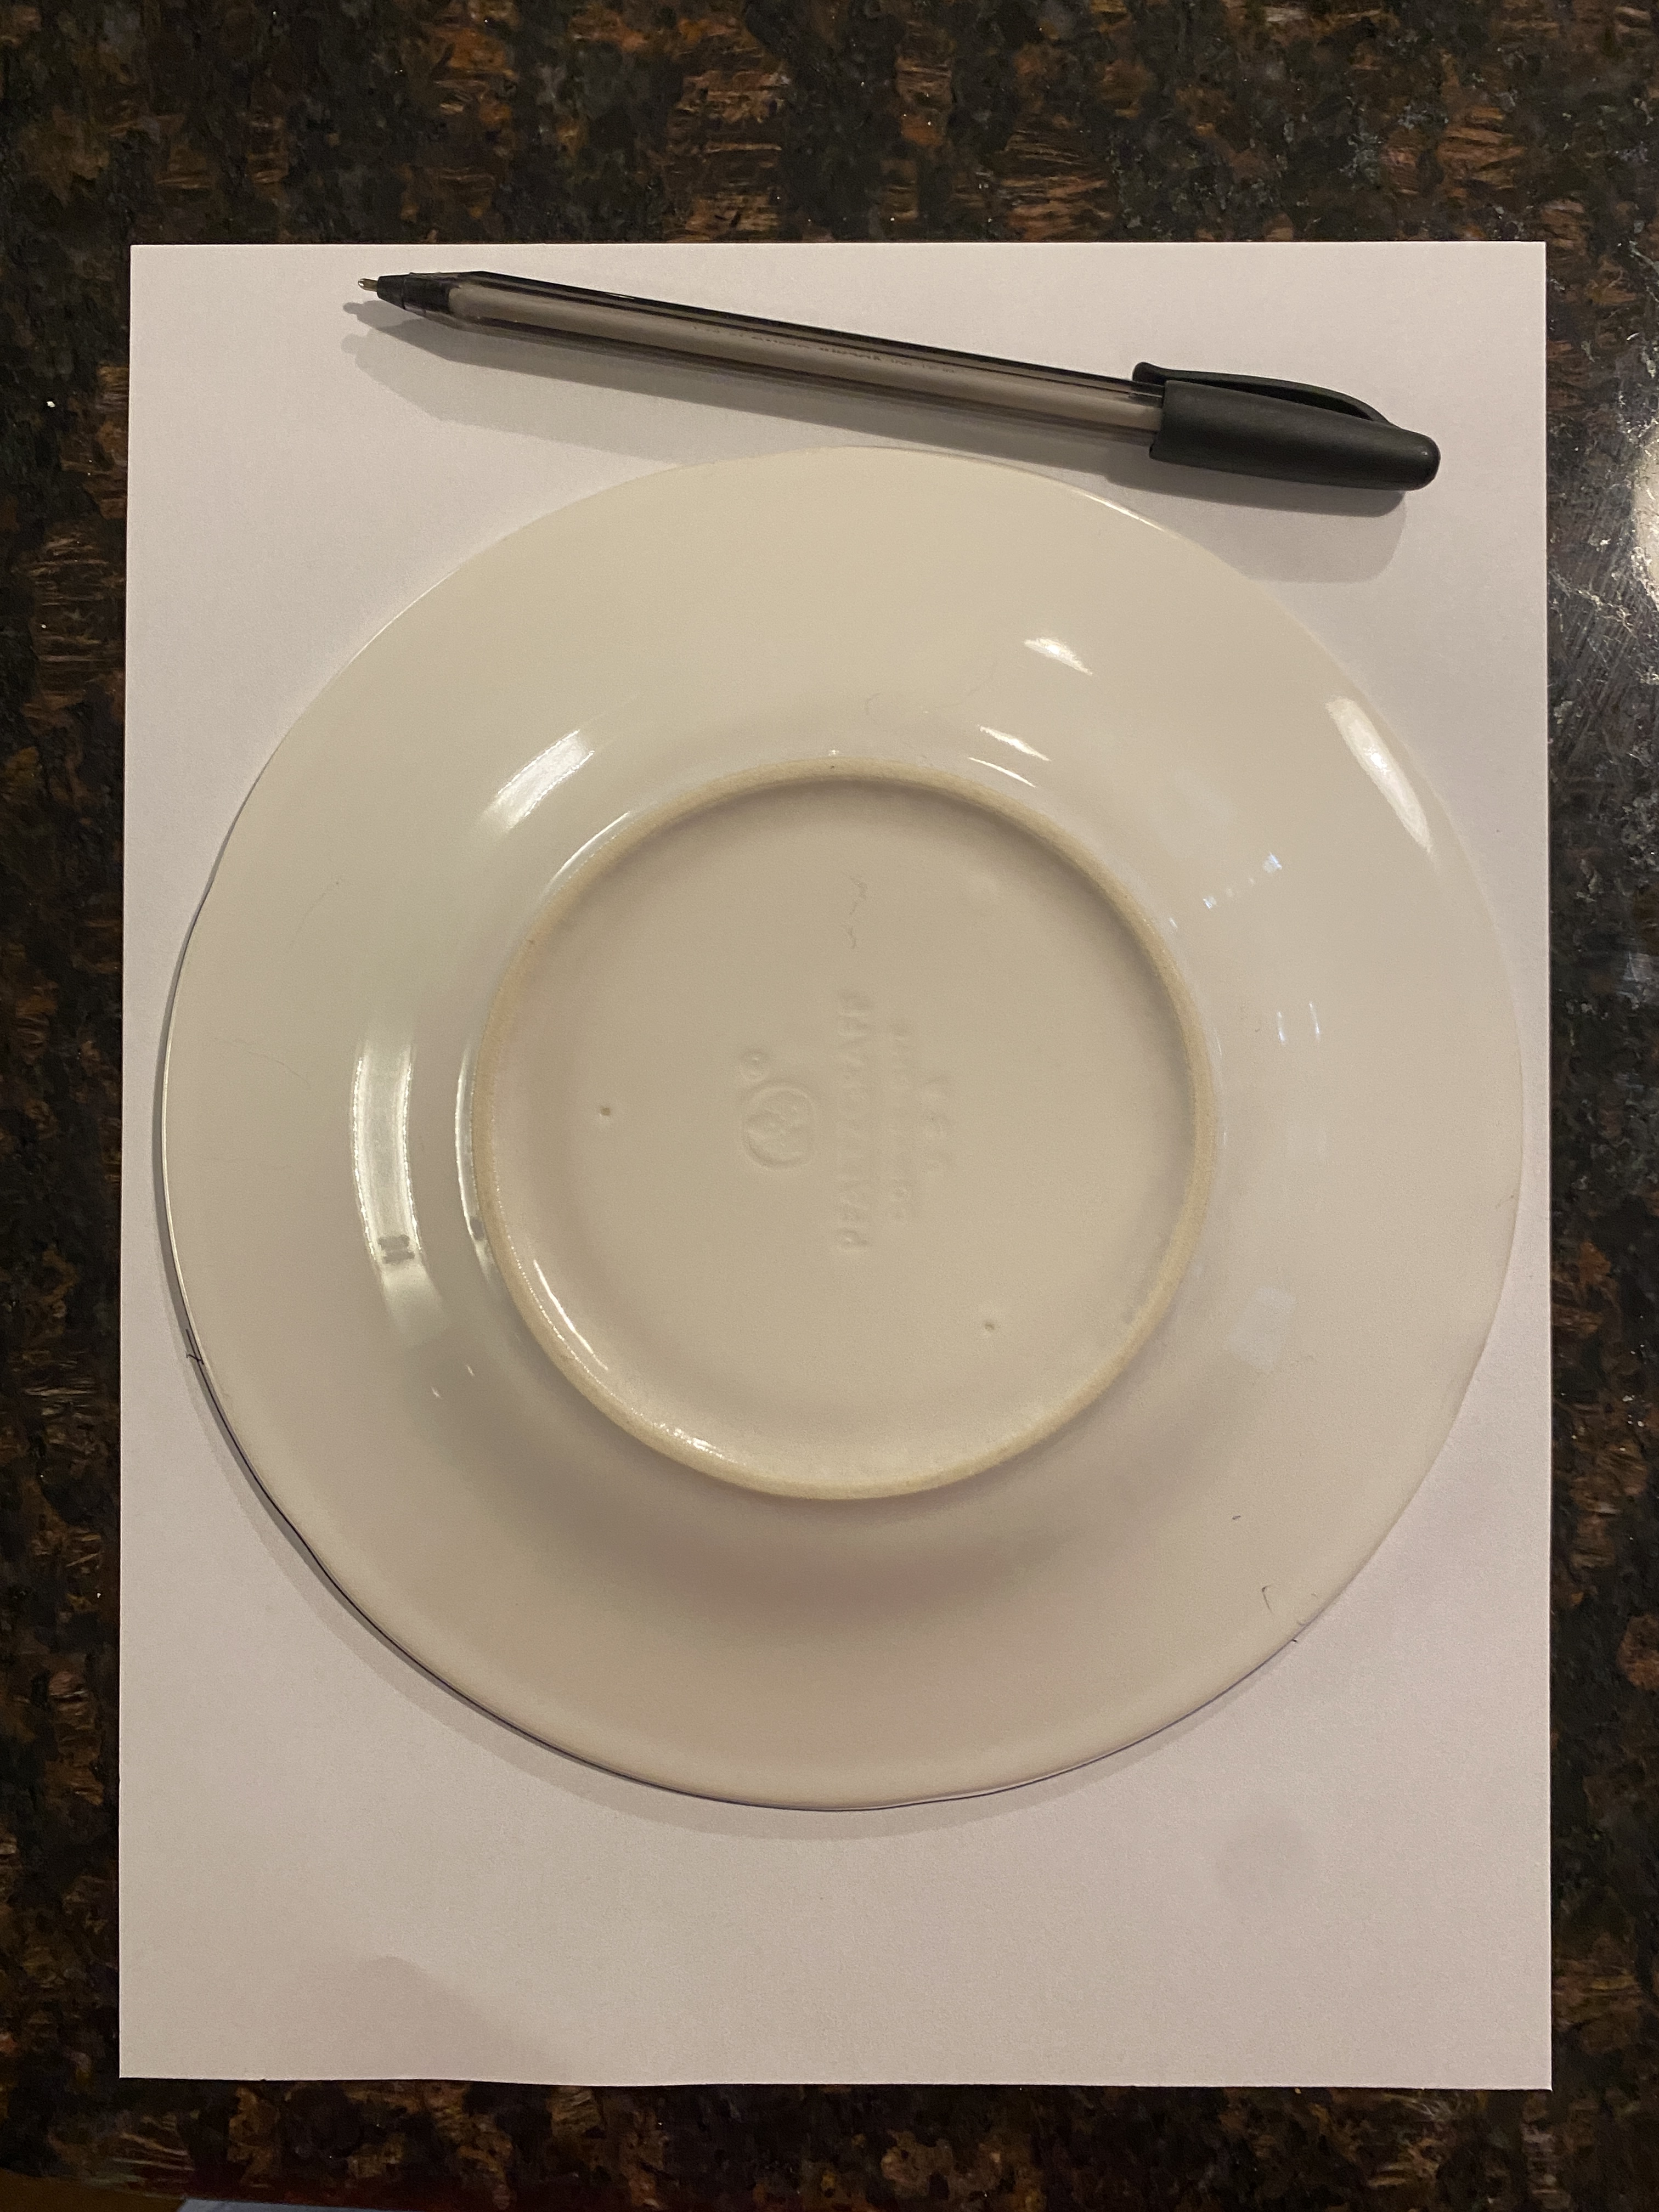
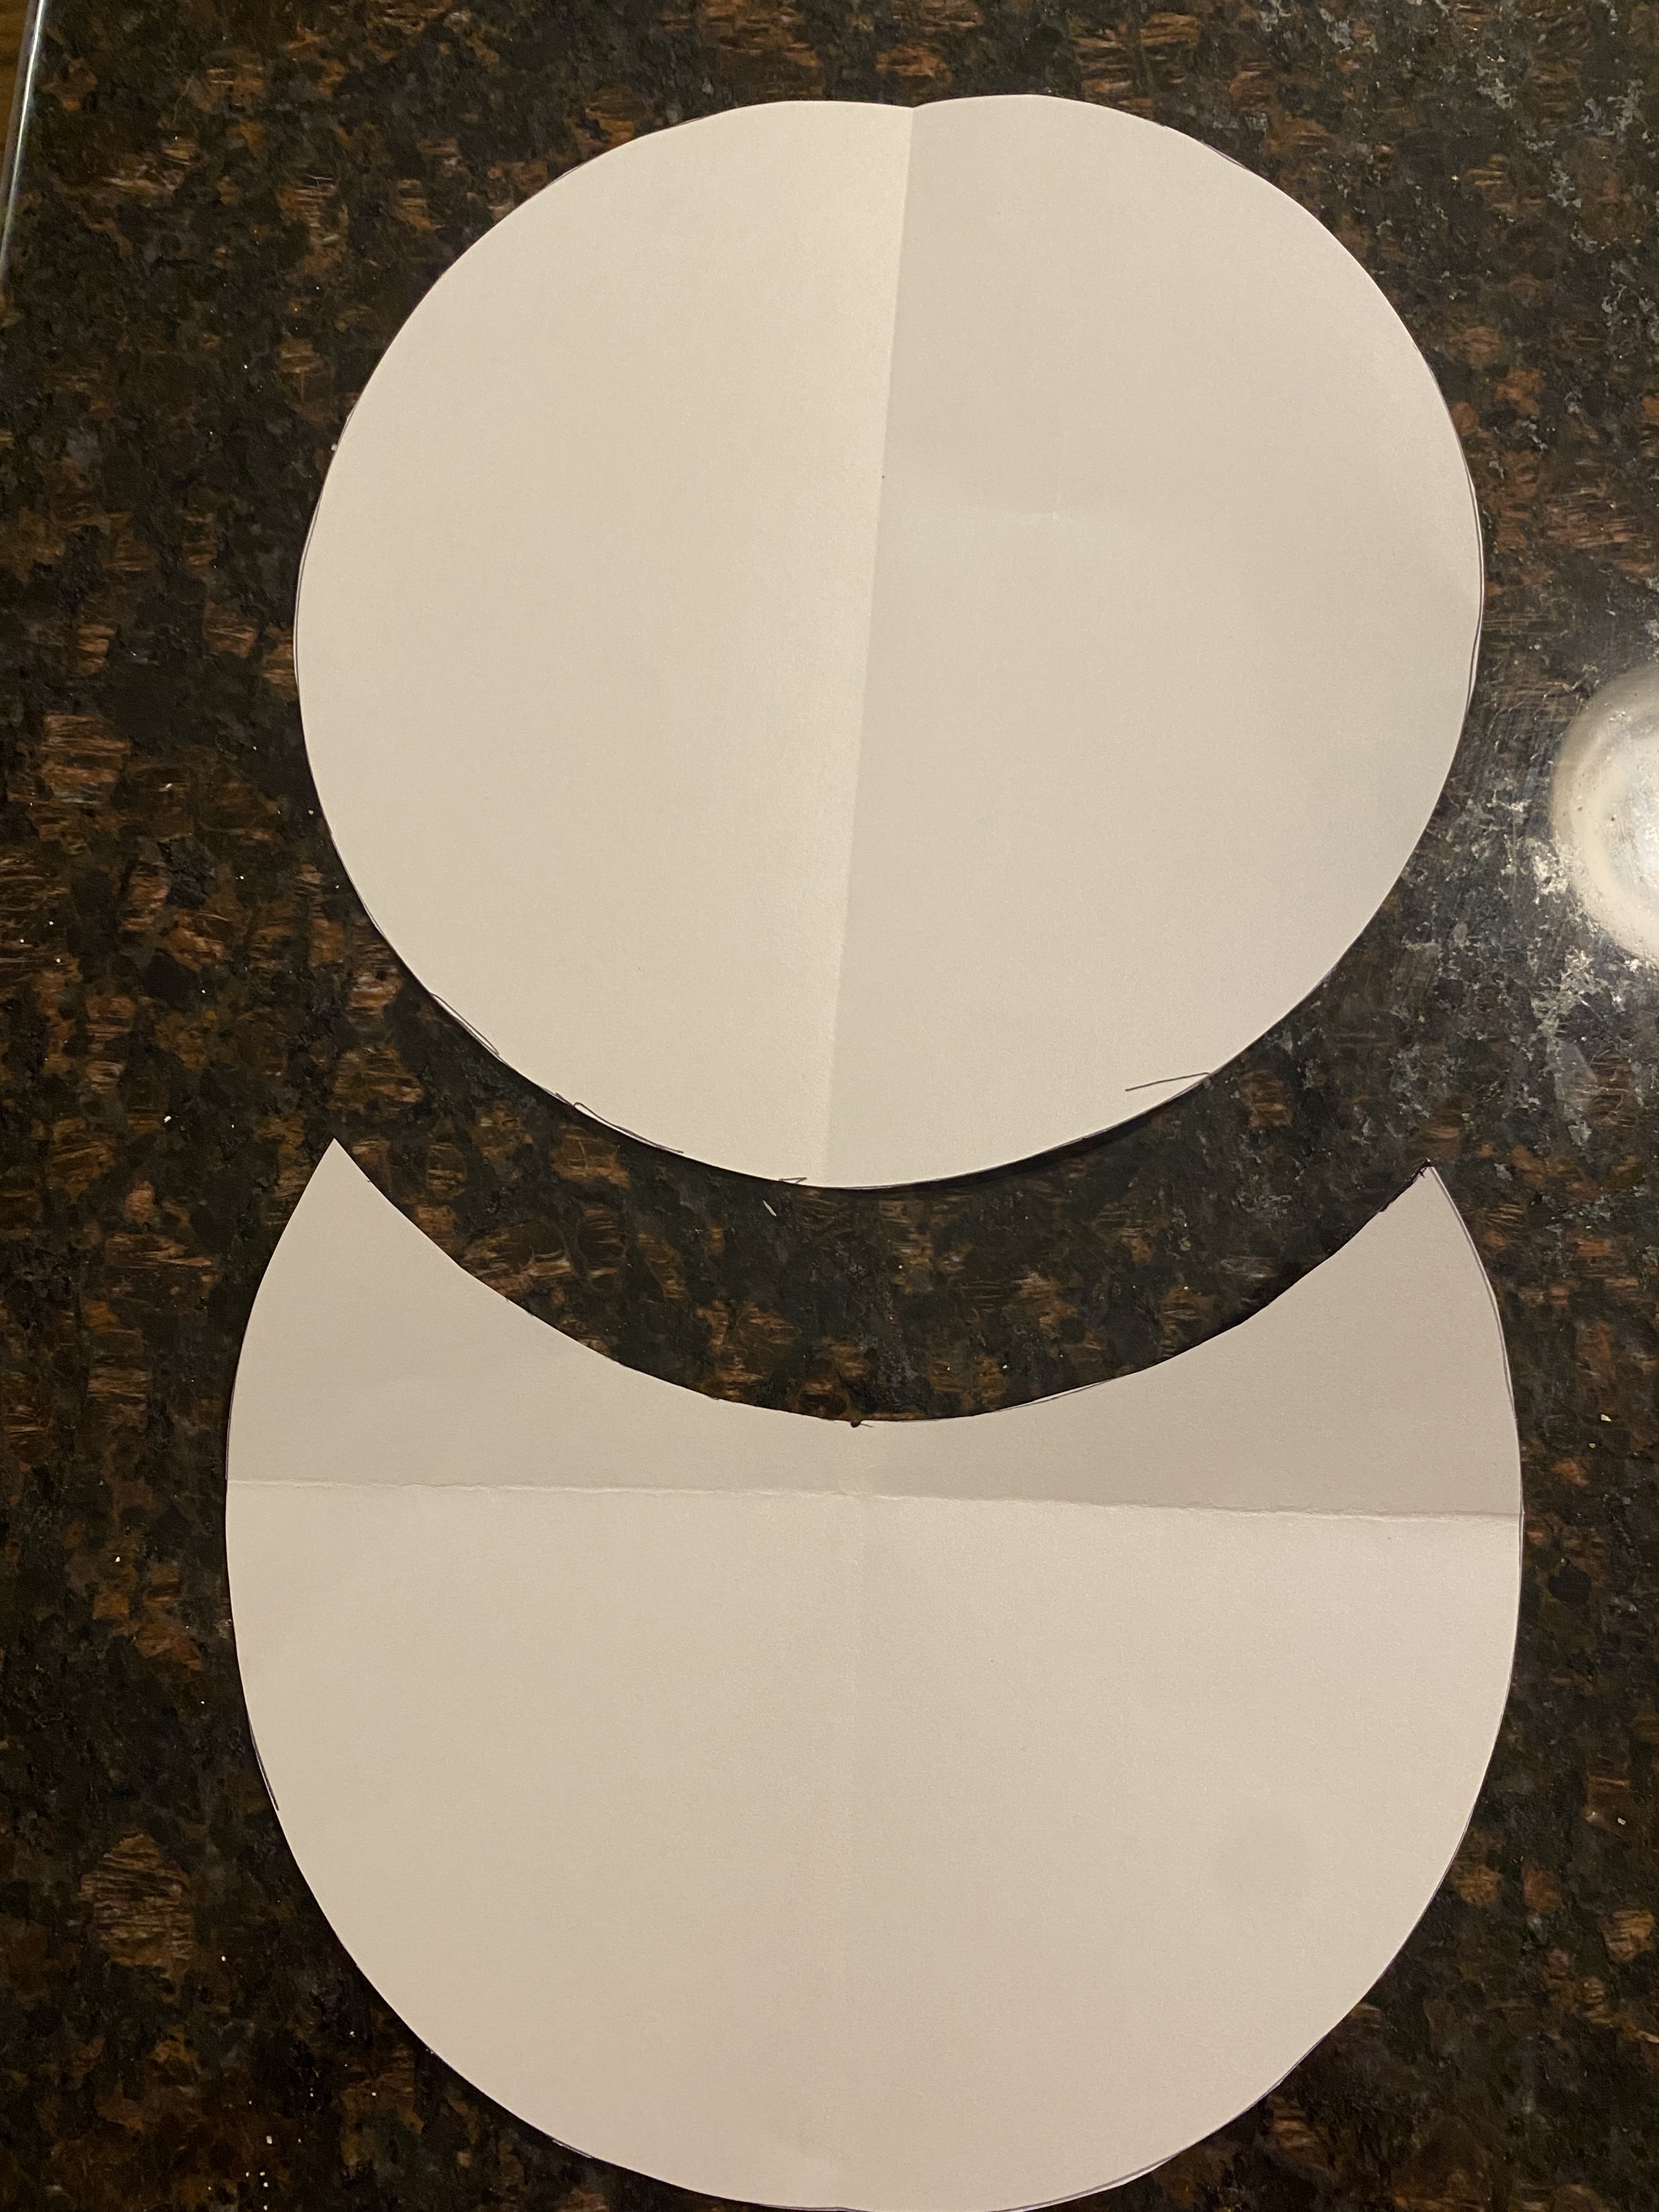
Cut out one of the circles. Leave the other circle intact (as a full-sheet of paper). Fold each circle in half lengthwise and make a crease along the fold.

On the full-sheet circle, place a ruler along the crease and make a mark approximately 4.5″ from the bottom. Place the cut circle on top of the full-sheet circle. Align both circles along the crease. Slide the cut circle up until the bottom of that circle meets the mark you made at the 4.5″ point on the other circle. Confirm that your creases are still aligned all the way to the top (fold down the top circle a bit to check). Trace the bottom of the circle to form the top arc of the moon shaped piece that will be the pocket template for your round potholder.

Cut out your moon shaped piece. You should now have two pattern templates.
What else do you need per potholder?

  • (4) 9-1/2″ squares of coordinating fabrics
  • (2) 9-1/2″ squares of Insul-Bright or Insul-Fleece
  • (2) 9-1/2″ squares of cotton batting
  • (1) 2-1/2 x 5-1/2″ strip for hanging loop (optional)
  • Approximately 45″ of 2-1/2″ bias binding

Basic construction notes:
a) Make 2 quilt sandwiches – one for the main body and one for the pocket. Include a piece of Insul-Bright/Insul-Fleece and a piece of cotton batting in each sandwich. Quilt as desired – a 1″ grid is commonly used in kitchen textiles.
b) Cut out the body and pocket pieces using the templates you drafted.
c) Add binding to curve of pocket piece using your preferred method.
d) Place pocket piece on top of body, align and baste in place.
e) Make hanging loop, fold in half and baste in place at center top on front or back of potholder.
f) Attach bias binding back to front and sew down – this video will be VERY helpful.
g) Flip up the hanging loop and stitch in place to secure (optional).

Here’s a helpful tutorial for an oval shaped potholder, but it’s essentially the same as for a round potholder with a pocket.

Helpful hints:
– Use a longer stitch length (3.5 mm) when quilting and topstitching.
– A left bi-level foot (or quilt binding foot) will help keep topstitching uniform when applying binding back to front.
– If the binding has a difficult time turning to the front and providing enough coverage, try grading the seam allowance along where the pocket and body are sewn together.

Live life on your own terms

You only have one life. Live it to the fullest. Stop trying to meet other people’s expectations at the expense of your own peace. It’s not sustainable. Quit worrying what other people think. The only person you need to answer to is yourself. Did you do your best? Are you happy/satisfied? Did you leave things a little better than you found them today? For me, this is what truly matters.

We’re encouraged to “do our thing” while various well-meaning folks proceed to tell us what they think we should be doing instead. It’s a no-win situation with these people. The best way I’ve found to deal with it is to limit any information shared, maintain a healthy distance and keep on doing my thing.

My retirement “thing” is constantly evolving. Therapy dog work and quilting are still the main activities, but they, too, have changed over the past 3 years. I truly enjoy the read to a dog program that finally got established at Park Street School earlier this year. Sadie definitely thrives on having 1-2 visits per week. Should the school-based READ program suddenly go away (not expecting it to, but things can change on a dime), there are plenty of other visit opportunities available. As next summer’s big quilt show gets closer, my involvement as a committee chair will certainly increase. I’m in the midst of planning those activities now. Rest assured, I’m engaged, learning new things and doing what I love to do.

Mid-August brings a return to therapy dog activities, new private sewing students and classes at the SQTM. I’ve had two referrals about memory quilts in recent weeks. Spent some time today running the numbers to see what services I could offer that make cents for me. 3 sizes: baby, lap or throw. 3 pattern choices: grid, mosaic or stacked columns. 3 FMQ designs: puzzle meander, loopy meander or boxy meander. Binding sewn by machine. Lots of infant items = extra charge. Personalization w/applique or embroidery = extra charge. By concentrating on smaller size quilts that work with my studio space and equipment, I can be competitive and profitable – at least on paper anyway. We’ll see what happens.

Photo by Brett Jordan on Pexels.com

Sewing machine tariffs – revisited

I finally caught up on all the email that arrived while I was in Oregon last week. Apparently, Bernina has announced significant price hikes on all Bernina and bernette machines effective August 1st. They’re joining Janome, Brother and Baby Lock in hiking prices due to tariffs. My local Janome/Brother dealer raised prices 10-25% across the board a couple of months ago. Stopped in today after guild meeting (7/25) and was told the price on the Janome 9480 with ASR (very competitive), but was also informed prices would be going up again on 8/1. I questioned this as I know there’s inventory in the back that’s been there since last fall. The clerk responded it was a “business decision” that applied to all inventory, regardless of when received.

If you’re seriously in the market for a new TOL machine from a dealer, you may want to consider finalizing your purchase in the next week. The good news? Prices on more modest machines available through mass merchandisers such as Wal-Mart appear to be holding steady for now.

What’s a fair price to pay for a sewing machine? Only you can decide. Check eBay, Check FB Marketplace. Check patternreview.com. My personal rule of thumb? The sweet spot for a new machine is about 65% of the suggested retail price (less if you can get it). For a machine that’s used – no more than 50% of the MSRP for a current model. Classroom machines from consumer shows should have every option available and carry the full manufacturer’s warranty that a new machine would have.

Am I ready to move on the purchase of a Janome 9480? Absolutely, but not at $1000 more than what the same damn machine (still sitting in the backroom at my local dealer) was selling for last fall.

No thanks, I’ll pass. I can wait. Maybe I’ll get to the point where I don’t need a stitch regulator for FMQ on a domestic machine.